GREAT PLANES - PETE'N POKE
40 scale.
Modeled loosely on the 1920s-era, Model "A" Ford engine-powered Pietenpol Air Camper homebuilt and the popular Great Planes Slow Poke, the Pete 'n Poke kit offers smooth, slow flight.
Pictures and my review of the model.
Initially I want to express that I am not professional model builder, and that what is written here is my opinions only and not expert advice.
The model arrived by mail, and it is always a special time with the first box-opening. The content looked good, only one balsa sheet was warped, and only one balsa sheet was cracked. Normal in any kit I think. It all comes to how it is stored in transport, and how it is stored in the shop. The sheet was a little more warped than I would desire, but the cracked one was no problem, since all parts on it was perfectly ok. Most of balsa stringers was straight, and the ones who were warped, was only a little. All in all no dissapointments.
The manual is comprehensive, and covers most of the building process. I would love the manual to explain a little more which balsa to use for each step of the bulding. The kit contains exactly enought sheet balsa and stringers, but not more. So there is no margin for error. I did read the manual a little loosely in the beginning, and did the mistake to cut a piece of balsa from the wrong stringer. Which I had to pay for later, when the leftover strings were to short. No problem for this particular one, since I could extend it with a another leftover stringer. But still, I would be excellent to not do this mistake. (It is also possible the manual is good in this, and it is me who is the one doing mistakes.)
The balsa strength supplied is very mixed, from hard to very soft. One of the trailing edges was delivered soft, and one was hard. I would love to be able to choose harder balsa for such parts.
The kit itself is OK. Pay attention to that I write OK and not excellent. This is due to a relative high percentage of malcutted diecut parts. For wing ribs and fuselage bulkheads there has been a lot of sanding in order to make these have the same shape and right size. This with also that leading and trailing edges need to be sanded in shape, gives my score to OK only. The trailing edge is a 1.1/4" by 1/2" balsa block, which needs to be sanded down to zero on side, to make it the right shape. A lot of sanding and a lot of work with a straight edge in order to ensure the TE to be straight and in the correct shape. I would wish to have a preshaped TE and LE for a kit for this money. The kit is not cheap, and it is a bit to close to a scratch build I think.
All in all I want to express that the quality of the die cut parts leave a little to be desired. I feel a bit tricked with so much parts with poor cut quality. Everything is able to be sanded in shape, or adjusted in order to be right. I would just love the kit to have one notch higher quality. This also goes for some of the balsa in the kit which is a little fragile.
Building it is relatively straight forward, it is a traditional build with both hard wood ply, balsa ply and balsa. I would describe the kit as sturdy (read: heavy) but with a good engine it will fly well. It is a parasol winged aircraft, and it is stated that it will do simple acrobatics. I am actually kinda curious over this, to see how it flies. The wing shape is dead flat underneath, and this suggest more trainer capabilities, than acrobatics.
I was for a time thinking about altering the rudder to look more like the plane which the model resembles. But I did not. It was easier to use the parts coming with the kit.
The Kit is rather quick to assemble... I work in average 2-3 hours a day on the kit, and after 4 weeks, most of the structural parts are built and assembled. I guess the model will be completed in 6 weeks, using 2-3 hours a day. Quicker than I expected actually.
I use mostly 3 kinds of glue for my models. for normal strength, I use UHU Hart balsa glue. This glue need to be applied generously, but has a relative strong joint. Most of the wheight of the glue will also highly reduce when the glue solvent evaporate. And for this reason it is my choice. It can also be sanded very easily.
When I need a flexible and strong joint, I use outdoor PVA glue. It is cheap and when hardened, it is very strong. The glue is on the heavy side, maybe like epoxy. But can be applied on both foam and wood. It applies white, and clears up to be transparent when hardened. I use a type which on balsa dries in 15 minutes, and is hard enough to hande in 30 minutes. It takes to the next day until the glue is completely hardened tho. But since it dries so quickly, it means very little waiting to build more.
Epoxy is the glue when I need a very strong joint. I always use 30 minutes epoxy, since the shorter time types are not strong enough. Epoxy is also perfect to fill cracks and uneven joints. It is possible to sand epoxy, but is is slightly flexible and not perfect for that.
Pictures and build stages:
First thing to build is the rudder. The build is very straight forward, and easy. Pinn the parts to the drawing, using a protector to avoid glue spill on the plan. I replaced the "paper" hinges with plastic hinges with a metal pin. It does create a little bit more space between the fin and the rudder, but for me these paper hinges with the kit seemed to be a little flimsy.
I added strenghtening here and there in order to make it alittle more strong in case of a hard landing. As you can probably see, I did the mistake of gluing the hinges to the fin and the rudder. It is not a big deal with the fin, since I can take the hinge pins out and split it. (And good it is, since I needed to add hardware for the rear wheel later in the building process.) I realized this when I was about to glue the fin to the fuselage.
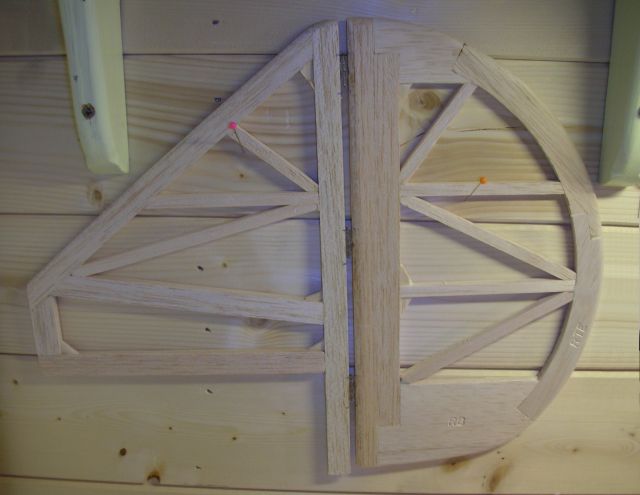
Fin and rudder.
Second up was the stabilizer, also a very easy and straigth forward job.
I replaced the "paper" hinges with plastic hinges also here. It does create a little bit more space between the the two parts, but I think it is worth it. The whold thing seems to be rugged but I added a little strenghening here and there anyway. Here I also did the mistake of gluing the hinges. The 6 hinges was a pain in the **** to get in. I have only the thinnest knives in my GP Hinge cutting machine...
I did not dismantle the stabilizer in two parts, but glued it in place before the fin. The plan shows to glue this in place after skinning the fuse and stabilizer. But since I did not want to split the halves, I was forced to glue it in earlier. It will mean I have a more complicated job when I skin the plane with Oracover though. But I think it will be ok. I will have to use the scissors more to pull the cover film between the parts only.
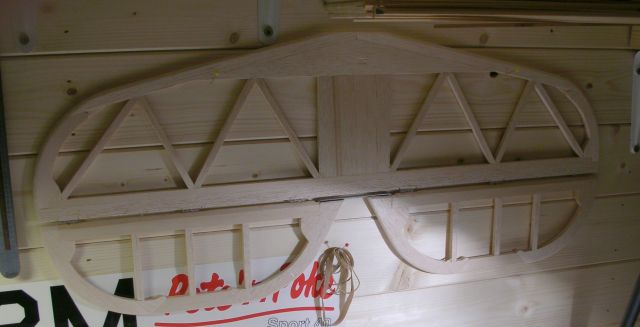
Stabilizer and elevator.
The booklet was not very clear on cover and hinges. When I read the booklet again, I could see the words "temporay fit" the stabilizer... but you know... I did many temporary fits before I was happy with the hinges and glued them
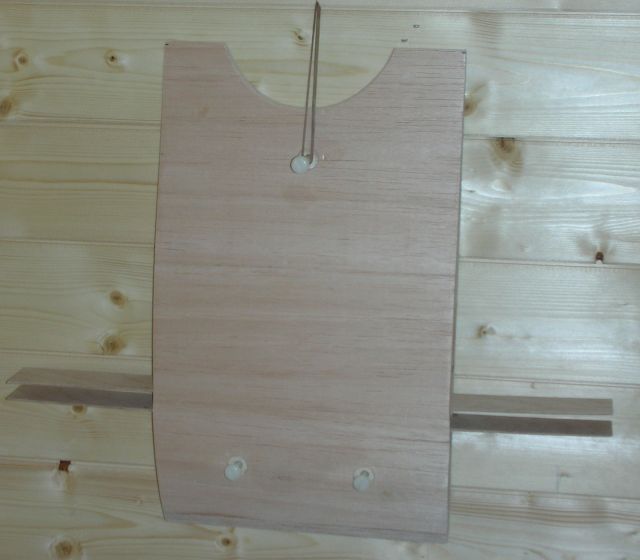
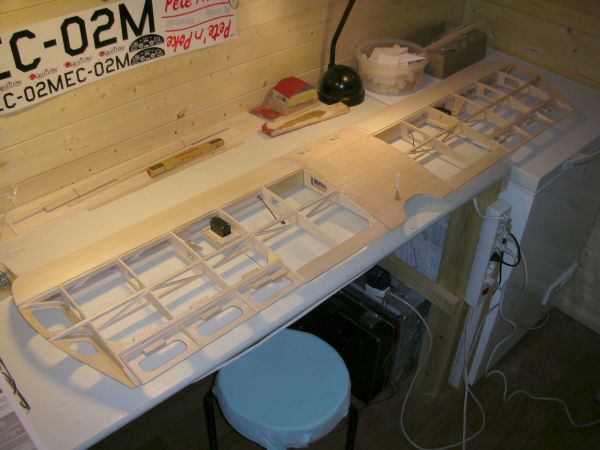
The center block was the next thing to build. Very straight forward, and with parts which did suit very well. Only comment I have is the huge sanding job for the trailing edge.
You can see the hardwood ply parts to be a little warped, but I believe this will be straight when the wing is mounted to one piece.
Winghalves could have been better described in the manual. It took me quite a few hours to ensure myself using the correct parts, sanding for shape, having a snug fit, and straight materials to build the first one. The second one was a breeze, since it was copying the first one mirrored on the other half on the plan.
As you can see on the top one, there is one central spar which is made from two parts. this is due to my lame non ability to read the booklet well enough, leaving me with a to short central spar. The front part will be covered with balsa sheeting like underneath tho. And since I made the longer cut, gluing with epoxy I hope it will be strong enough.
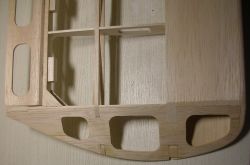
The wingtip was to be made of two halves, but the balsa it was made from was so fragile it broke up a couple of places when I glued it in. Hence I added structural strength to the wingtip by adding two 1/4"x1/4" stringers from bottom to top in the middle.
I have the wings pinned to the door now, both for curing and for keeping them straight till I cover them with film. (I plan to use white Oracover). I have never used Oracover before, but it have good reviews.
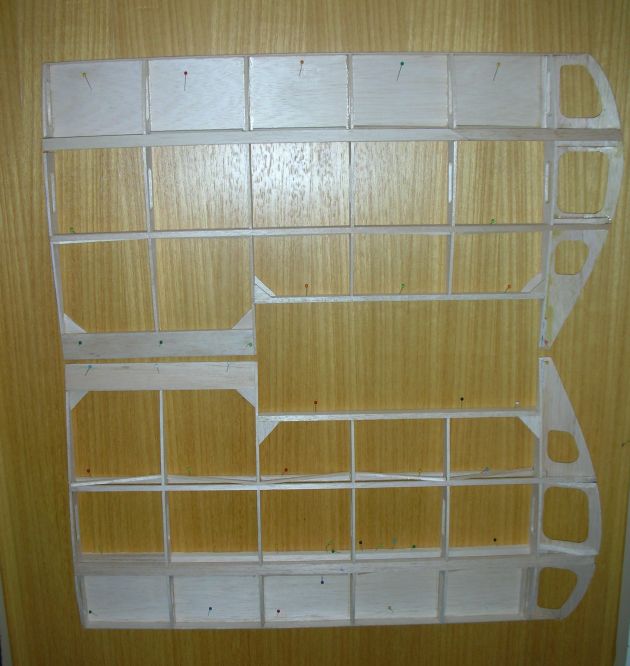
The strengthening is more visible on this image, where you can see the stringers running from bottom to top in the wingtip.
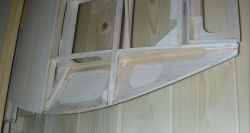
One of my wings were a little warped, due to a warped stringer I think. I tried to match two stringers warped in opposite direction on top and bottom, but still one wing was warped about one millimeter.
To fix this, I pinned the wing to the table and added crossbeams between the top and bottom main spar. This also made the wing a lot stiffer, and hopefully also stronger in case of a hard landing.
This strengthening between the spars is also visible in the picture above.
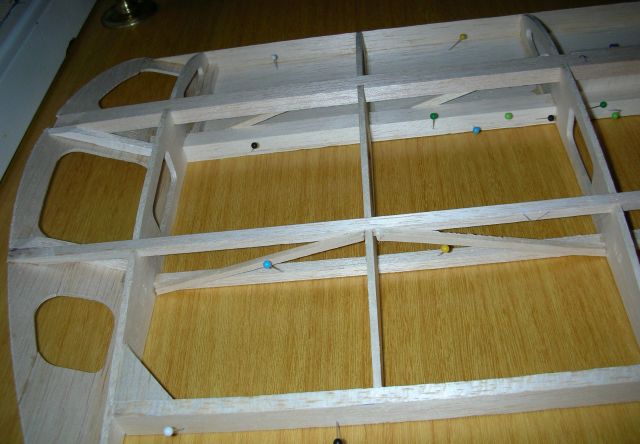
Wing added stiffness
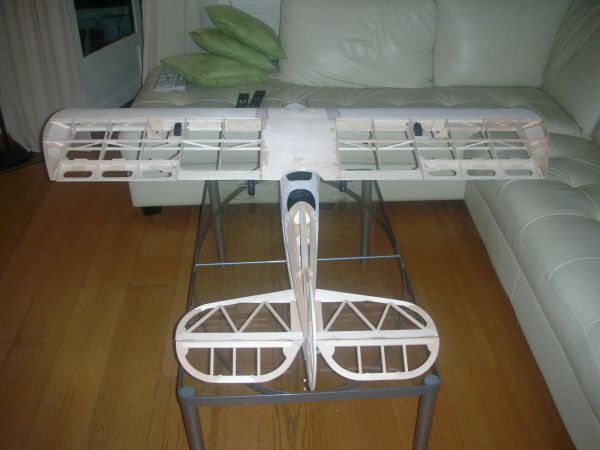
After the wing halves have been pinned to a flat surface for a couple of weeks, it is time to complete them. The wings are complete with ailerons, servo hatches, strut assy and mounted in one piece. The Wing has been assembled according to the plan with a slight v-shape of 1/4" higher on each wingtip.
Assembly was rather straight forward, and required a minimum of sanding and adjusting. (Due to a big effort getting the first rib correctly located on each winghalf.
Next job is to fit the hardware as hinges, servos and control horns before I sheet cover the front of the wing and glue the leading edge to the front. The leading edge will require a lot of sanding. Luckily I have a razor plane for balsa, so the job will not be to tedious.
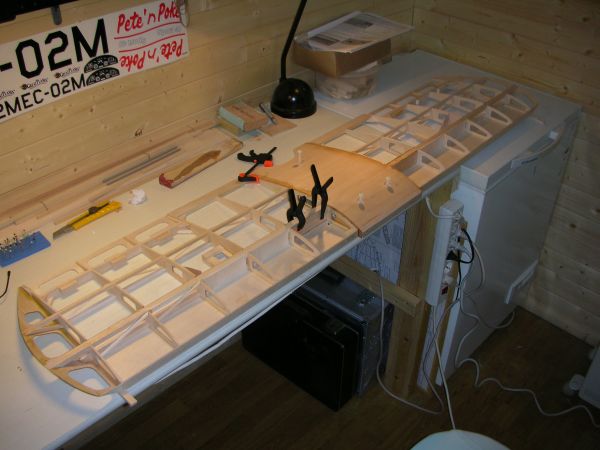
Wing epoxied into one piece
I have done some alterations to the wing design. I was afraid the center section and wing halves were to weak, so I varnished a band of silk over the joints:
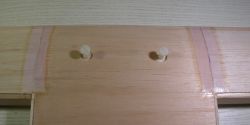
This will add strength, and also it evens the joints so they becomes invisible.
I use a alcohol based varnish which fills up and glue relative well.
In the old days I always used a cellulosis varnish. (Golac if someone remembers the
brand) That particular varnish
did smell like Uhu hart, and was perfect
for sanding. One could
use water based 1000 grain paper and get a perfect
smooth surface. This varnish is no longer available to buy, and the
more modern varnishes is heavy and not very suitable for sanding.
So I use a very similar varnish as Golac, based on alcohol instead.
Not as good, but it works.
Completing the wing was a breeze. Sheeting the front and gluing leadinge edges was easy. Sanding again, but since I have a razor plane, it was minimal sanding after I had planed the correct shape of the LE.
The hardware is installed in the wing according to the plan. Hardware is of a good quality and is easily mounted.
I use two S148 Futaba servos in the wing. They are cheap and can be easily replaced.
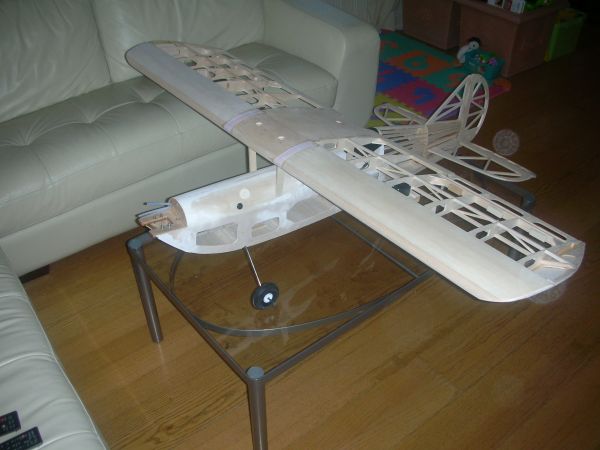
Completed wing. It has a lot of surface and relatively big ailerens.
One last modification I will do to the wing is to add a couple of layers of balsa to the wingtip. Now it is a 3mm (rather fragile) balsa wingtip. And I cracked these when I glued them in, and I have cracked them when I was sanding the wing. The bottom picture shows the wingtip with added layers for strength.
I dont like the finish on the wingtips either. The main spars are visible and dont fill the openings fully. After glueing two layers of 1 mm balsa crosslayered to the wingtip it becomes a 5 mm ply which is a LOT stronger.
And this is always useful when one lands to hard.
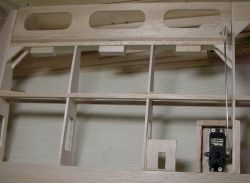
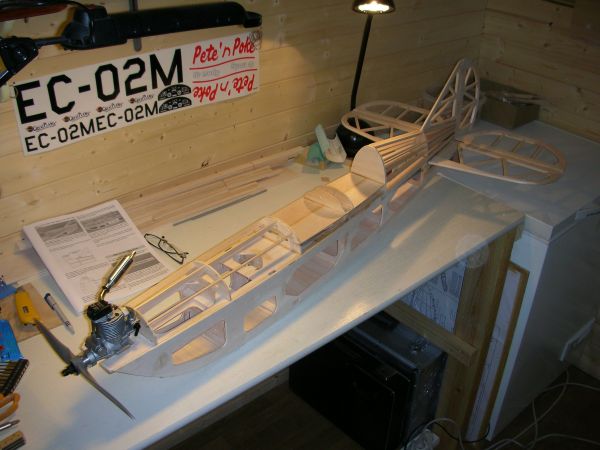
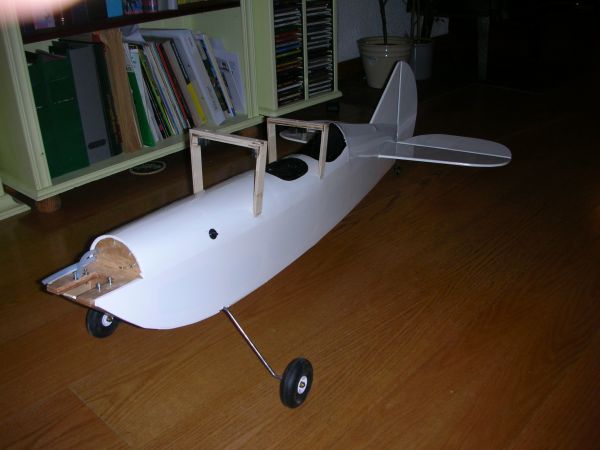
The fuselage is mostly made of balsa ply, and seems to be strong. It needed a bit of sanding to be a good fit. After completing it, I still feel I could have done more to make better fit between parts. Thinking back, it would be wise to make a bottom frame of blocks for the fuselage to be built in. I added pins and clamps and wheights, but did not get the perfect fit I was looking for.
Balsa ply is hard to bend into correct shape, and I guess some of the problems can can be from the parts. But I still feel we need to blame the builder (me) for the fit not beeing perfect.The engine mount is made of two layers of balsa ply, and I think this is to weak. I will add a thin hardwood ply underneath making it 3 layers, and also maybe 3-sided spars in order to stiffen the whole thing up a little more. What you really dont want is a loose engine.
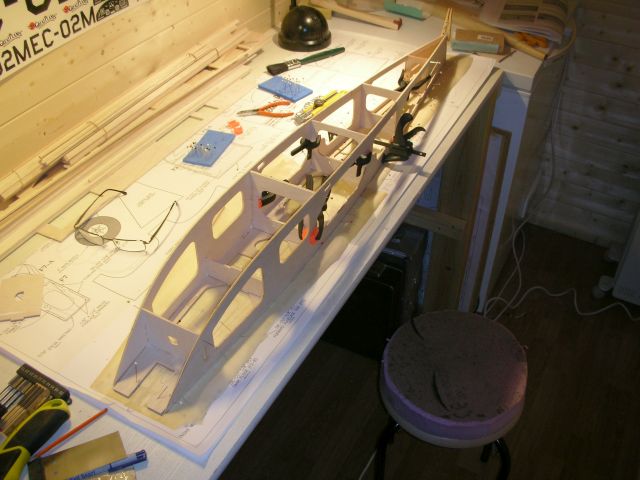
Fuselage plywood frame

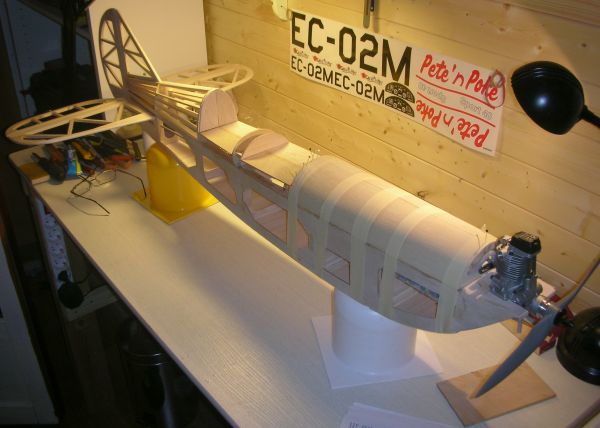
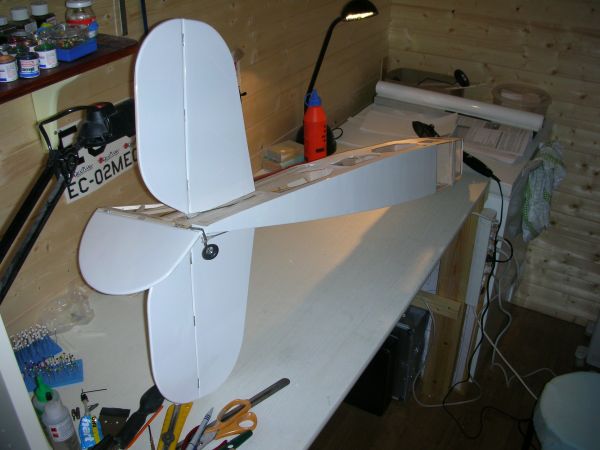
Fuselage with fin and stabilizer mounted
The bottom half of the fuselage is completed with balsa covering and tank and servo hatches. I had to glue the stabilizer in a little prematurely, but I believe it will only affect how easily the model can be covered with film.
The hatches was to be made with 3mm balsa only, so I framed them inside and made them stiffer. It means a few grams, but I think it will make them last longer.
I have strengthened the motor mount plates with two pieces of hardwood ply. And I am rather happy with them now. I have 4 very thin steel shims which I plan to epoxy on the bootom of the mount in order to avoid the nuts of the mounting bolts to go into the wood causing the engine to loosen and start vibrating.
Until now, I am happy with the fuse. It seems very rigid and not so heavy as I was afraid of. The build was pretty straight forward, building directly on the plan. Luckily the body ended up to be dead straight and rather perfect.
The completion of the fuselage goes quickly at the end. Parts fit well, and the materials are of good quality. I did complete the most of the top until now. I only need to make the hardwood frame where the wing is to be mounted before I can cover the fuelage top with sheet balsa.
Initial test fit of the OS FS 52 Surpass show that I need to alter the motor mount a little. The kit is made for a 40 size 2 stroke, and the casing is a littlebit to big on the 52 size.
Only comment for this part is basically the same as for the rest of the kit. The balsa is very fragile, some times the parts cracks when taked out of the die-cut sheet and some times when mounted to the model.
The hardwood pins for the frame where the wing is mounted, seems very very weak. I will strengthen this by drilling holes for inserting pins and maybe also add a layer of hardwood 1.5 millimeter ply over the joints. One really dont want the plane to loose the wing and become a heavy motorized projectile in flight.
The wing struts are a very complicated installation. They are mounted slanted outwards and slanted forwards. Im order to get the correct angles one is supposed to cut templates from the plan, and use these both for manufacturing the struts and mounting them correctly. I have done all what the plan explains, and I think I have got it correct. (But to be honest, I am not really sure.)
The wing struts are to be epoxied only, but I added small screws to the front ones in order to keep them together more. Only glue looks terribly weak for this point if one is going to fly the plane a little acrobatic.
I also need to use a inclinometer in order to set the wing to the correct angle for the stabilizer. The wing need to be lifted 1 degree in the front to fly nice. And I am actually not certain how to get this 100% correct without buying the specialized tool from Great Planes.
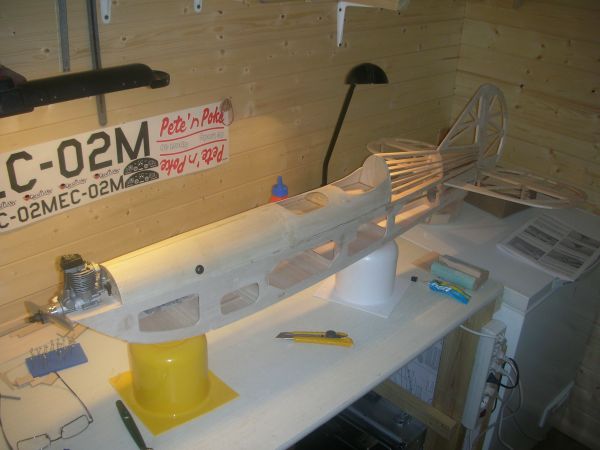
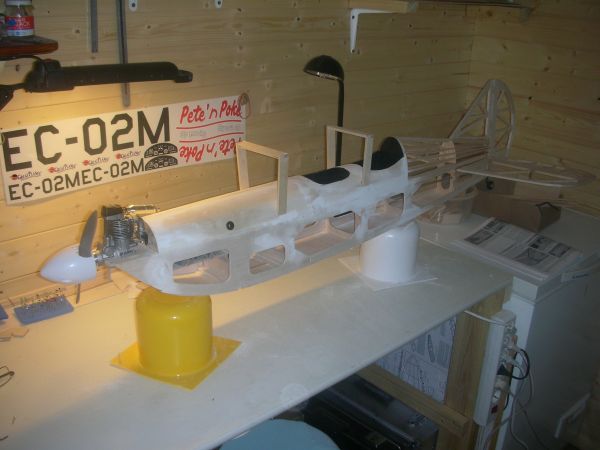
Anyway, the fuse is now completed with the hardware and engine mounted. I think we are getting close to cover the plane soon.
Fuselage completed more, just missing sheet balsa covering
Balsa covering started. The holding tape is still on, waiting for the glue to dry
I have read that the templates to be used for the wing struts was incorrect in size, and after double checking the templates to the plan, they do indeed look to be approx. 1mm to short. If you are going to build this plane, be assured to double check the templates to the plan before you start cutting.
Building the fuselage is now almost completed. The work was kinda quick and not to complicated. Sheeting the fuselage with the wing struts was a bit tidious, but all in all I was even happy with the result before I added filler to even things out.
Next thing will be to get the wing inclination to be one degree higher on the front of the wing compared to the stabilizer. I will use a digital spirit level for this. I dont really see myself buying the special tool from Great Planes.
My plan to use a digital spirit level did work very well actually.
The level I used was able to show inclination in 0.05 degrees.. and it was
perfectly accurate to be able to lift the front of the wing one degree
compared to the stabilizer.
The wing struts on this model is VERY complicated to make and to get right. I used the templates on the drawing and found then to short compared to the drawing itself. And when I mounted the whole thing together the aft ones seemed to long... almost 4 mm infact. But I did my best to measure, cross measure and to check over and over again before I adjusted the lengths of the the struts to sport ONE degree higher inclination on the front of the wing.
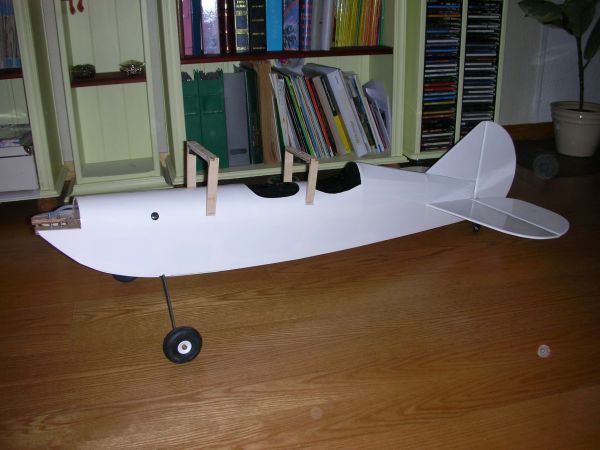
Here the fuselage is completed without adding filler to even joints out. Most of the fuselage does not need filler at all, and where it is neccessary, only a thin amount it needed. I am happy with the fuselage.
In a way I am now uncertain if all is right anyway... and I wonder if it will fly. Only time and a test flight will show this I guess.
The wing surface of this model is large, and I guess it will have a lot
of slow flying capabilities. Also, surprisingly enough the rudder, elevator and ailerons
are relatively big. It seems for me to be an agile plane, if having
enough power.
The plane reminds me a little about my pugnosed Cezeta scooter. The design on the plane is actually kinda stylish... if it was not for the nose. Something is wrong with the nose of the plane designwise. I cannot really pinpoint out why I feel is wrong, but there is definately something.
This plane and me is going to be friends I think. I have always fancied weird contraptions, and we already have shared blood by me cutting my finger when I was carving a piece of plywood...
Here the fuselage has got filler on the uneven
spots and also the struts are test mounted.
The inside of the open canopy has got a lick of paint too. The black ring on the side is the filler tube for the fuel.
I did test fit the recommended 2.5" spinner to see how it looks. And I could straigth away see that it needs to come off and be replaced with a spinner half the size! I did double check the kit and it really say a 2.5" spinner... and heh.. it looks very stupid. Maybe a 2.5" spinner is a spinner which is 2.5" long and not 2.5" wide???
Next stage is to fix the gaps in the rudder and elevator, since I think they are to large. I am afraid of flutter in the controls, so I will add some balsa to narrow the gaps. After that is is only covering to do... and decor.
It is very easy to apply, and ir really really forgiving if you dont have the correct tensioning on the film all over the surface. One quick warm up with the iron, and voila the film is like a drum.
It has been quite a few years since I did cover film to a model, and I havent tried ALL types there is. But really, I was very positively surprised when I started with this one.
I am old enough to have used parachute silk and dope on my models. I did try a very early film for 20 years ago which was sorry to say: Shite.
But this covering film, will be my favourite from now on. I have even read that you can paint on the Oracover film.
The plane is now ready to fly. I had some remains from earlier (20 years) red film which i did use for decor. MAJOR error and dissapointment. The film looks like solarfilm, but i am not really certain what brand it is. Anyway, when applying the film, heating it up created litterally millions of miniature air bubbles which i had to pin prick each one to get it looking relatively good. It did not come out at all nice, and the heating of the film also took the shine away from it on these bubbles.
Massive dissapointment though, specially since the rest of the plane has a relative high standard. It will fly, and on a distance it does look ok, but not good enough.
So better leave this as an experience added, and use better quality film on later models. After all, any flight is a crash waiting to happend. And to deskin the wing and do it one more time seems obsolete. The plane will be a flier, and does not hold any scale appearence to the model it is based on.

Fuselage completely covered. Only thing missing is
the blue decor and the detailing.
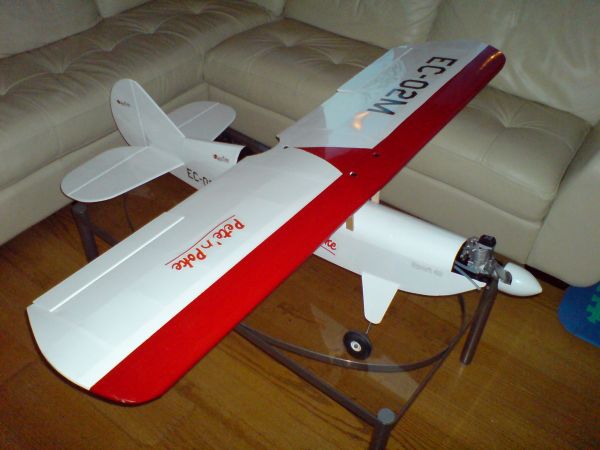
I did simplify the decor for many reasons. One of them was the dissapointment in the red film i used.
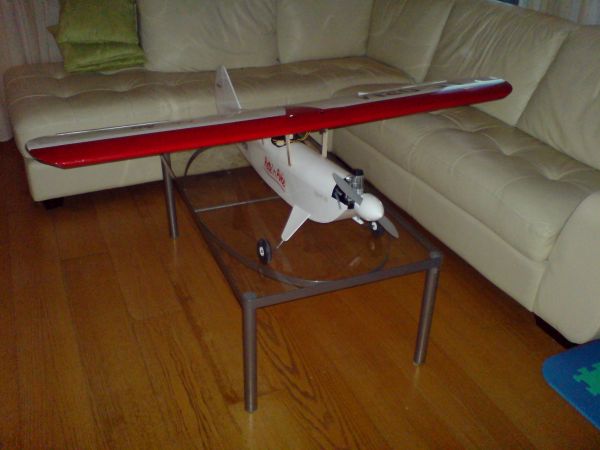
Still looking like a handsome plane, and I think it even will fly well.
Review history:
12th of October 2007, Box opening, kit started.
2nd of November 2007, initiated the report, documented rudder, stabilizer and wings.
Uploaded 7 pictures.
5th of November 2007, added some more texts after building more on the fuselage.
6th of November 2007, added one more picture of the fuse, and added some explanation
of a mistake I did gluing the hinges for the rudder and the stabilizer.
7th of November 2007, added one more picture of the fuse, and some texts about the building.
8th of November 2007, epoxied the winghalves to the centerpiece and uploaded one picture.
12th of November 2007, added 4 pictures of complete wing and modifications. Explained why these modifications were done, and wrote some lines about the glue I use. Wing is now complete with all hardware and is ready to be covered.
16th of November 2007, added some text describing the last part of the build. Soon there will be only covering of the plane to be done.
23th of November 2007, added a couple of pictures, fuselage completed with hardware installed and I have started covering with sheet balsa.
28th of November 2007, added more pictures of the fuse and wrote about completing it.
29th of November 2007, mounted landing gear, epoxied the engine bay fuelproof.
4th of December 2007, uploaded a couple of images with the completion of the plane parts. It is now soon time for oracover.
5th of December 2007, adjusted and levelled the wing struts to 1 degree inclination of the wing (complicated!)
8th of December 2007, last piece glued. Model is completely made, and it is ready for covering.
9th of December 2007, fuselage beeing covered with white Oracover. Uploaded one picture.
19th of December 2007, all parts covered with Oracover. Only assembling and decor left.
3rd of January 2008, Started new job, and there is little time for modelling. The work is now commencing slowly. Unhappy with the decor I added due to shite red film.
21st of March 2008, The plane is finished, only connect the radio, initial trim and running in the engine left. Been at the airfield a bit more lately, and i am now waiting for the snow to dissapear for the maiden flight.