MORGAN +4 DHC 4str.
It is the impacts in life we remember, not the details. The fact that I dont remember my age but only the picture of the first Morgan is exactly what I am talking about. I knew afterwards very strongly, I wanted one. It was an easy dream to have, since I would probably never get one. Until one day I was standing in front of a 4-4, which I could afford. That was the end of a dream, a dream which I sometimes miss. I did own my first Morgan.
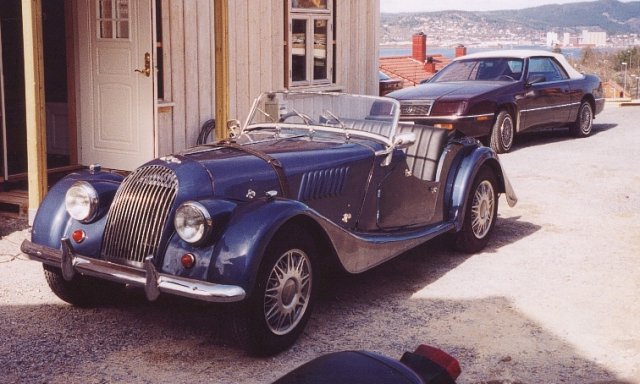
1955 Morgan +4 4 seater DHC
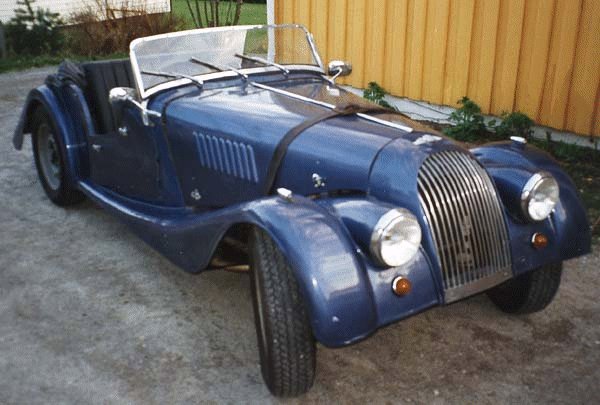
This Morgan was originally a +4 DHC 4 seater delivered from the factory, also known as a Snob Mog. The missing louvers on top of the bonnet, four seater firewall and VIN shows signs that this 2 seater have a past which was different than what it looks. The car was restored by the previous owner with a factory new body from a 4/4 - 2 str narrow body in the late 70's. This made the car appear a little off set. That was the second time the car was equipped with a 2 seater body actually. The first one was put on the car in england already visible on the pictures from early 70's when it was imported to Holland.
The car was very usable even if a little odd looking, and I found it very difficult to take it apart in order to restore it with a new DHC body. Driving it is much to fun. Nevertheless, the rebuild of the car to its former glory has started. It took a good 4-5 years to search for the parts needed, but I have now collected most of them. Parts to rebuilt a DHC are scarce, and for the 4 seater almost impossible. I have been lucky to get help from 3 gentlemen which had the parts I needed. Without their help the task of rebuilding the 2 seater back to the 4 str DHC would really be impossible.
Let me first write a few lines of the history of the car. I found the car in Holland around Amsterdam where it had been standing unused for 8-9 years. The previous owner was suffering from hernia, and was not able to use it. So it stayed in his garage in wait for better years. After a long decision the car was for sale. I talked to Hermen Pol about the car, being a restoration project and a 4 seater DHC. The car was tempting even if he told me it probably needed a full restoration. We had a long weekend in Amsterdam to look at the car and it was a wonderful weekend with Hermen on a Morgan Safari.
I used the car like this a few years.
Morgan history
After World War II Morgan had re-introduced their 4/4 model fitted with a 1267 cc Standard engine. This continued in production until 1950 when it was replaced by the larger Plus 4 announced at the 1950 Earl's Court Motor Show. The Plus 4 at its introduction was fitted with a 2088 cc engine based on that used in the Standard Vanguard, installed on a strengthened 4/4, chassis with a wheelbase lengthened by 4 in (102 mm). Hydraulic brakes, at first all drum, were fitted for the first time on a Morgan. In 1953 a higher performance version was announced with the 1991 cc I4 engine as used in the Triumph TR2. The radiator grille was now surrounded by a cowl that blended into the bonnet. Front disc brakes became an option in 1959 and were standardised in 1960. From 1962 the engine was the Triumph TR4 unit, which increased displacement to 2138 cc. In 1955 the less powerful 4/4 model re-appeared in phase II form. The 96 in (2,438 mm) wheelbase of the Plus 4 was adopted by the 4/4 when it reappeared in 1955, after which the two cars were for most purposes the same length and width.
Body Styles.
Body styles available were a 2 seat sports, 4 seat sports and more luxurious 2 or 4 seat drophead coupe (4 seat coupe 1954-1956 only). One of the interesting quirks of the Plus 4 was that the engine cowling fitted so closely to the engine that there was no room for an air filter. Some owners stretched cheesecloth over the carburettor as a field-expedient.
You can read more about this particular model of a Morgan on my pages dedicated for the Snob mog here:
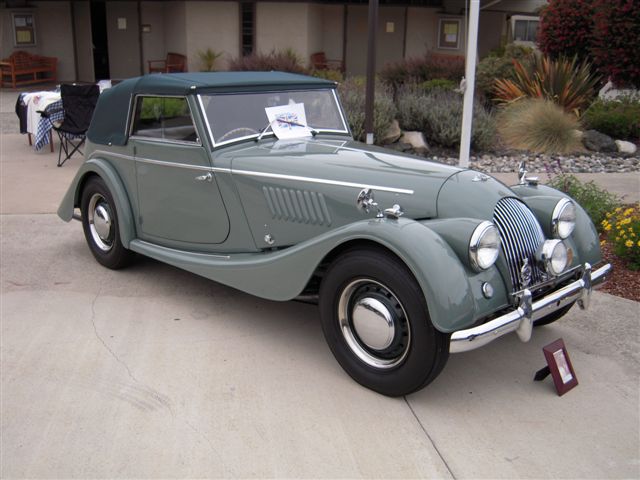
The car had little resemble with a 4 seater Drop Head Coupe. But there are subtle signs which speaks of the cars origin.
My current Morgan was originally a +4 DHC 4 seater from the factory, one of 178 +4s to be delivered that year. The 4 seater DHC is also known as a Snob Mog. The missing louvers on top of the bonnet, four seater firewall and VIN shows signs that this 2 seater had a past which was different than what it appeared to be. The car was restored by the previous and one earlier owner which into a roadster, which might at the time be a favourable looking Morgan.
The car was very usable even if a little misaligned, and I found it very difficult to take it apart in order to restore it with a new DHC body. Driving it is much to fun. Nevertheless, the rebuild of the car to its former glory was started.
Let me first write a few lines of the history of the car.
I found the car in Holland around Amsterdam where it had been standing unused for 8-9 years. The previous owner was suffering from hernia, and was not able to use it. So it stayed in his garage in wait for better years. After a long decision the car was for sale. I talked to Hermen Pol about the car, being a restoration project and a 4 seater DHC. The car was tempting even if he told me it probably needed a full restoration. We had a long weekend in Amsterdam to look at the car and it was a wonderful weekend with Hermen on a Morgan Safari. This is how the car looked when it was towed out of the garage for the first time in many years:
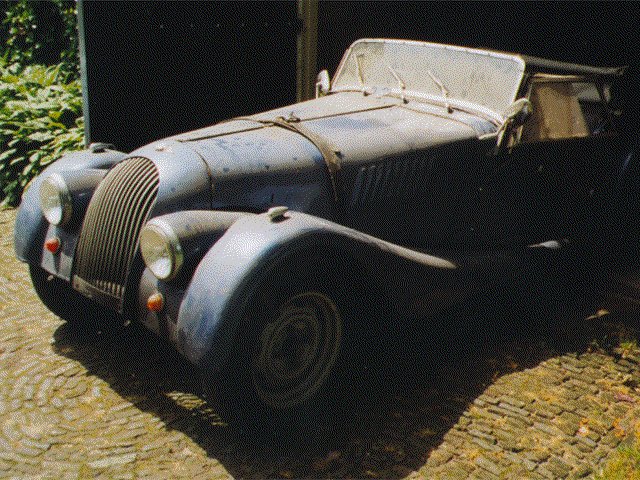
8-9 years of dust...
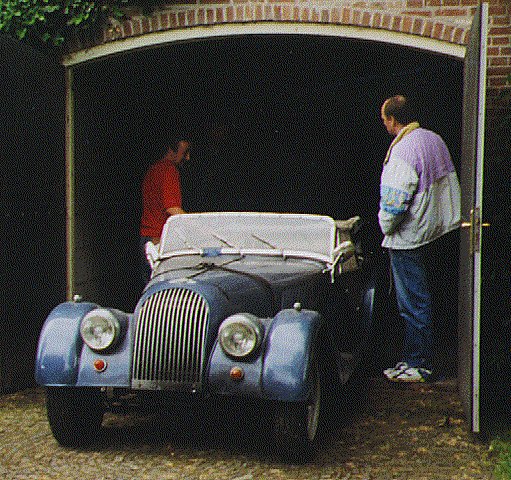
Looking a bit better after beeing rained on I think....
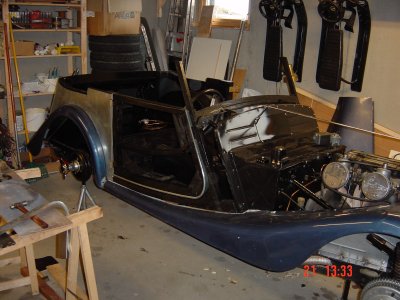
Not a pretty sight, but still a Morgan looking acceptable. At that stage I was a bit disappointed, since I imagined the car a little better. However, since the engine was not seized I decided to go for it. The car was a bit dusty, but the summer project I hoped for looked like a 2 year restoration. But since the car was a Snob Mog I bought it.
After getting the car home, and after doing a decent clean, the project looked more promising. Further inspection revealed matching numbers except for the original Vanguard engine replaced by a TR3 engine. When the engine after all is replaced, I am rather happy with it being a TR3, since this makes the car more fun to drive.
After a good clean...
One week work was all that was needed to get the car running. All brakes was seized, and the carburettors were full of brown gooey. It was a quite a bit of work, but the car ended up driveable. Even if the water pump was snotty and one of the brake hoses were clogged. The engine got 3 rapid oil changes, and has been used for since with no problems. A good proof of how sturdy these TR engines are!
After the first test drive...
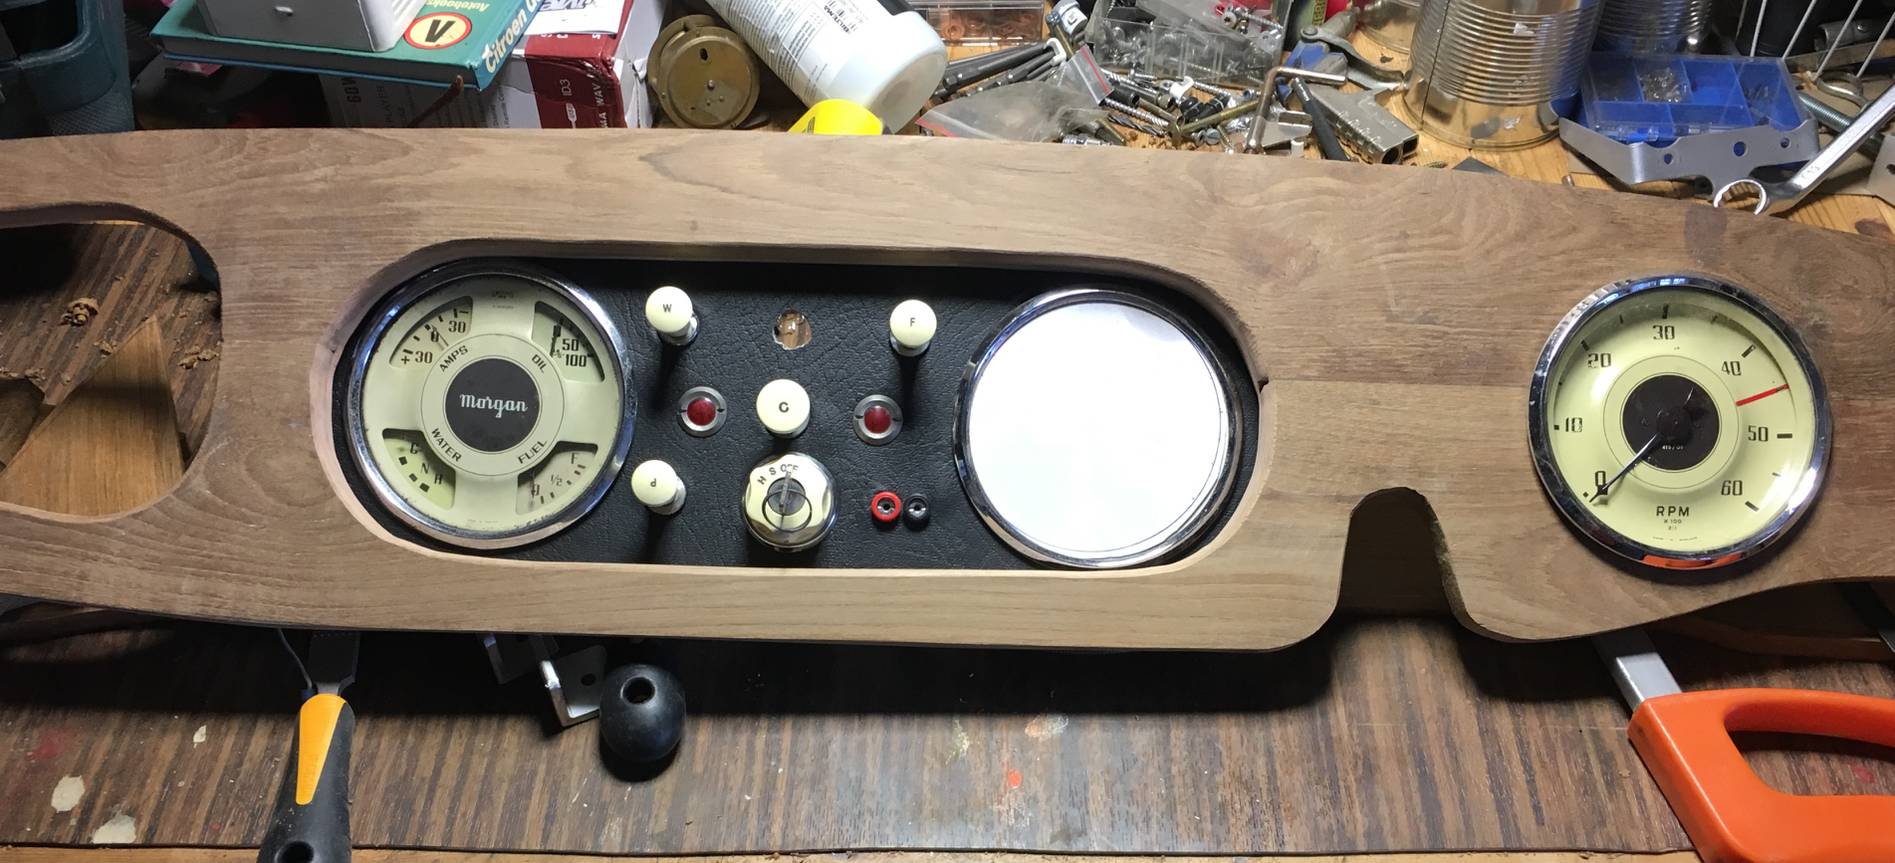
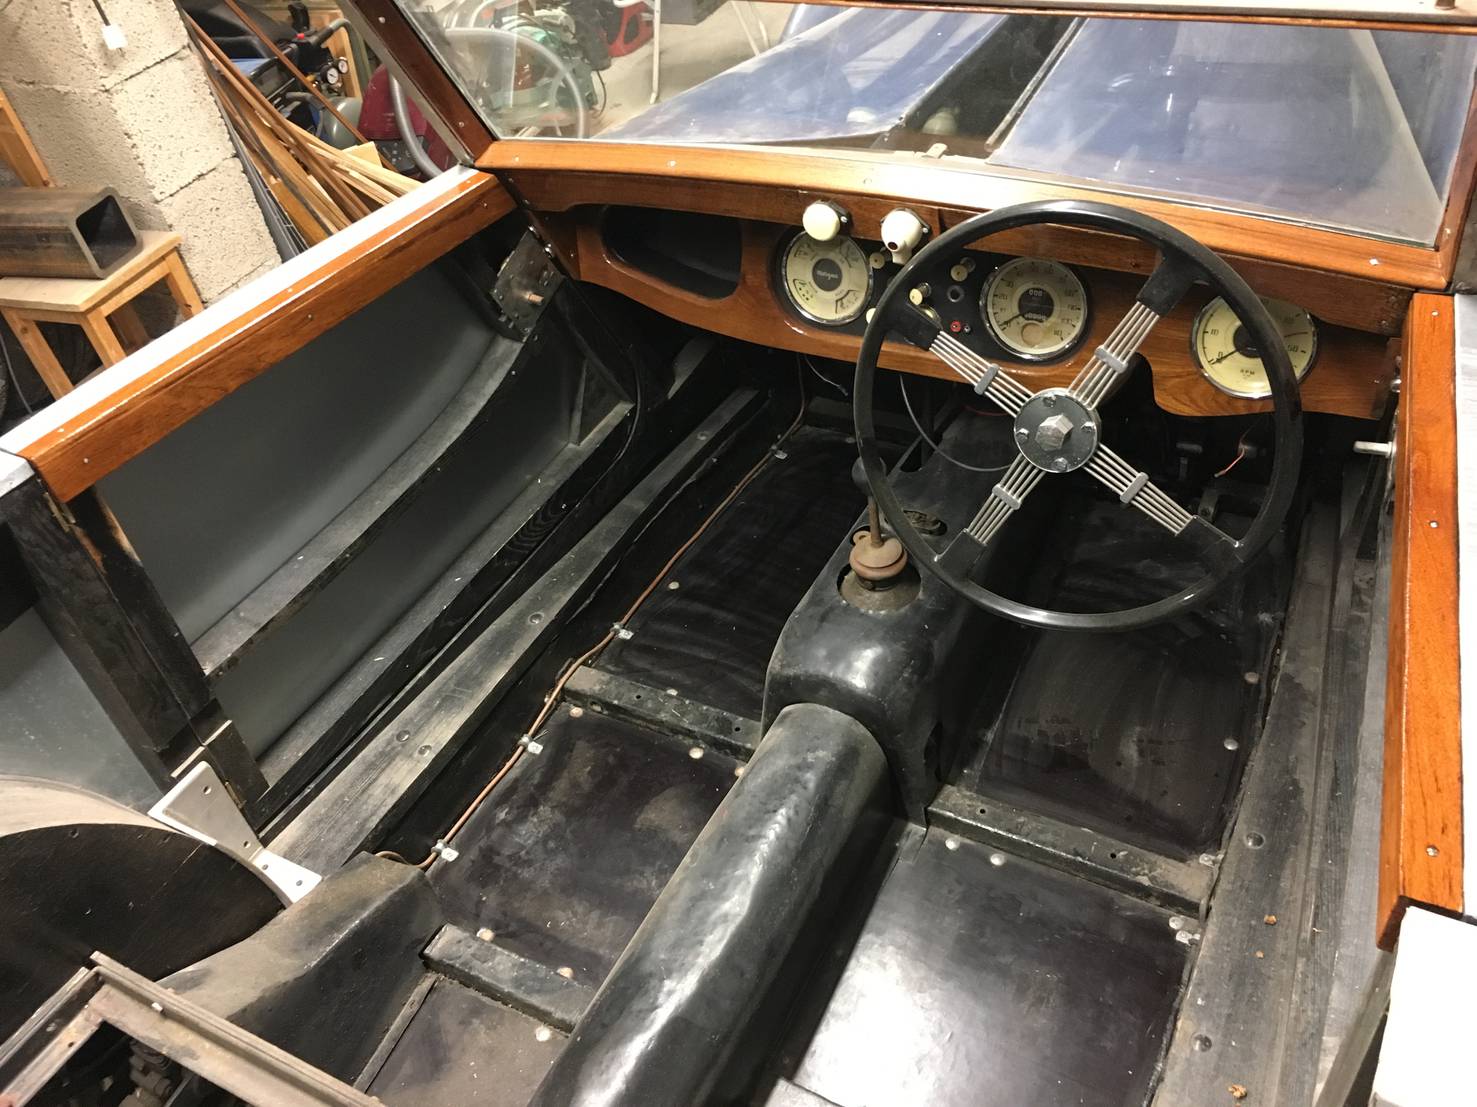
The Morgan was used for quite a few years, and I did a lot of work with it. The interior was been completed in a simple manner, since it would be removed when the new body was completed. The dashboard was completed with all original switches and gauges. Luckily the white faced instruments was there, even if the rest was replaced with aftermarket parts. The revcounter is new, bought from Melvyn Rutter. I was lucky to obtain one, after all the revcounter is the most important piece of kit installed in any sportscar.
The leaky water pump was replaced, also were most of the brake parts. Not having the original Morgan 16 inch wheels, it was fitted with Wolksvagen Type 1 wheels, was the reason to purchase a set of wire wheel hubs with a set of complementing wire wheels.
I have got excellent help from Melvyn Rutters, Harpers Morgan, Knut Hallan, Bob Nogueira, Gerry Wilburn and his son Derek Wilburn. Without their help would not have been able to restore the car with it's 4 str. DHC body. It was quite a daunting task to rebuild it all, so much missing and many questions about details.
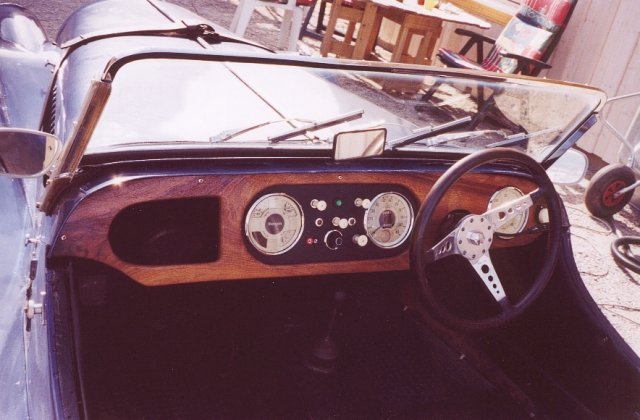
At last, new instrument panel and switches...
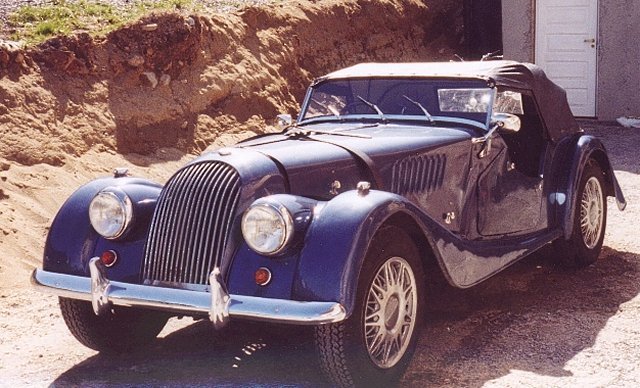
The car was used for quite a few miles, and I was really happy with it. The car drives fantastic. It is wind, noise and smells of car engine all around when driving. The bumpers was supplied by Knut Hallan, the friendly Norwegian importer of Morgan's. These made the car look way better than without. I was lucky to obtain these original and not repro parts. They have a few scratches, but not many. Decicions now is if I should replace or re-chrome them. I guess they will be used till I find a very nice new set.
The years first spin in May 2001...
Cleaned and polished...
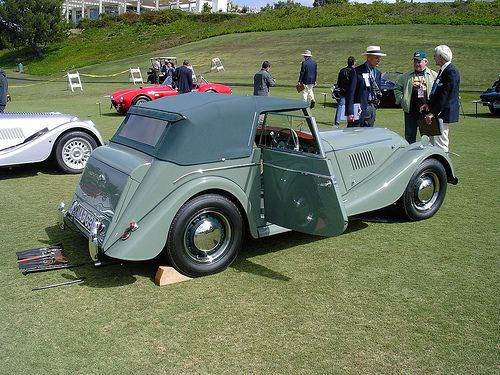
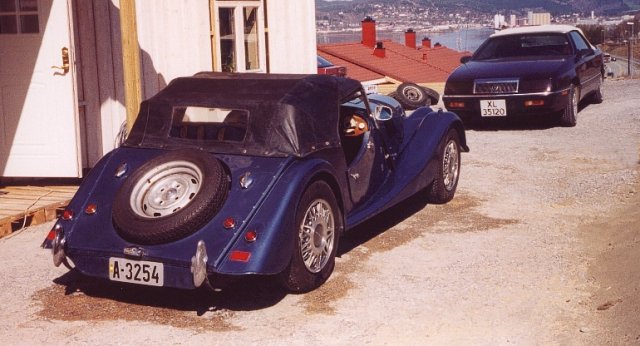
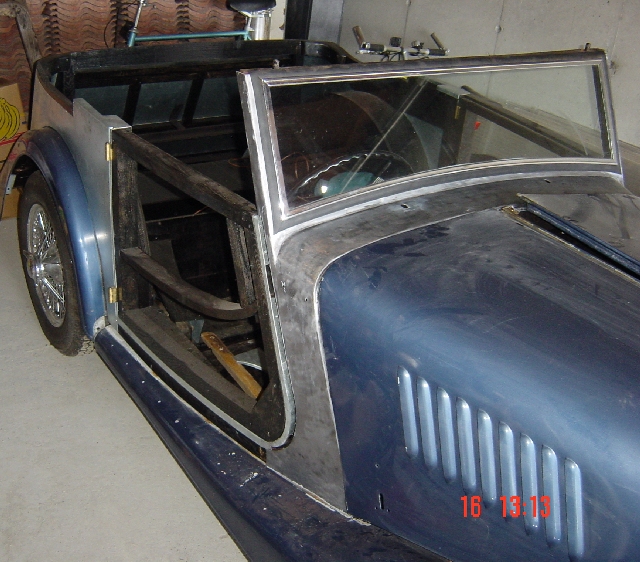
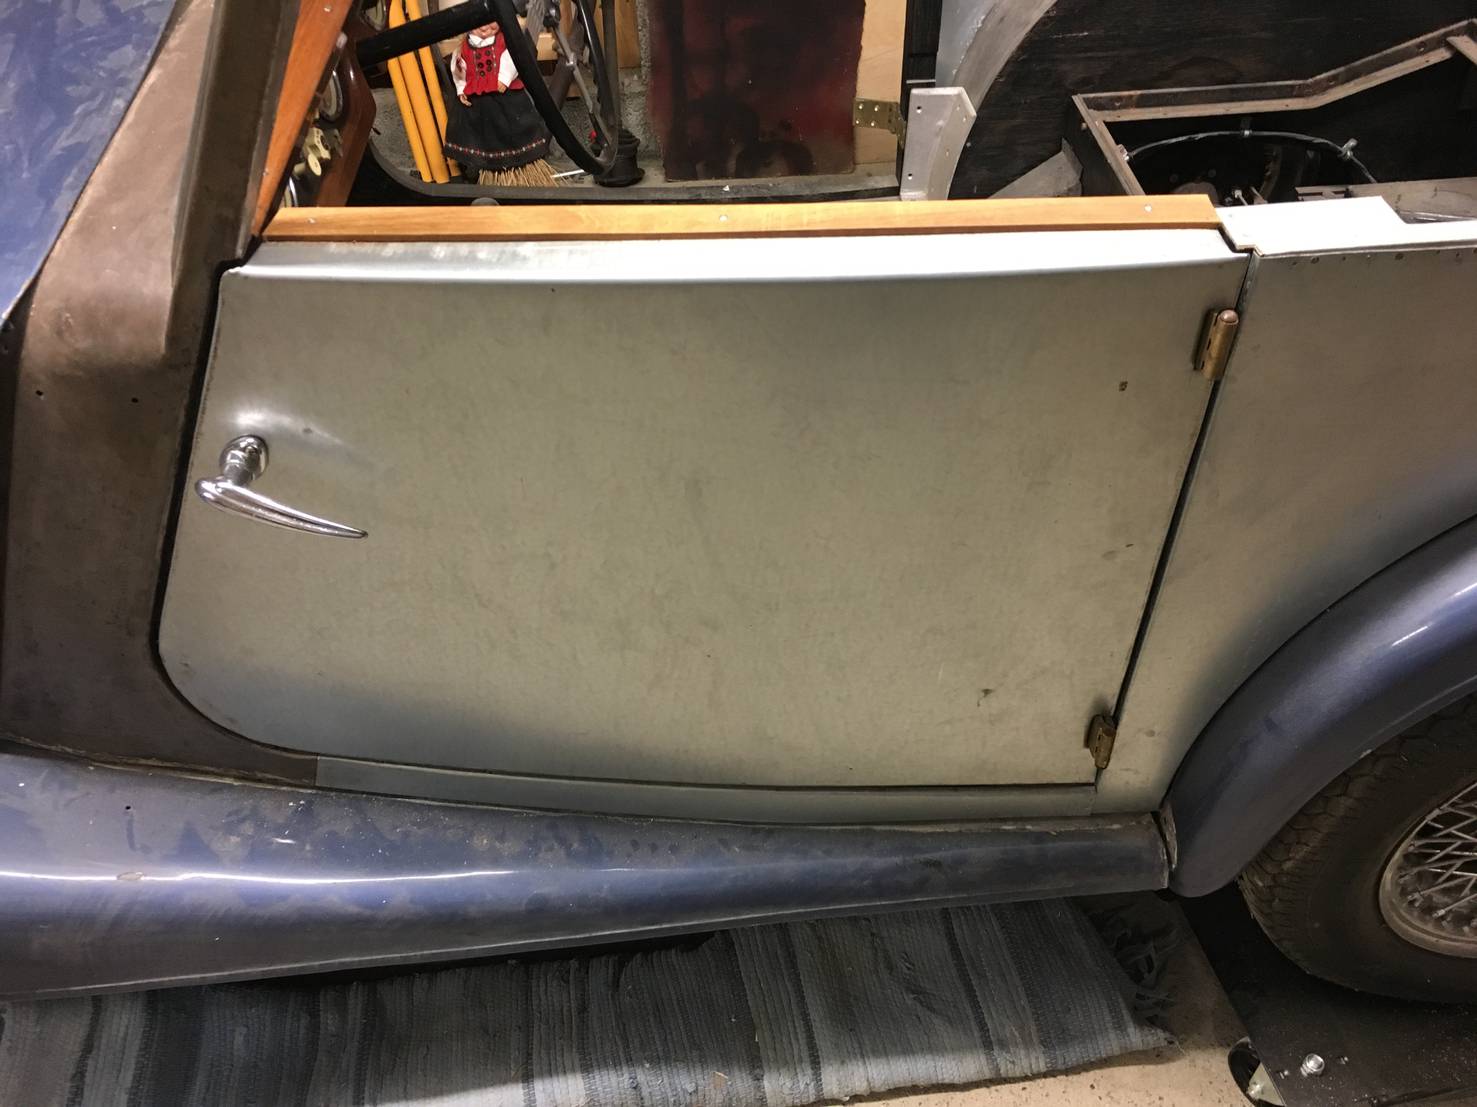
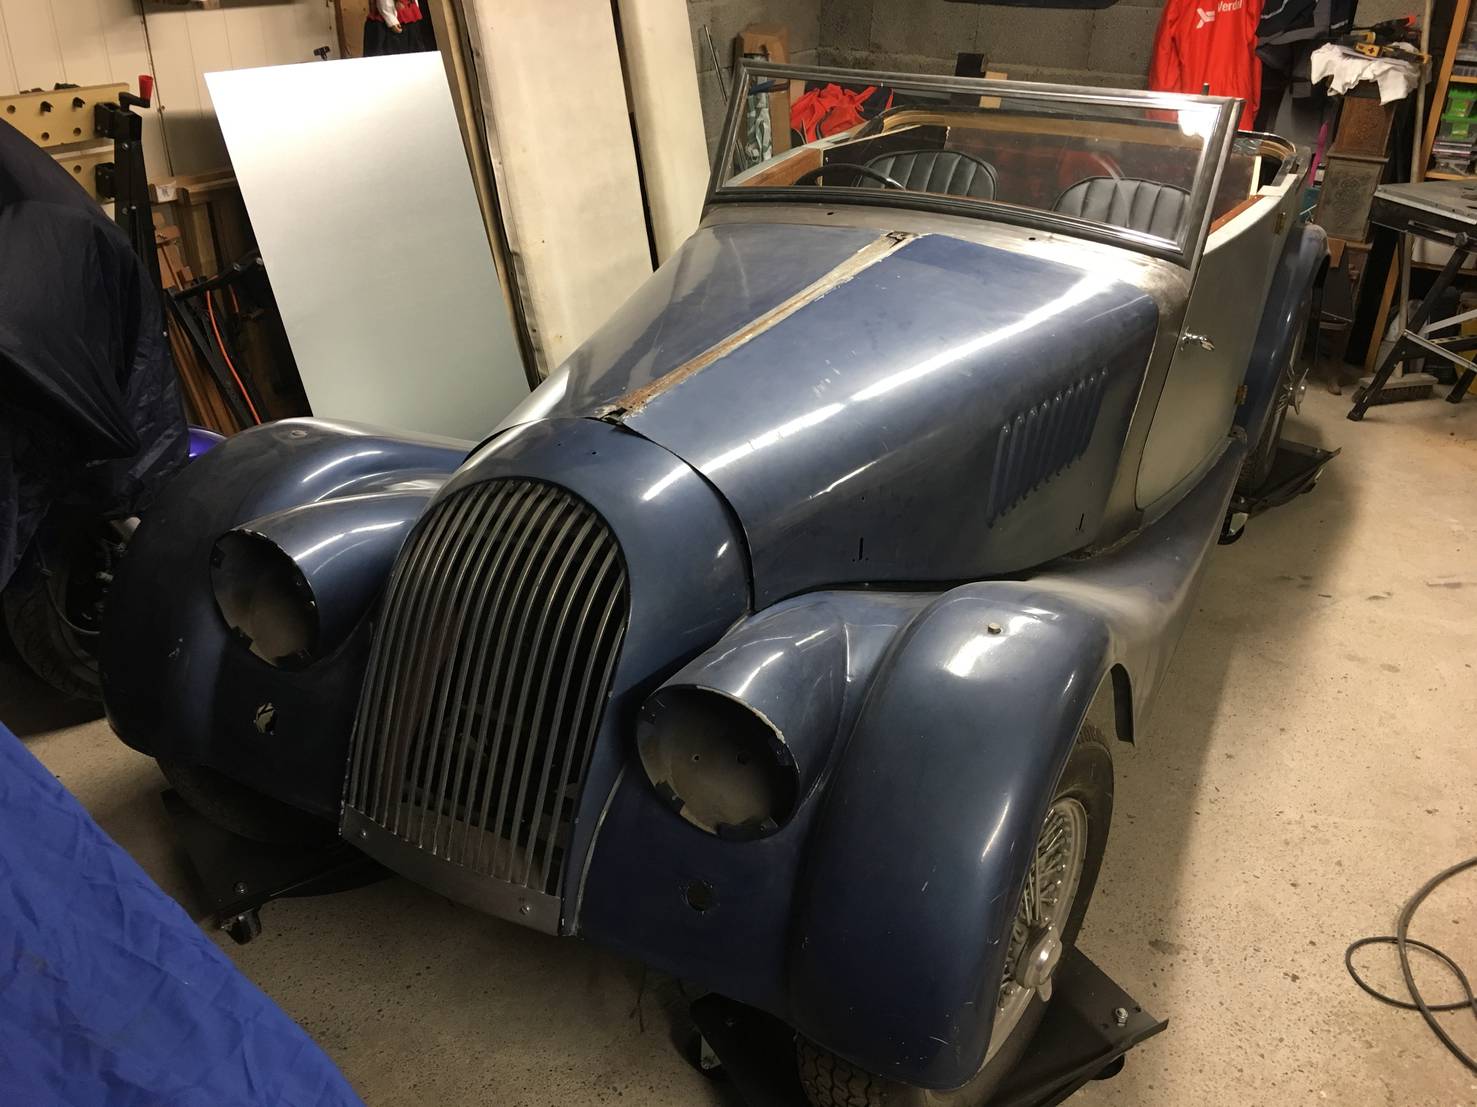
The 4/4 body makes the car look a little odd when the top is up.
(But who
drives a Morgan with the top up anyway?)
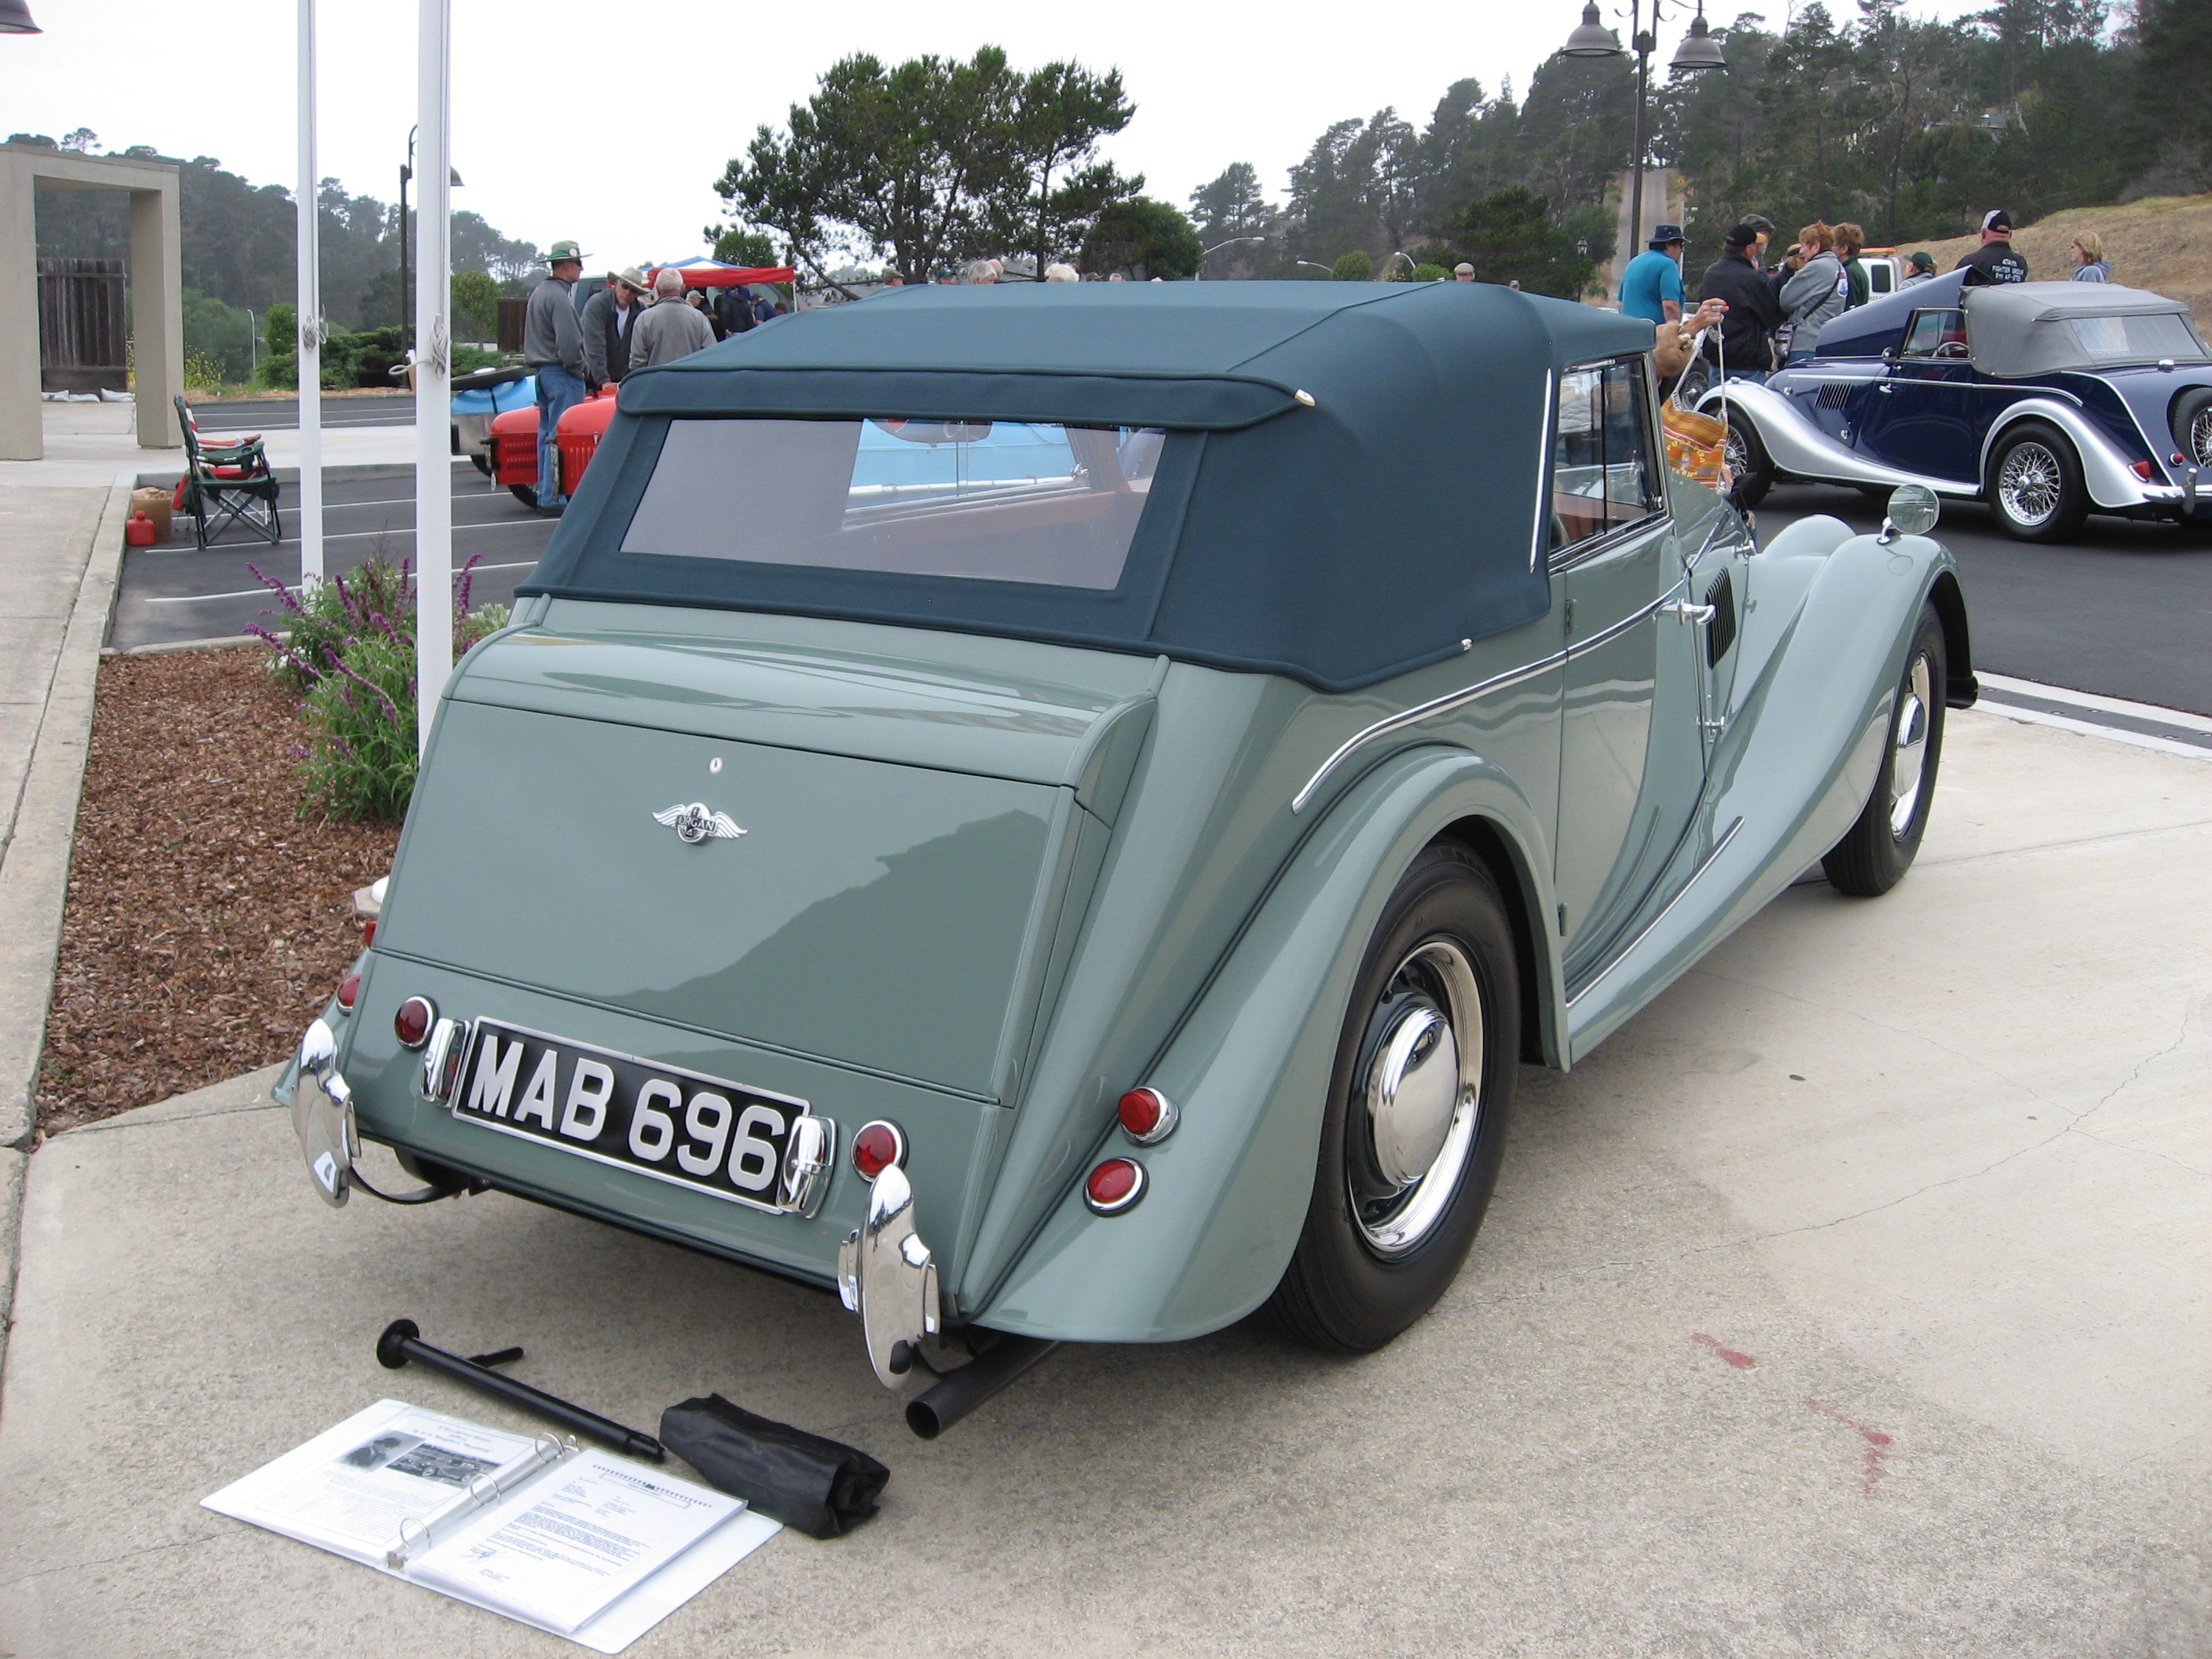
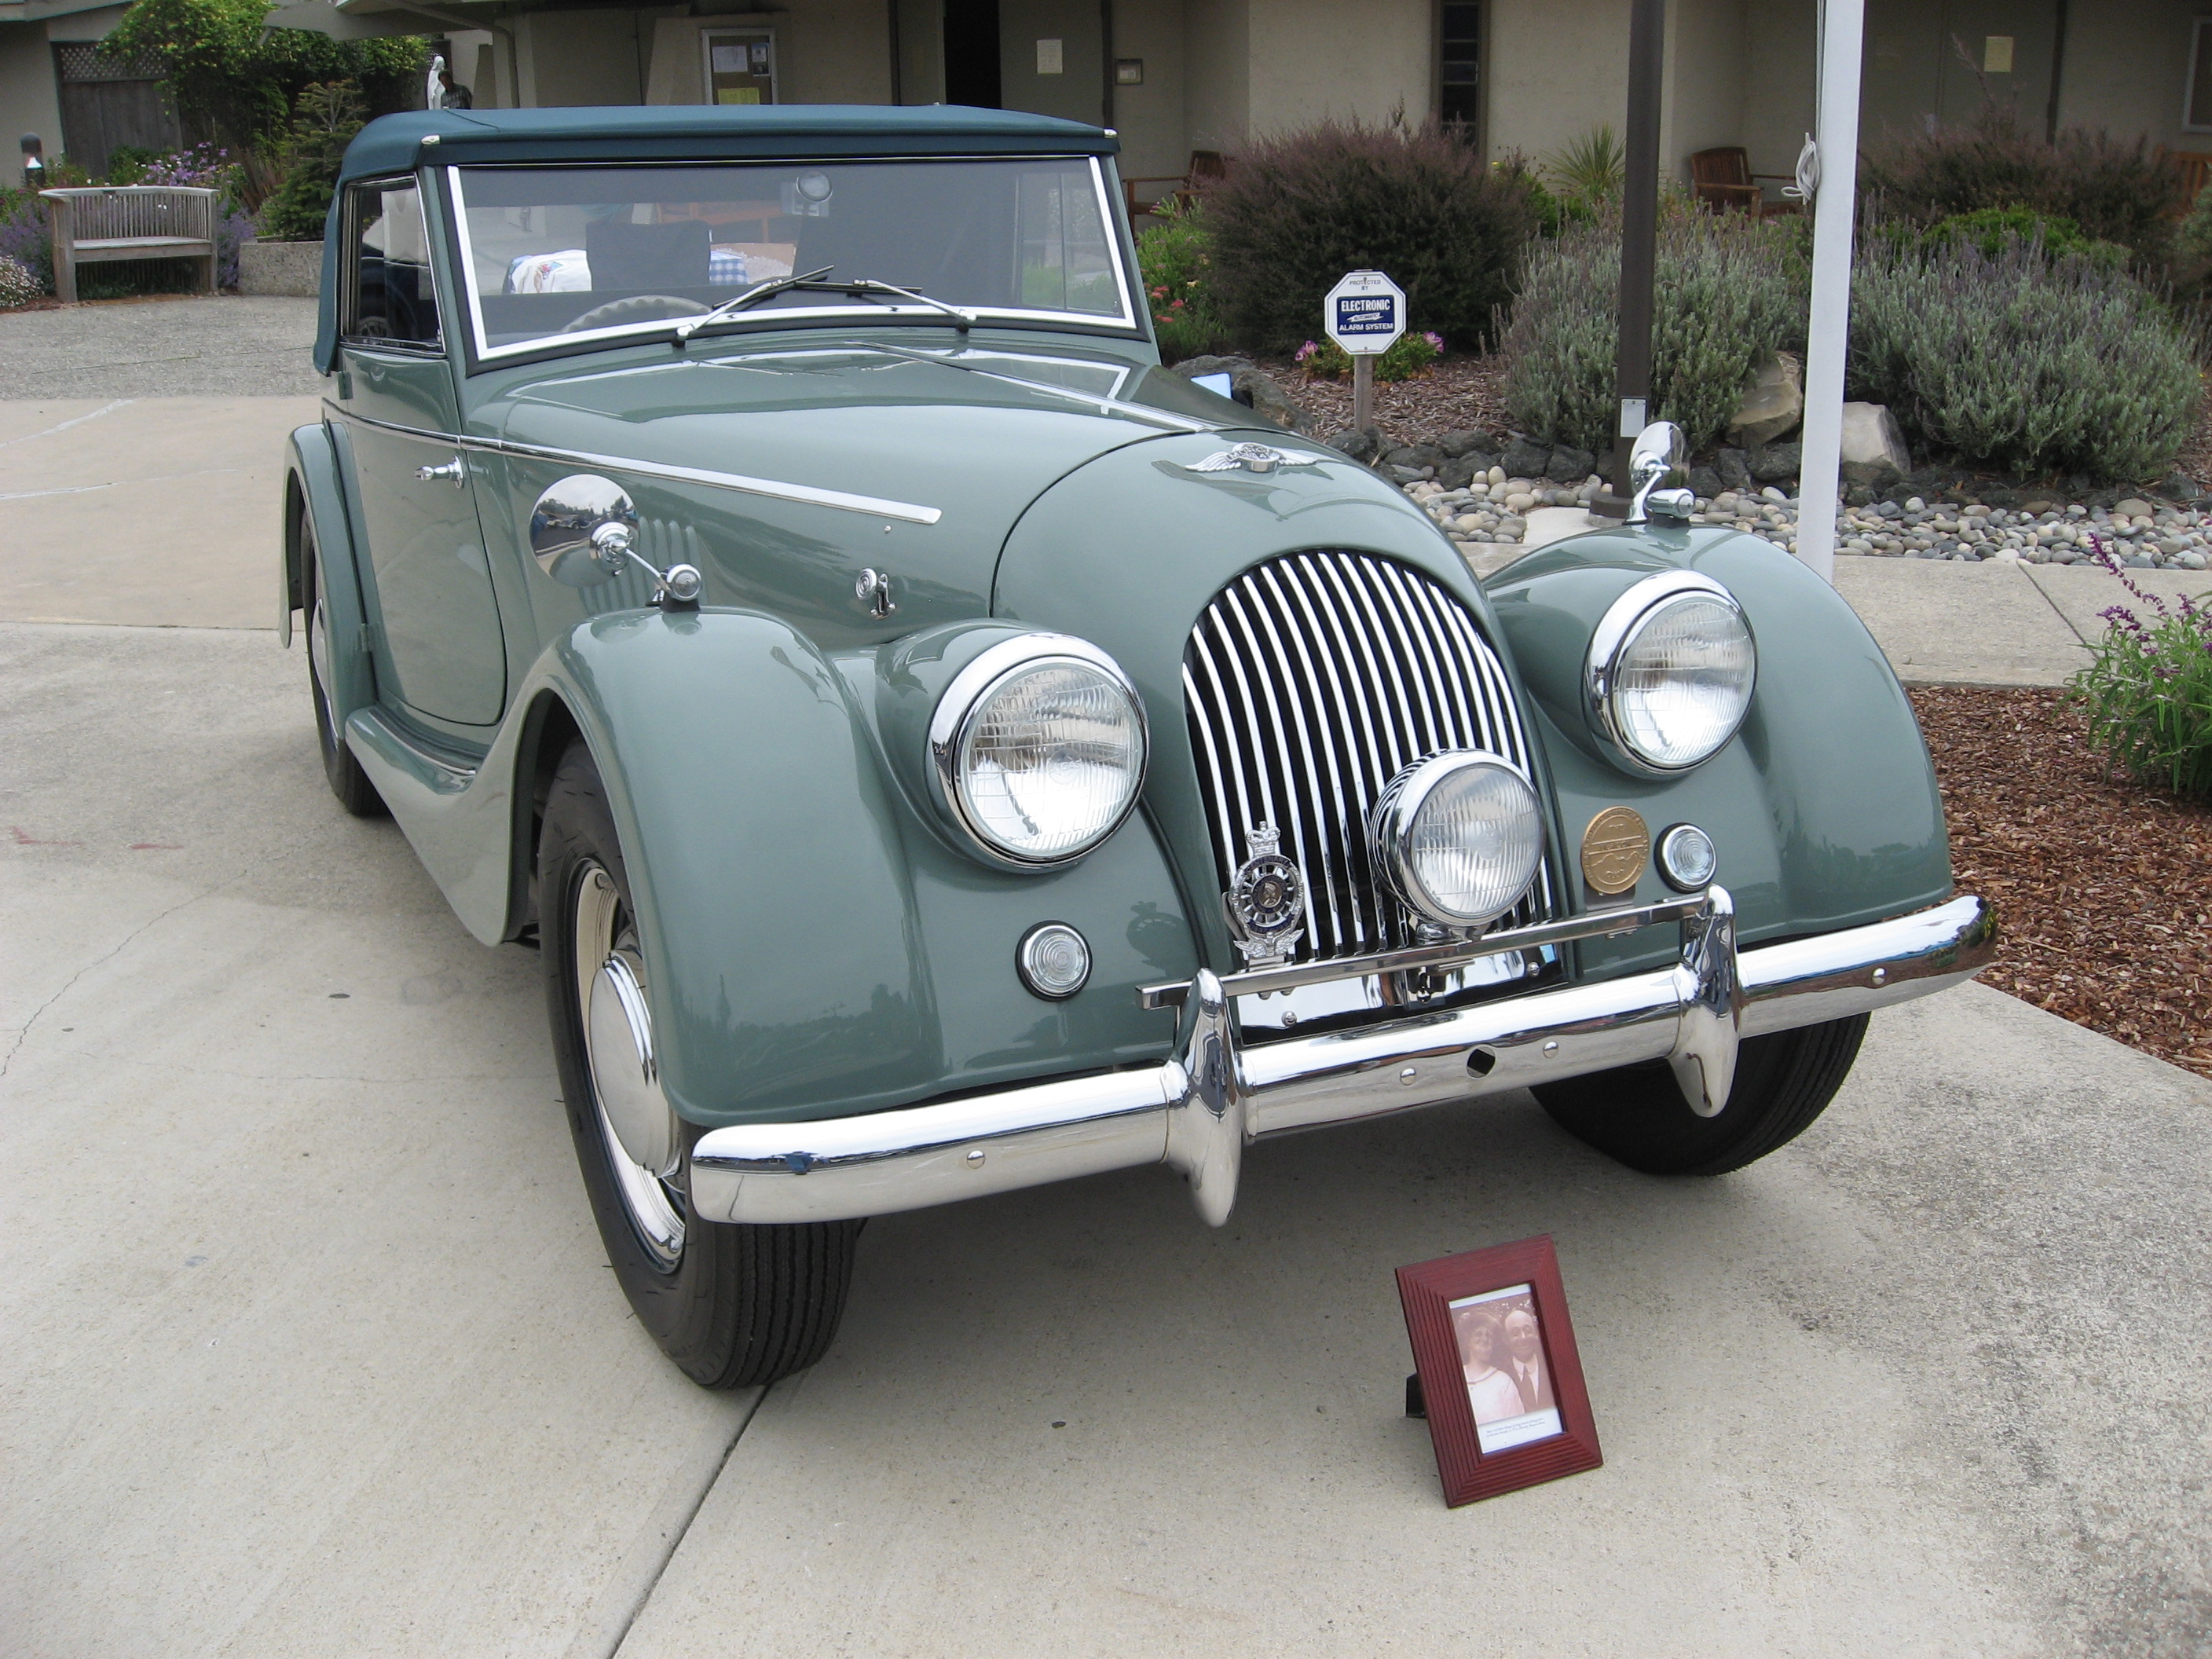
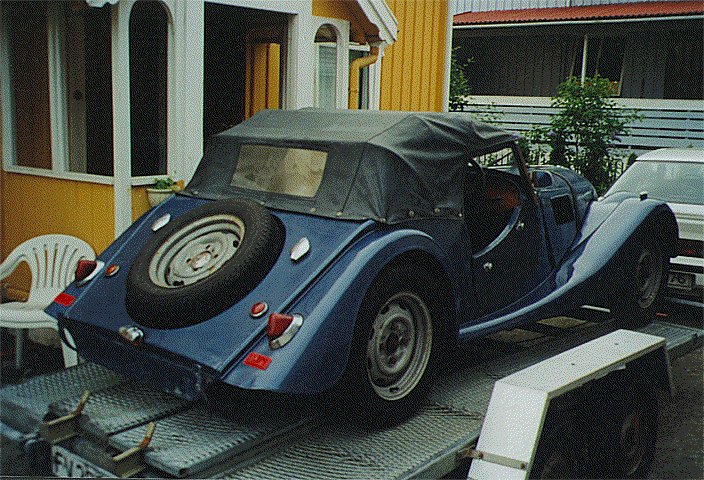
Looking at the pictures above, one can see there is a few unoriginalities to the car. Whenever was a +4 produces with 3 windscreen wipers? And also if you look closely you can see the 4/4 body is slightly to short and the bonnet does not fit very well. The bonnet is simply half an inch to short. The rear reveals double petrol caps. Only one is in use, and it is important that you fill it with that one only!
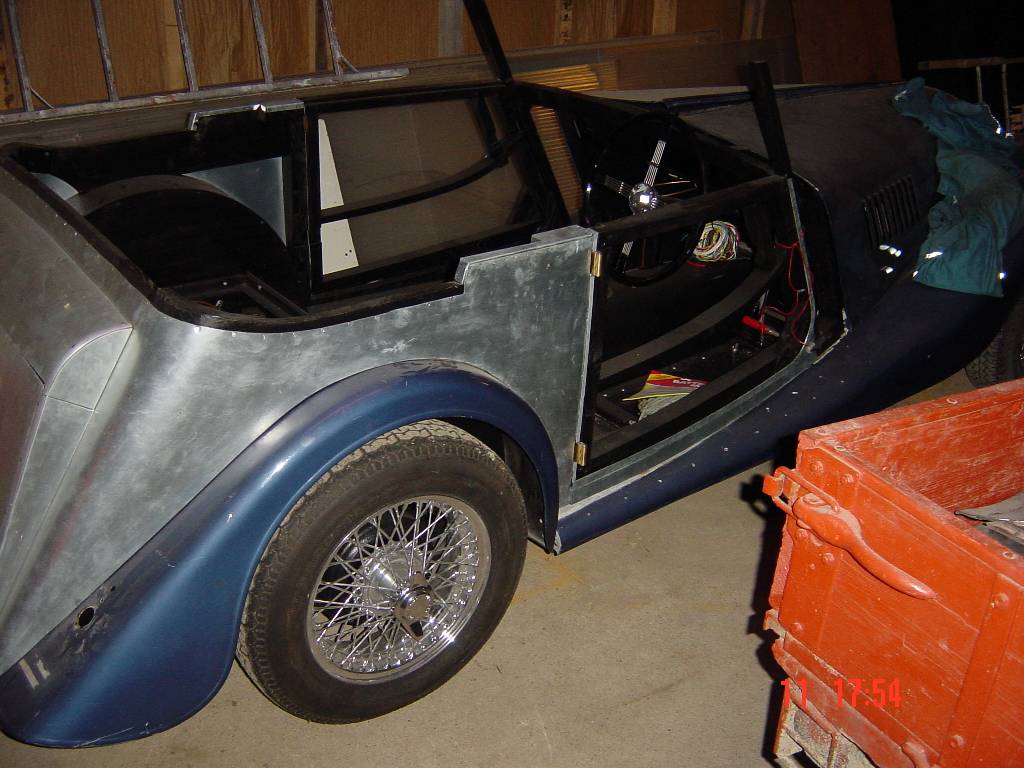
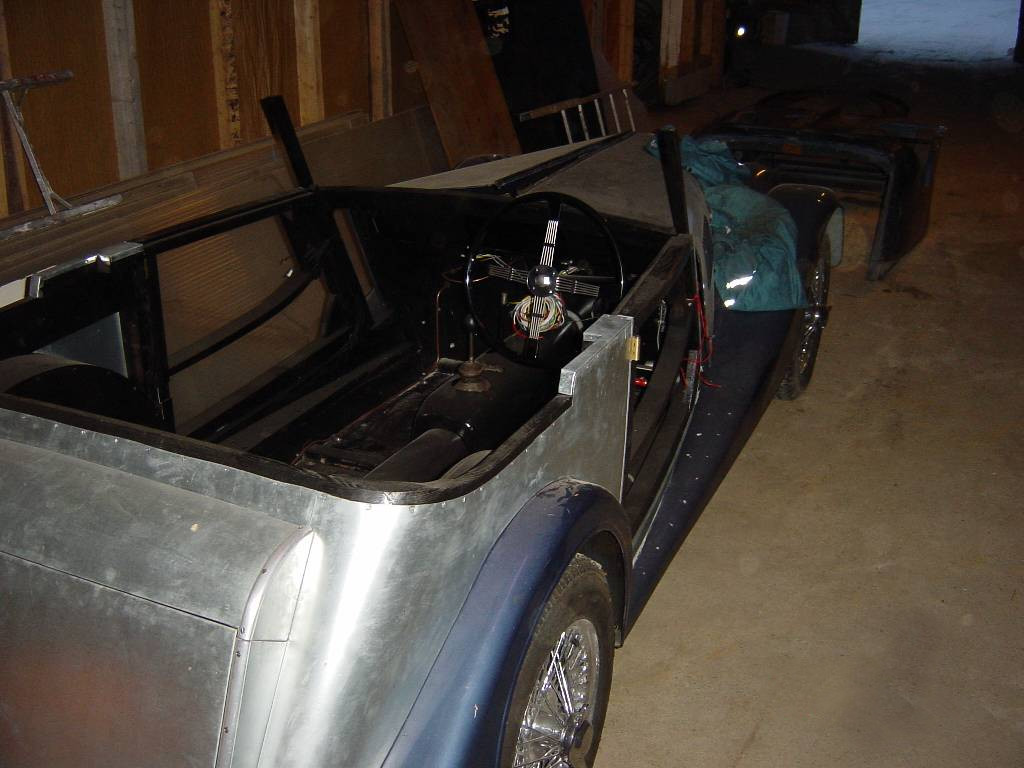
Anyway, the restoration of the car begun in 2002. In 2003 a lot of work were done to it, mostly replacing the old body with the new one, and sheet metaling most of the car. Only doors were left. I leave it a little up to you to look at these pictures and to see the work commence.

The 4/4 body on its way off the frame.
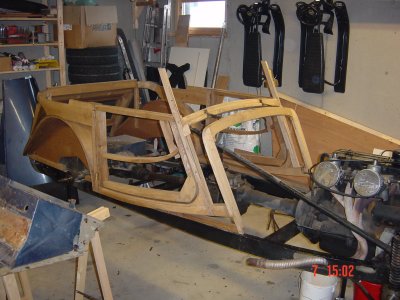
Frame clean, with new wooden body tub in situ.
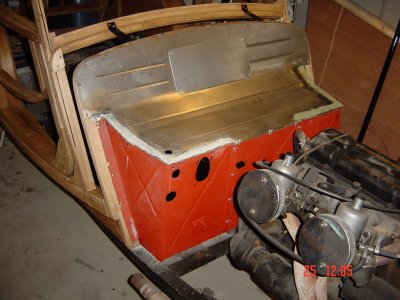
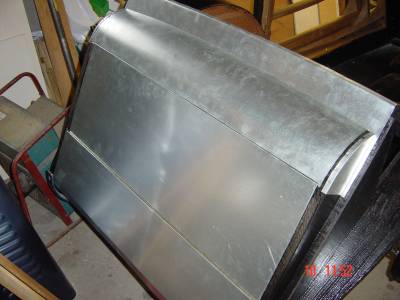
torpedo repaired with new panels.
New front inner wings and the Datsun 260Z drum modification to use wire
wheels.
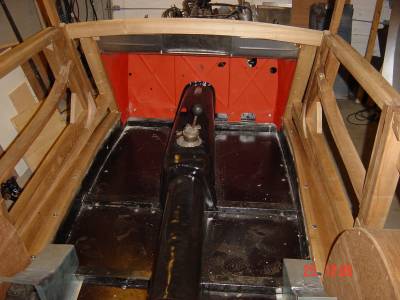
New floors of waterproof veneer, boat quality..
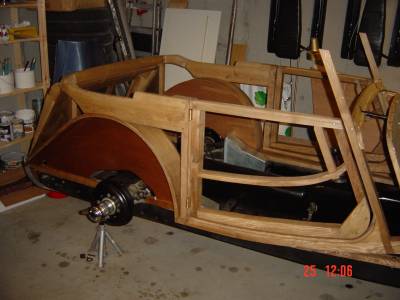
The frame before any sidepanels is mounted.It is is a piece of
art really this frame.
The build quality was A+++ and it did fit with
millimeter accuracy.
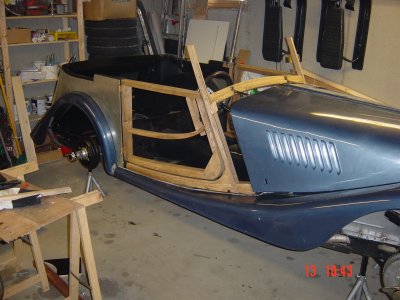
Slowly coming together and looking good!
Rear end during panelling. Panelling the car was actually not so complicated as I thought.
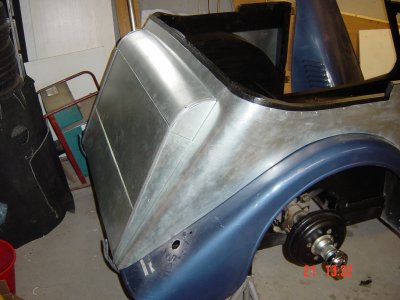
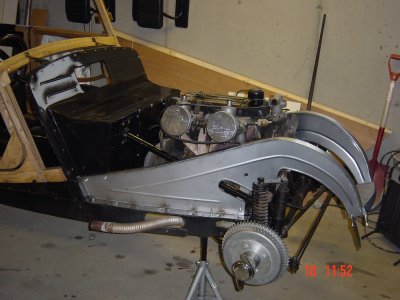
Rear end panelled, wire wheel hubs ready for wire wheels.
Closer, details added, and only a few panels to mount before paint
job.
Winter 2004 update:
Here is the Morgan's state winter 2003/2004. There has been less progress on the car lately, this due to a very cold workshop and a huge workload at work. I do however hope to get som time early spring to work more with it. When the sun comes back and warm up my area, I hope to complete it some more.
Rear End with wire wheels. To bad the color combination blue/silver
were not delivered in 1955.
A rolling chassi at least. There is still some fitting to be done up
front, and skinning of the doors... But It looks more and more
complete.
Spring 2005 update:
I worked a little on the car again, completed the metal under sill boards amd added skinning for the front scuttle. The sheet metal for the scuttle comes from the remains of a 2 seater DHC in Texas and fits perfectly. It is a complicated part to manufacture so I was fortunate to find one original piece to use. It came along with wooden interior trim. Some to reuse and some to replace. Also I have front seats to restore and is working with the dashboard fascia for the moment.
I will now start to adjust wings and bonnet in order to make them fit perfectly. I have traced someone with an english wheel not far away from here, and I plan to have the doors reskinned by him. He is a very busy fella tho, and it will take time before I can have them done.
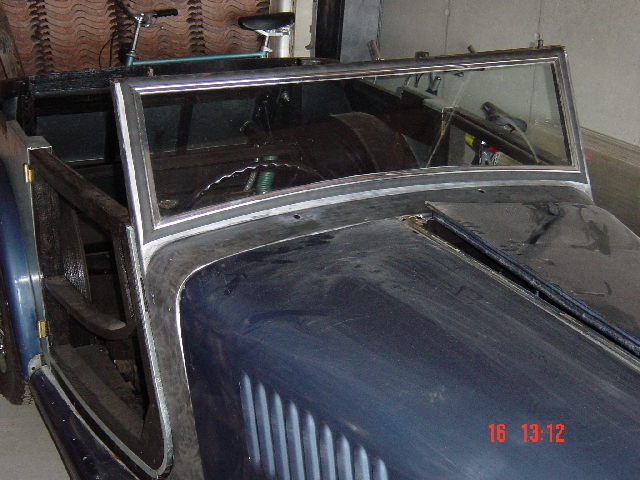
Front scuttle sheet metaled, and test fit of front window.
If slow, at least there is progress :) Skinning the doors will be next,
which is a bit of a puzzle, since the sheet metal has curvature both
ways.
Summer 2007 update:
Time flies! A new daughter arrived last summer, and all hours are spend with her now. I have worked a little in the workshop, but it has been little and slow. Life is like this I think, some time one has plenty time for hobbies, and some time not at all.
Summer 2010 update:
Small tasks done, the project has been on a standstill for a while.
Summer 2016 update:
One door panel made, it was not as difficult as dreaded, but it need a bit more work. Not happy with how straight the top bend ended up to be. The problem is quite simple, if I hit the metal with a hammer it gets bigger, hence the top part of the door warps a litte. I have used a tecnique with crimping the metal and then straighten it again.
I dont have a lot of tools to do sheet metal, but I have come quite a long way using a hammer, pliers, clamps and sheets of plywood. I have added a sequence of pictures which more or less show the fabrication of door skins using a minimum of tools. It takes some time, but the result was surprisingly good. The problem with Morgan DHC doors are the two direction rounded edge on the top. To achieve the curvature of the door in two directions you will need a crimping tool.
Here are some pictures to show how I did make the door skins.
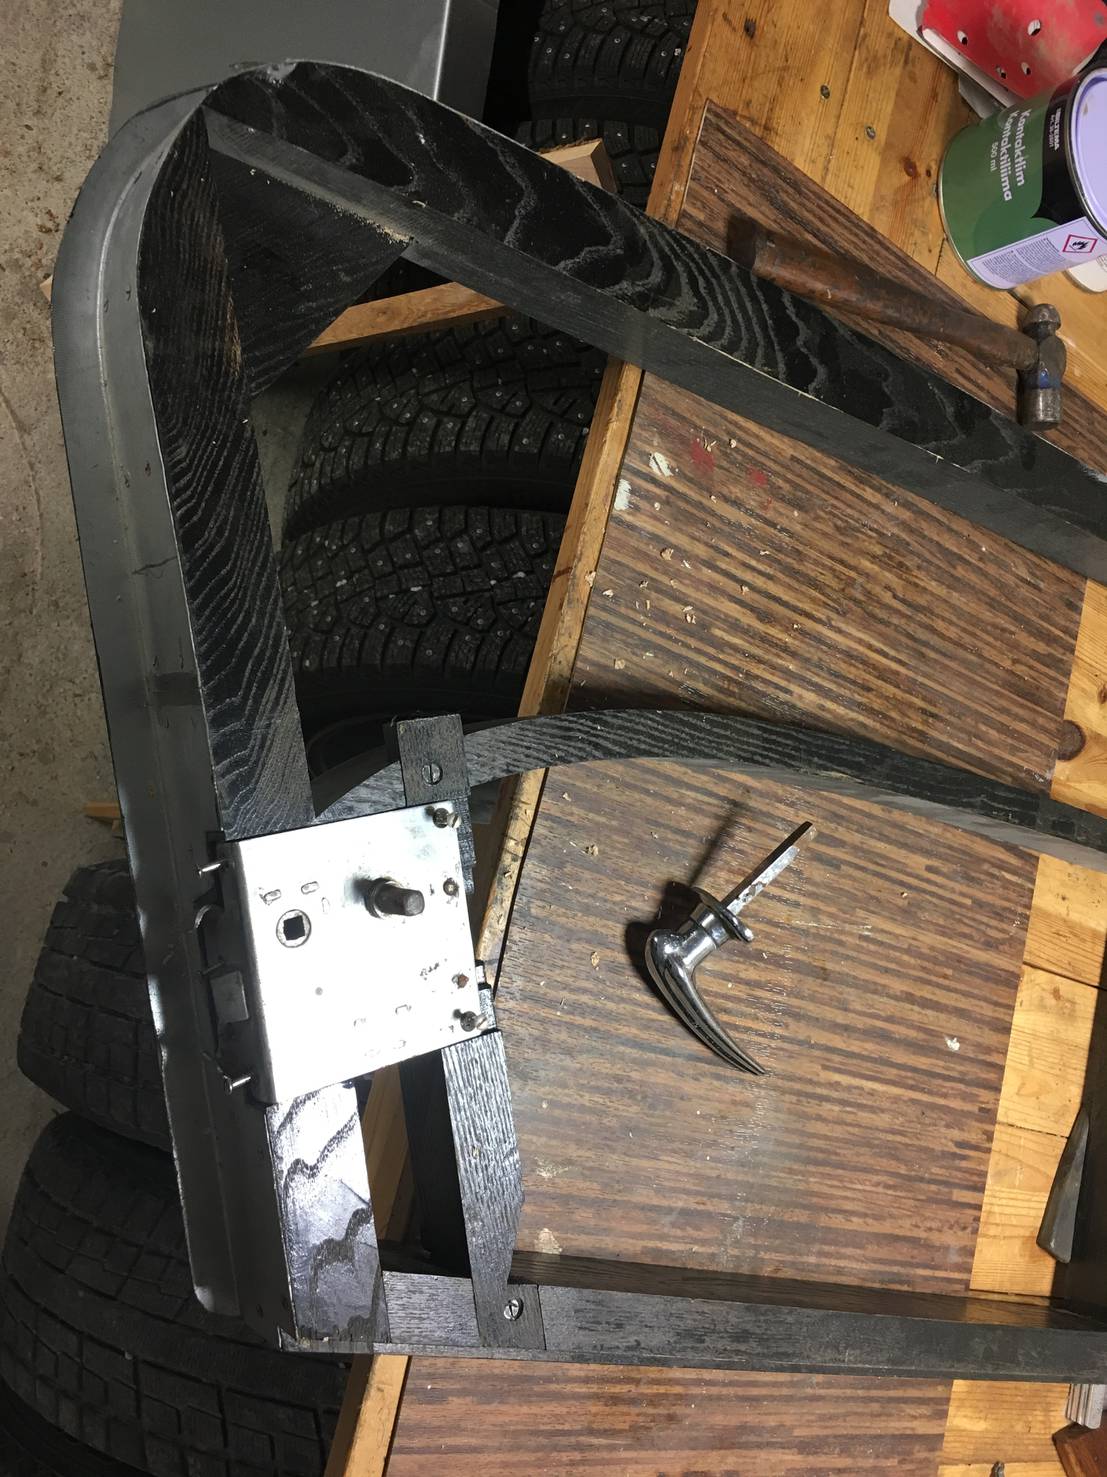
Fitting the door look.
Drilling a hole for the outside handle
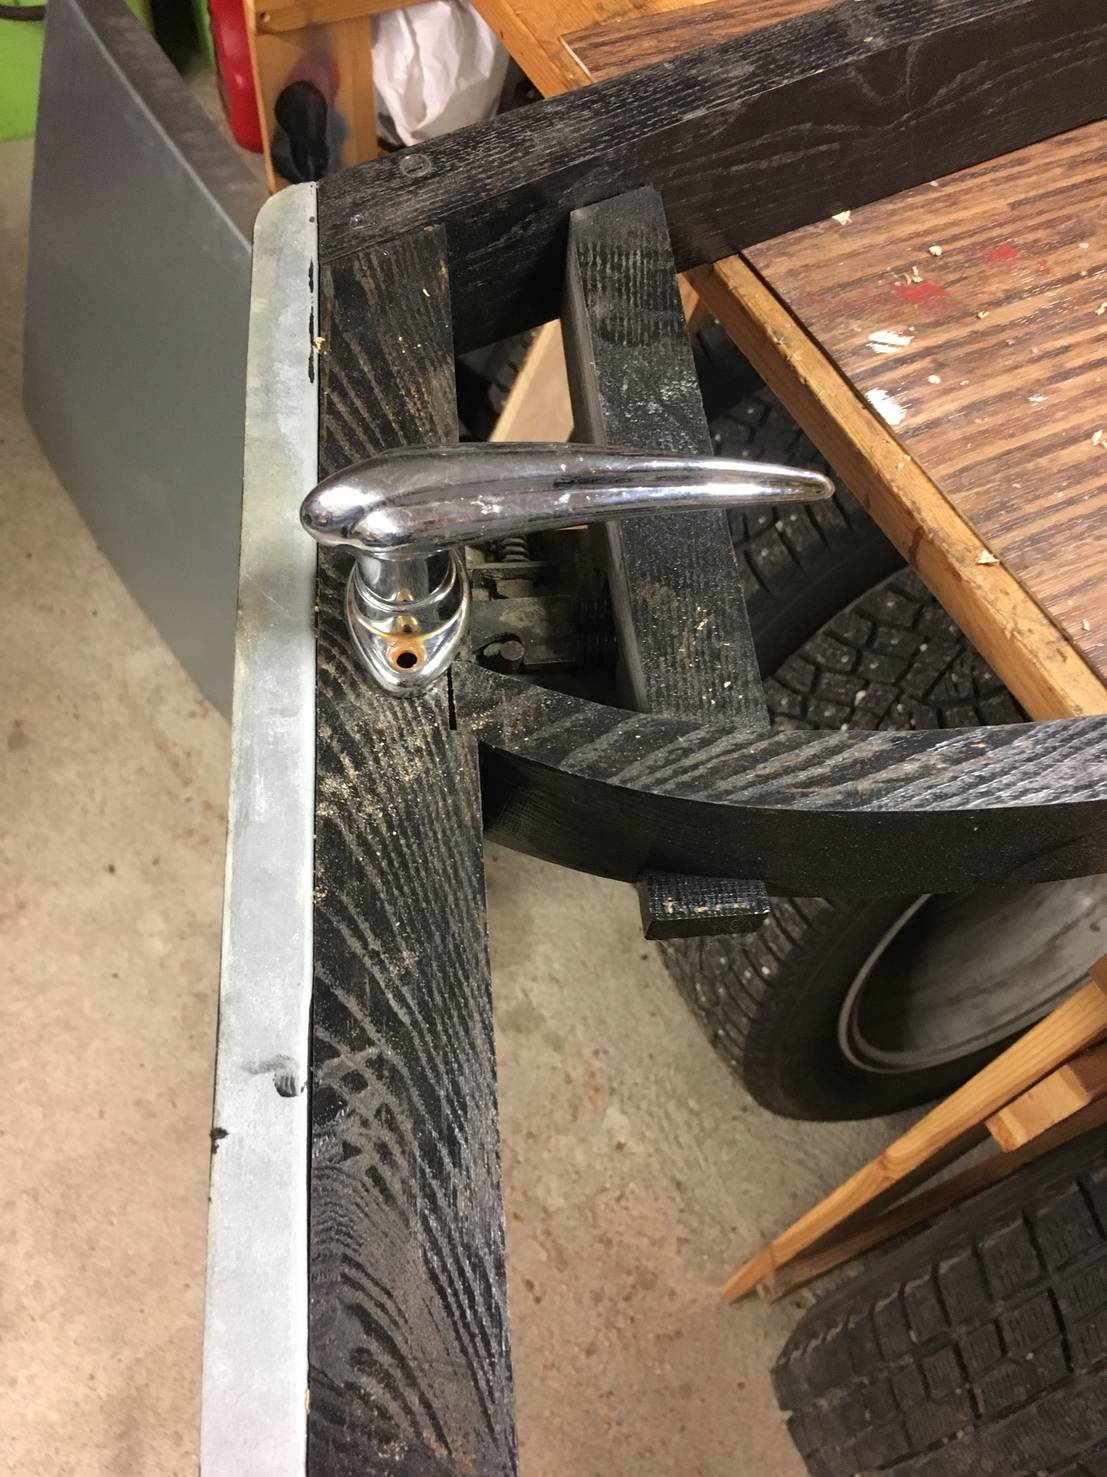
Testfitting.
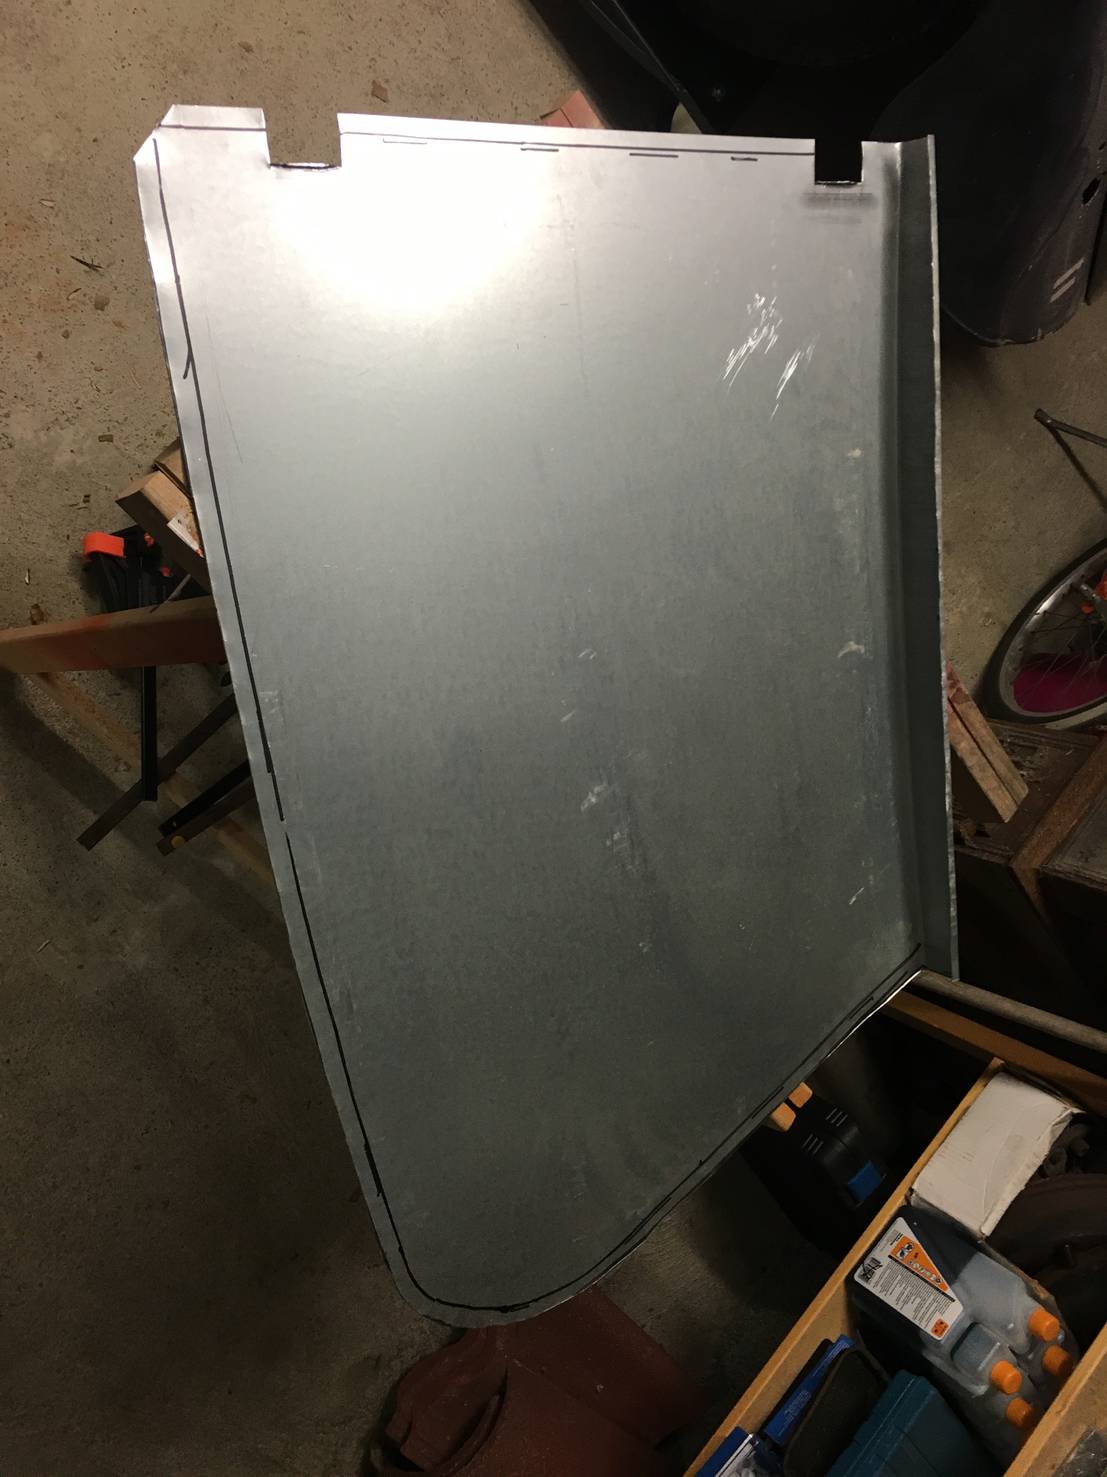
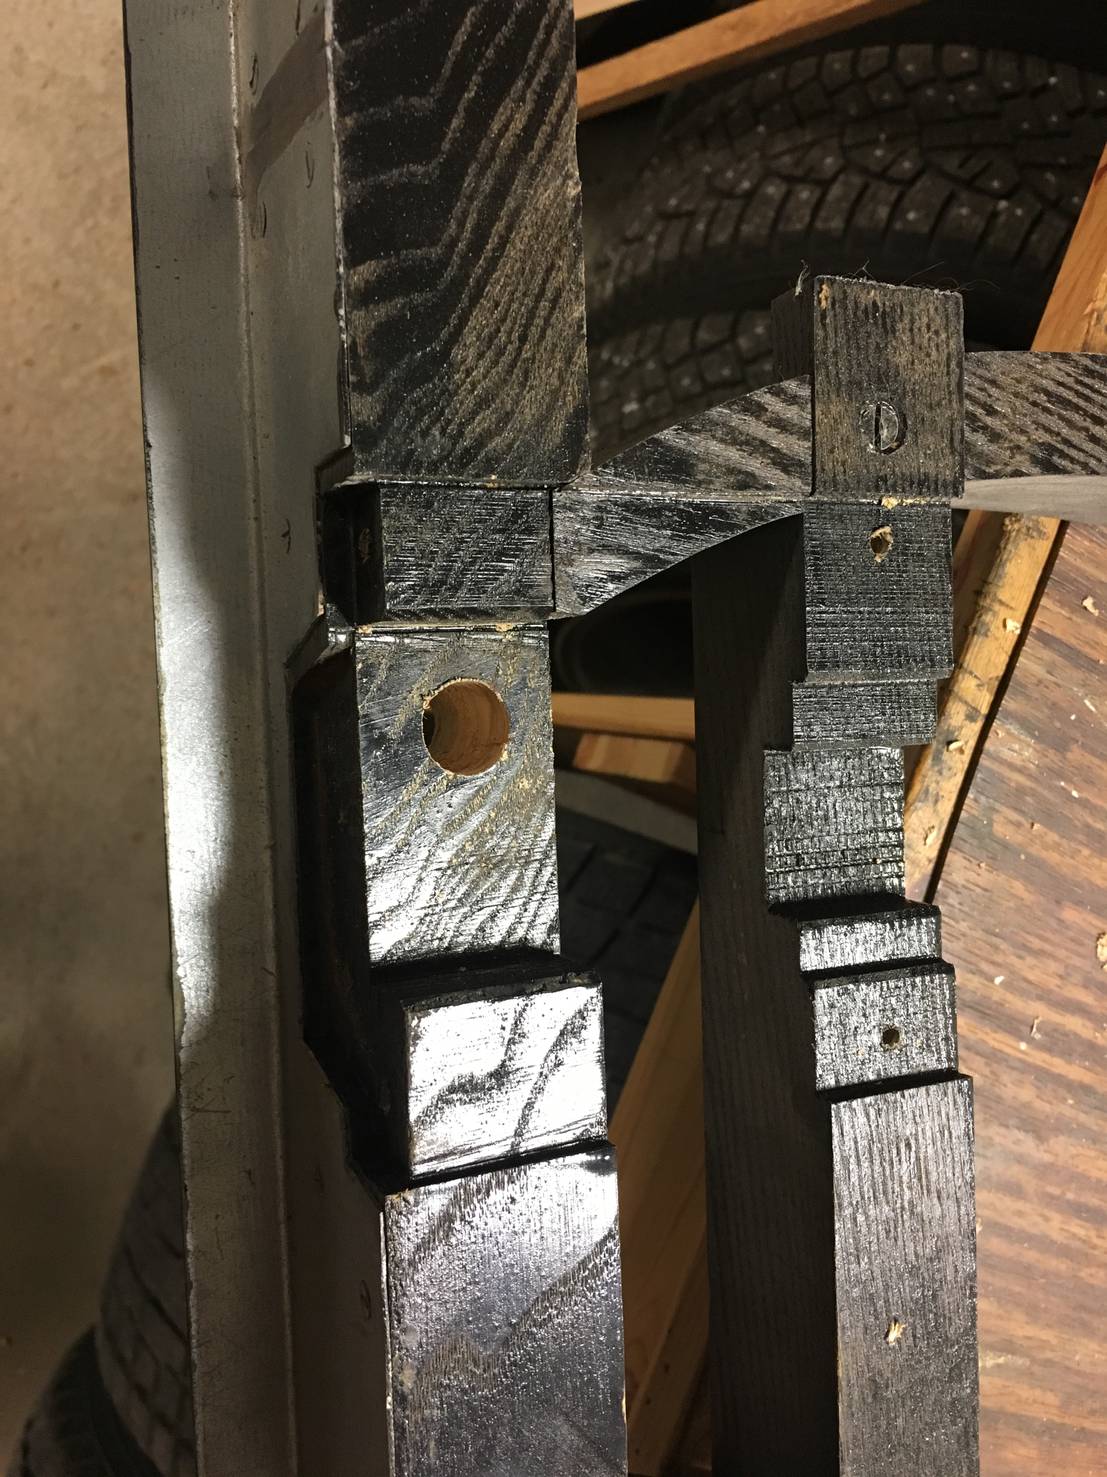
Precutting the hinge gaps, and marking the panel where it need to be folded around the door frame.
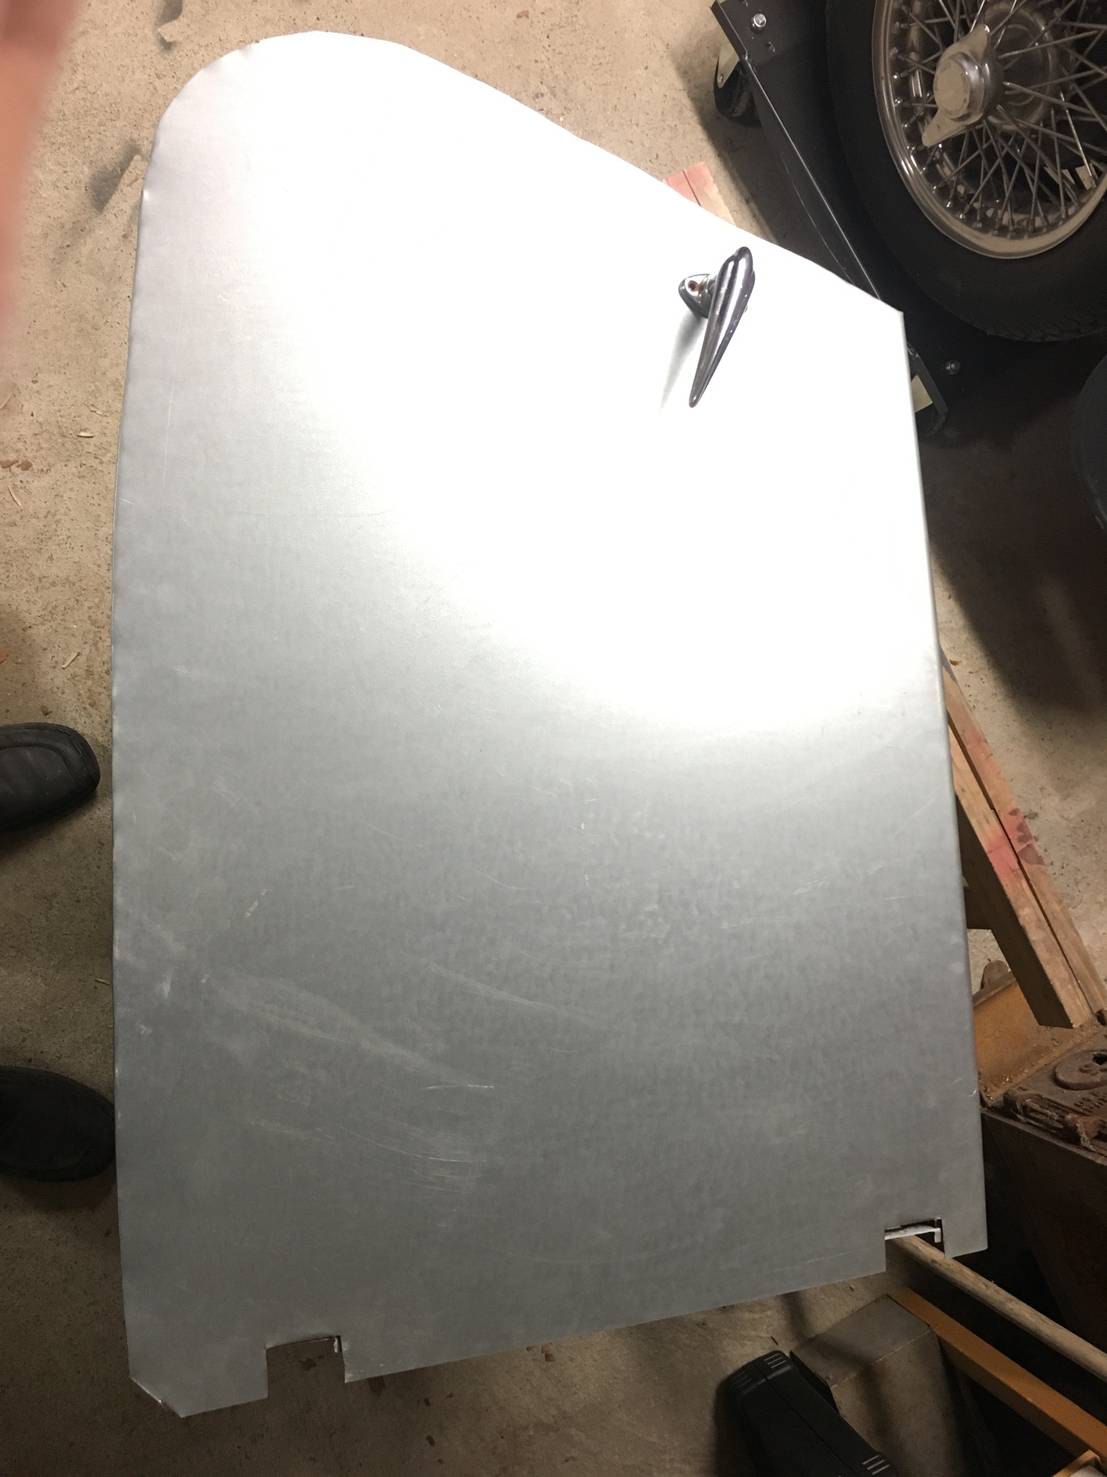
Testfitting to check handle hole and top aligns the frame.
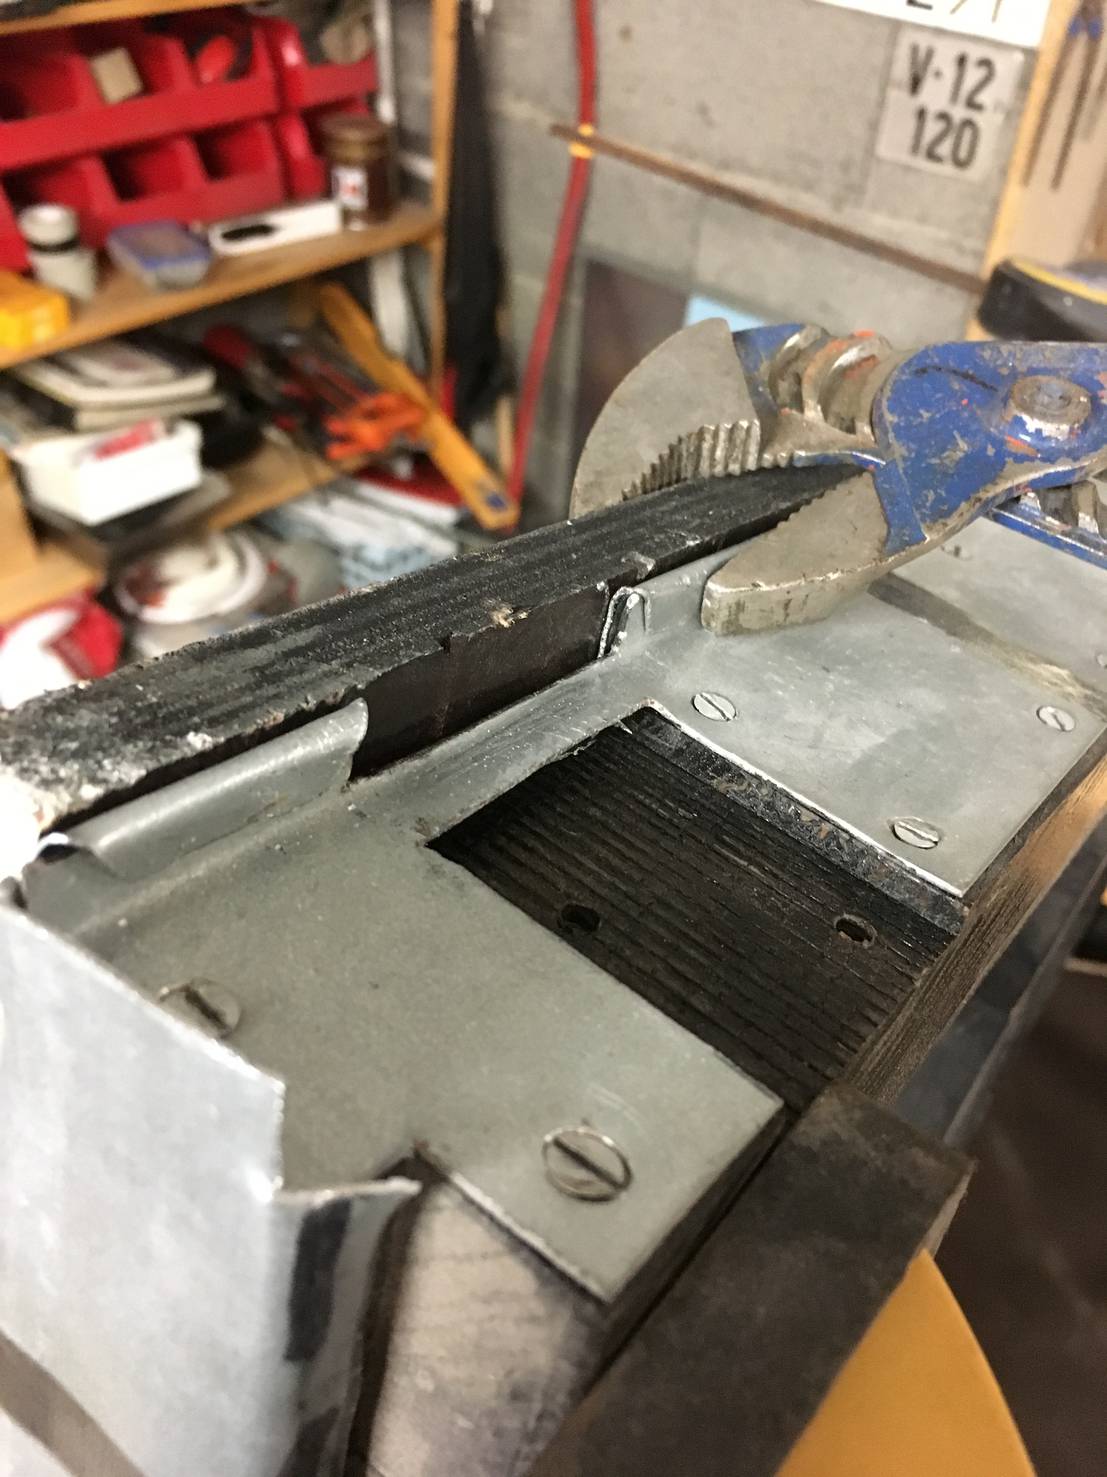
Clamping each side of the top, to fold the 90 degrees bend on the top.
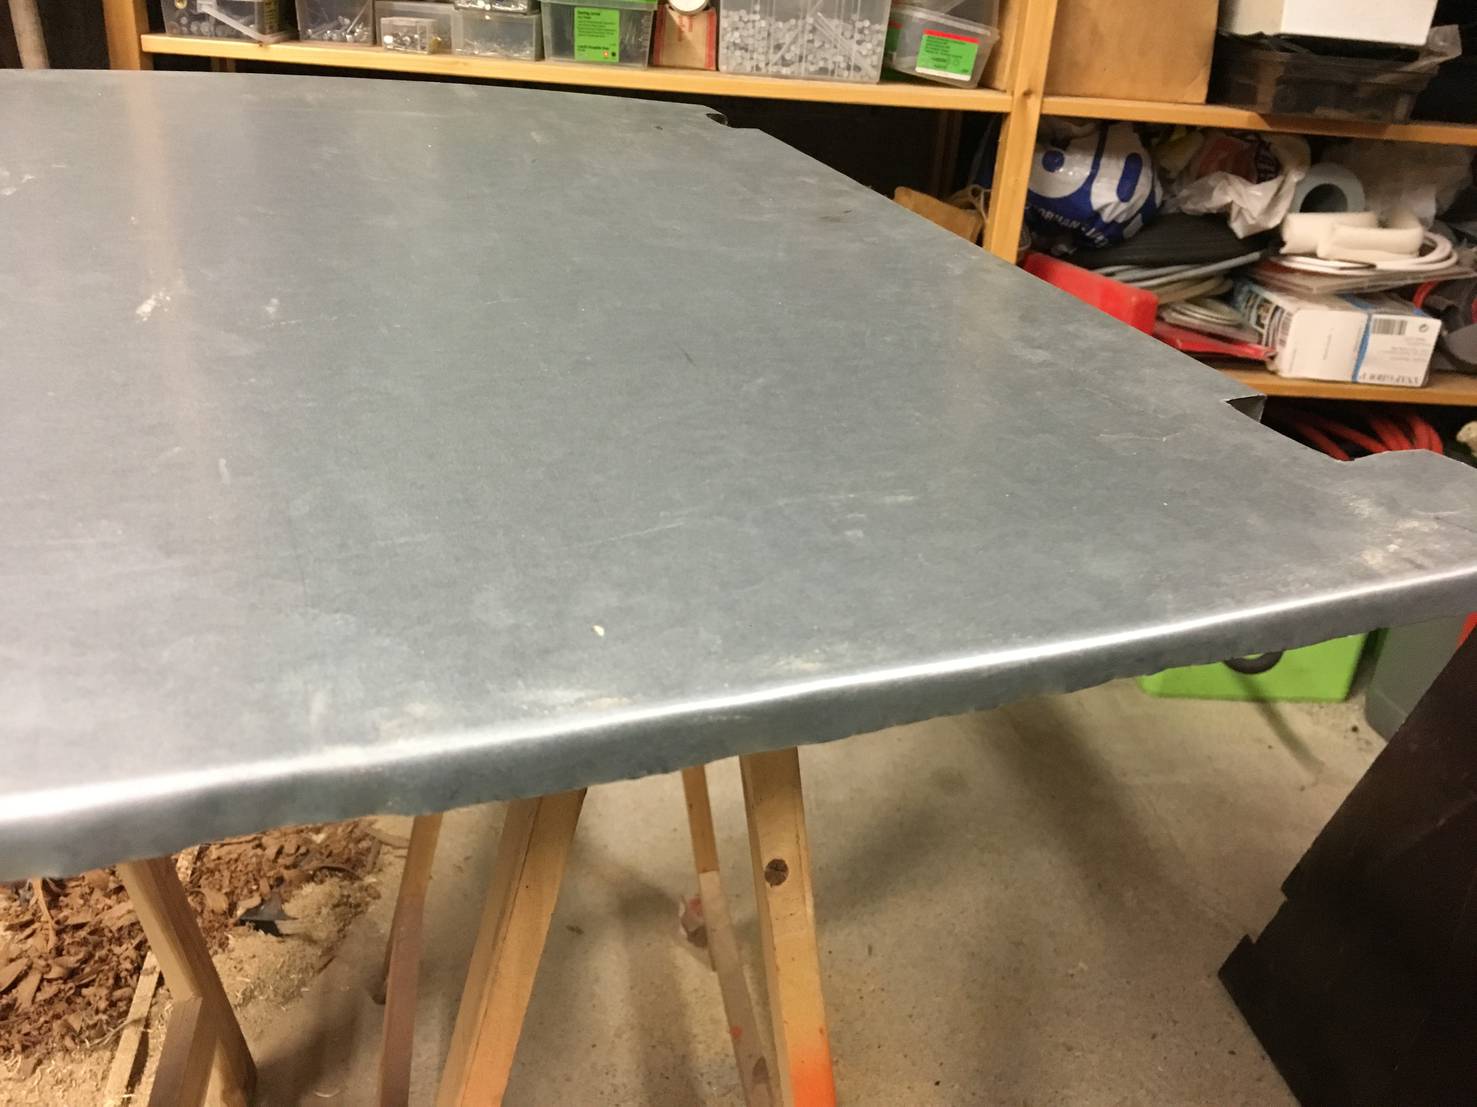
Testfitting the top, seems fine!.
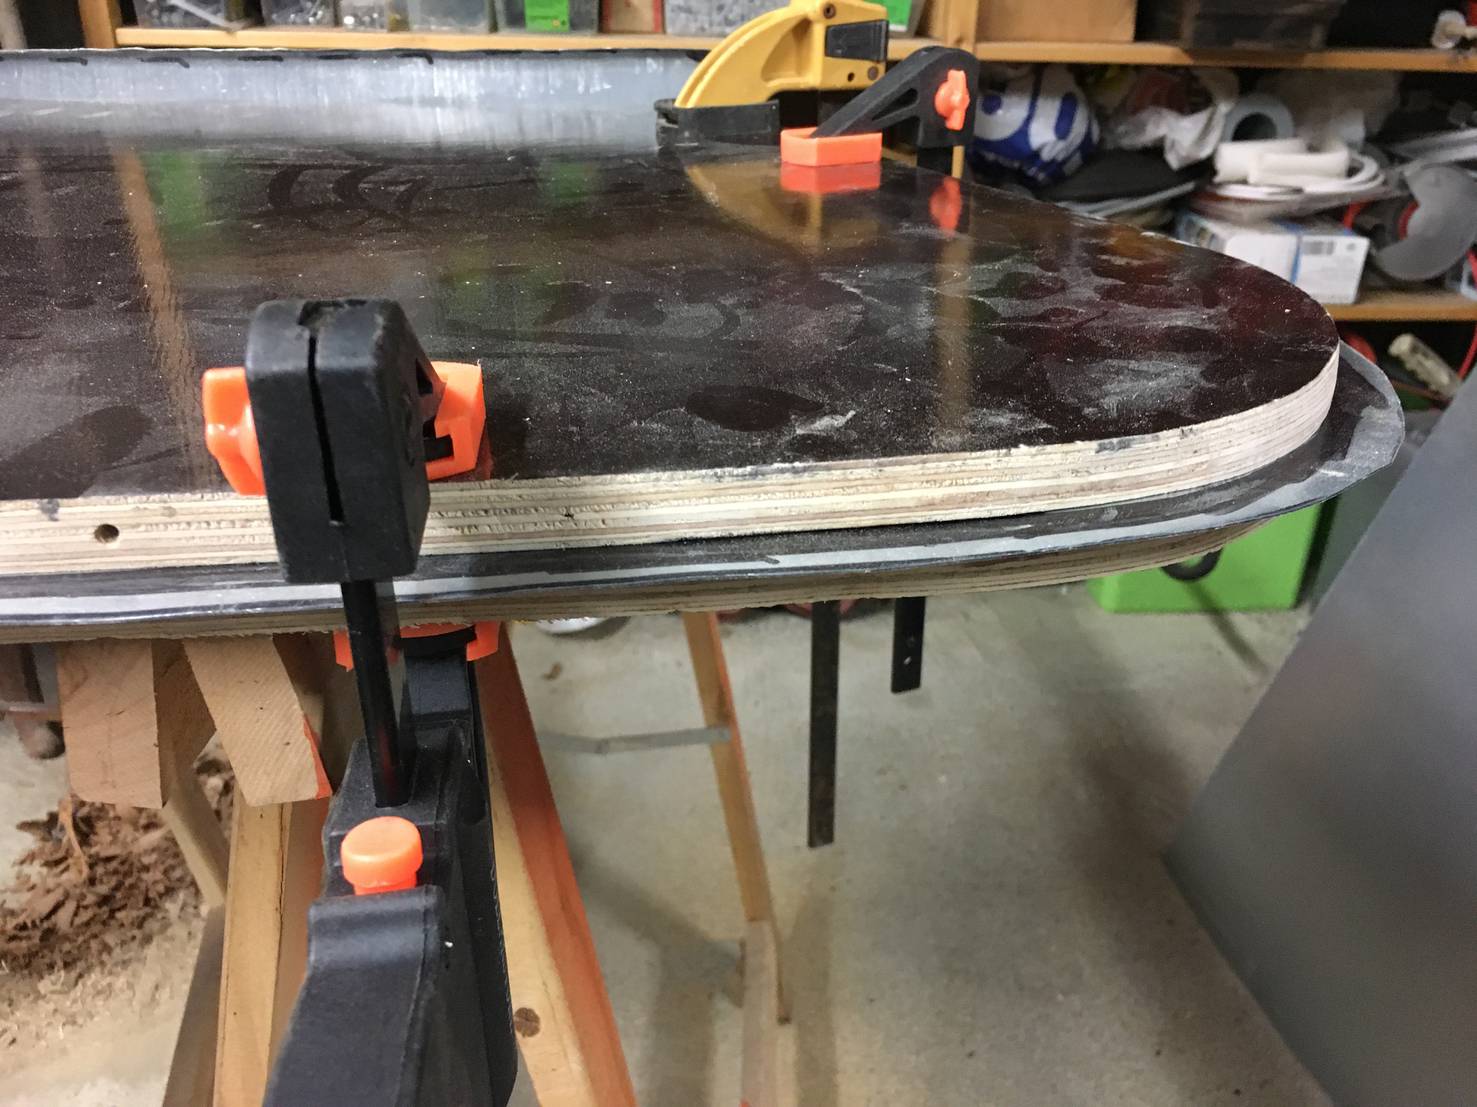
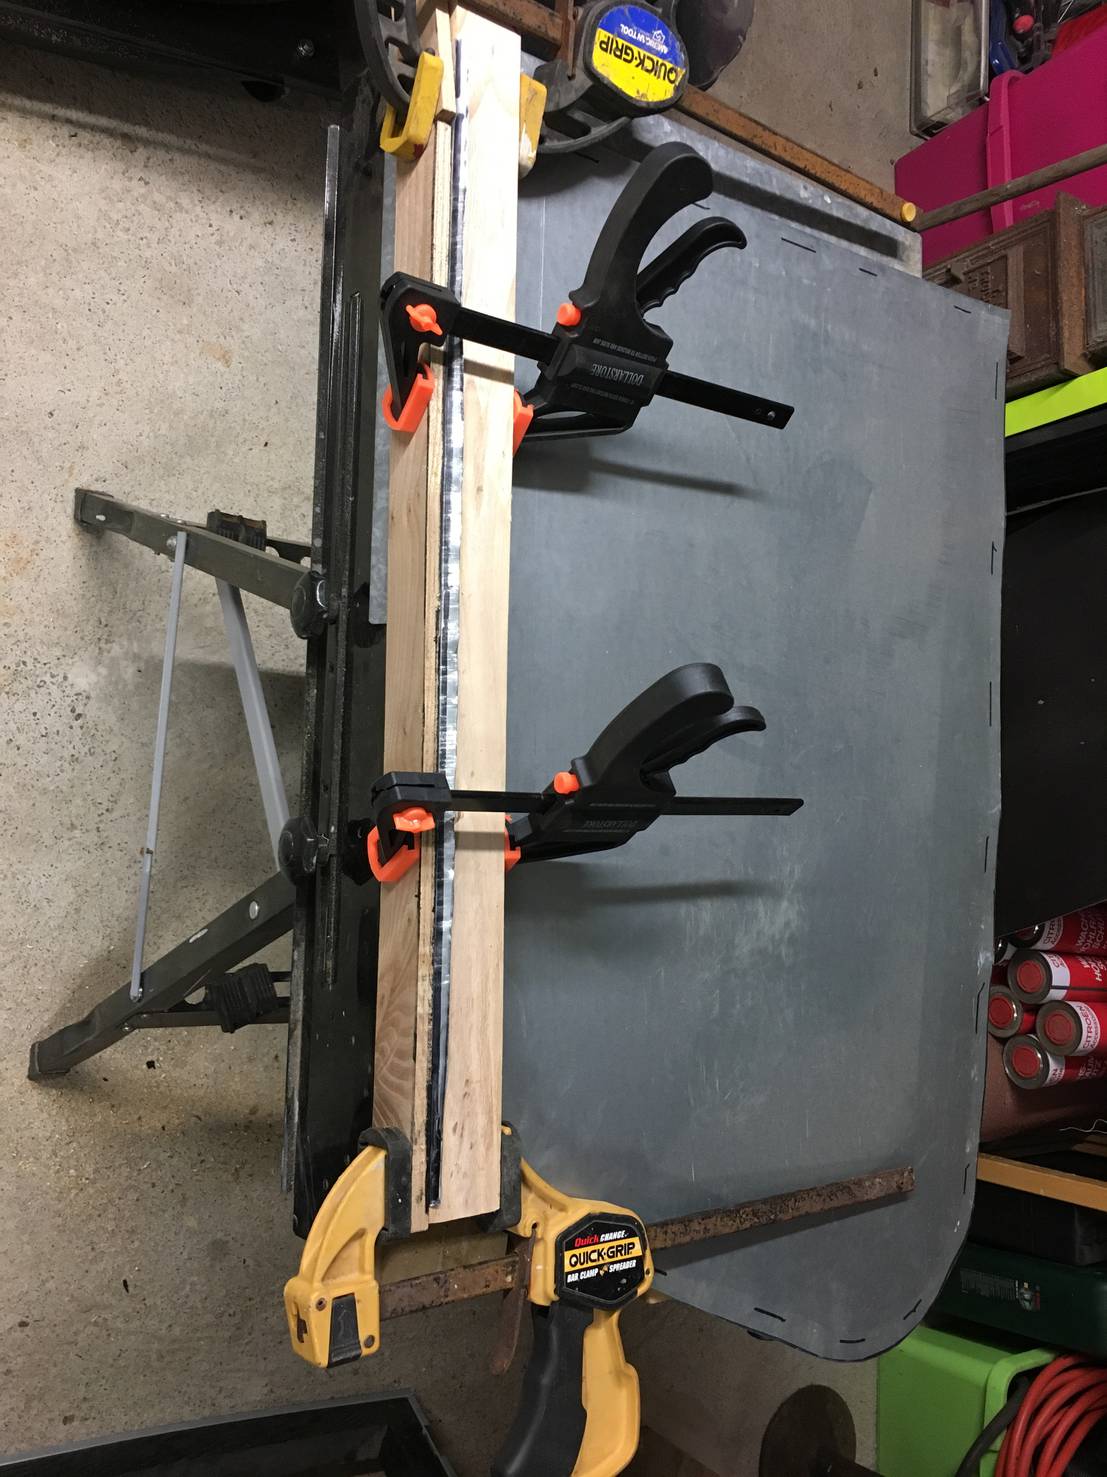
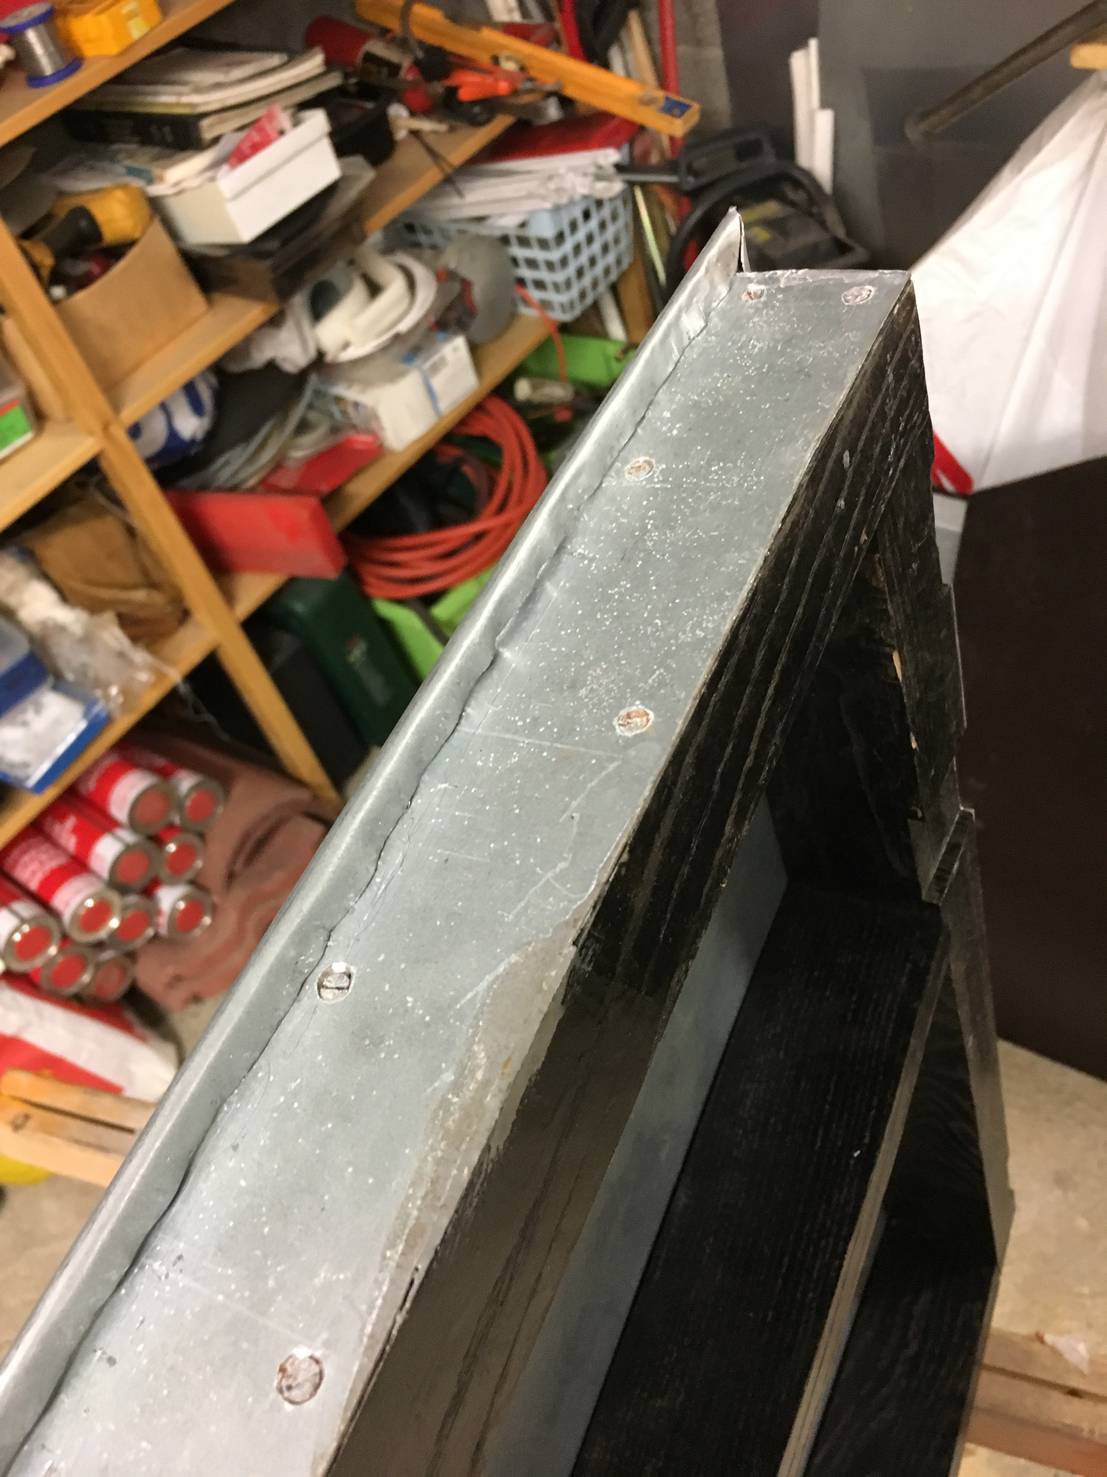
Clamping precut plywood sheets which have been cut to match the door opening and door frame.
The metal lip which sticks out can be hammered to a 90 degrees bend without deforming the door skin.
Skin is put on the door frame and bent in place. I use the same plywood sheets on the doorskin side
to avoid damaging the door skin while folding.
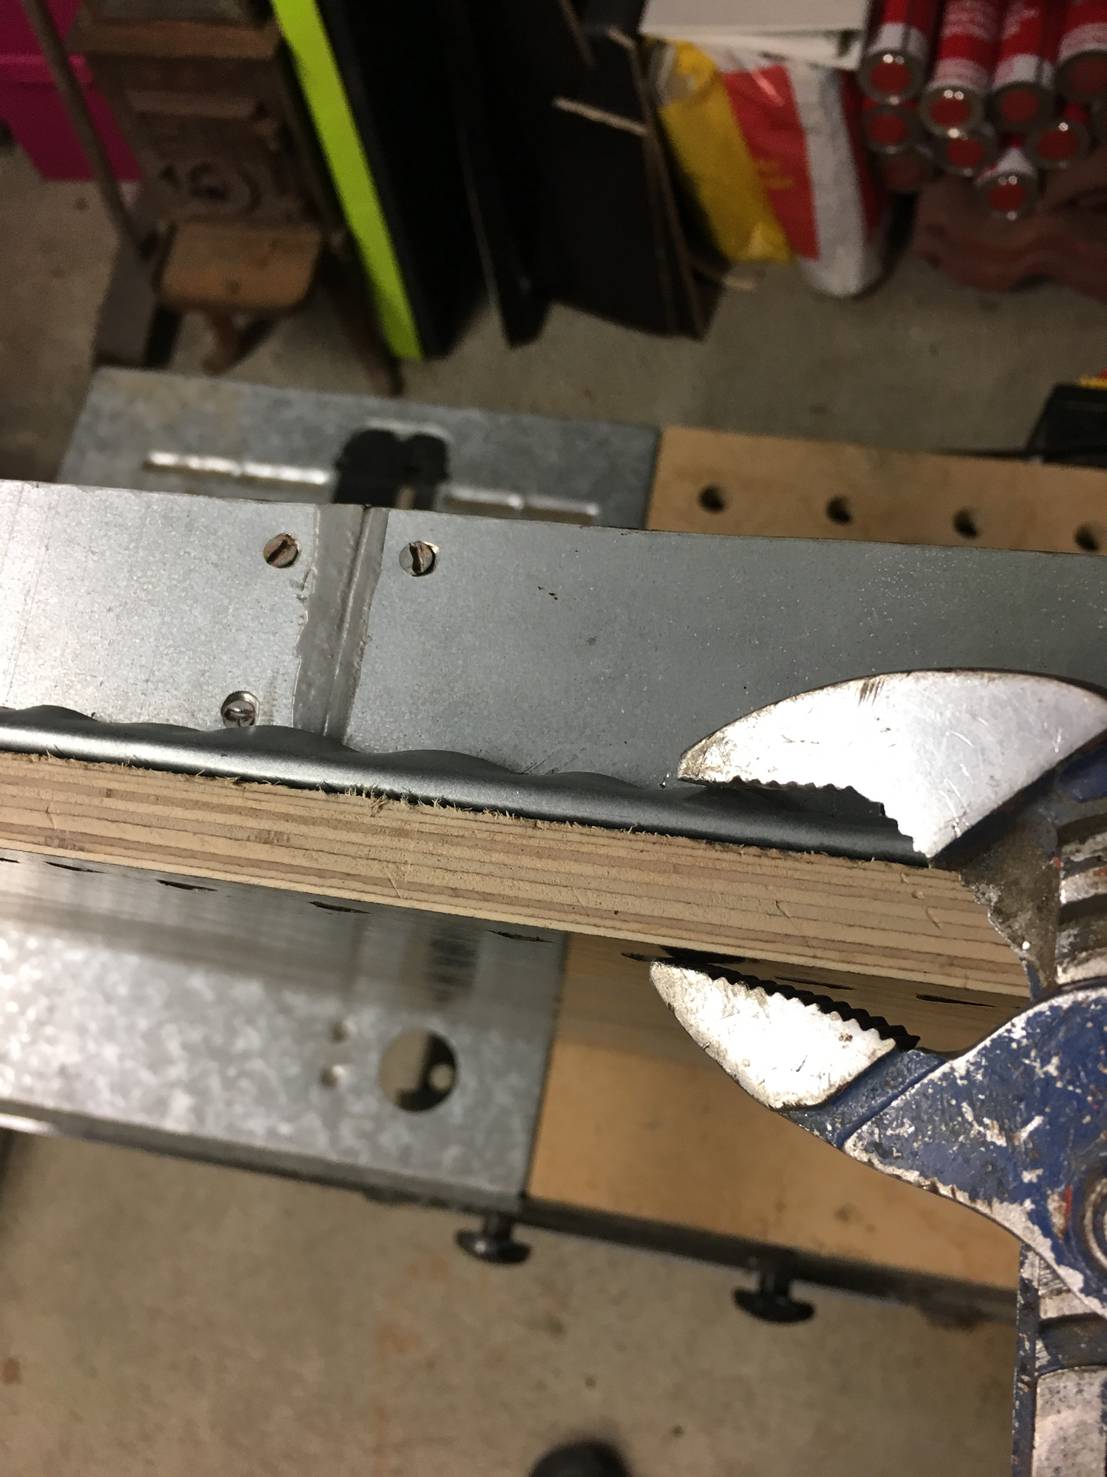
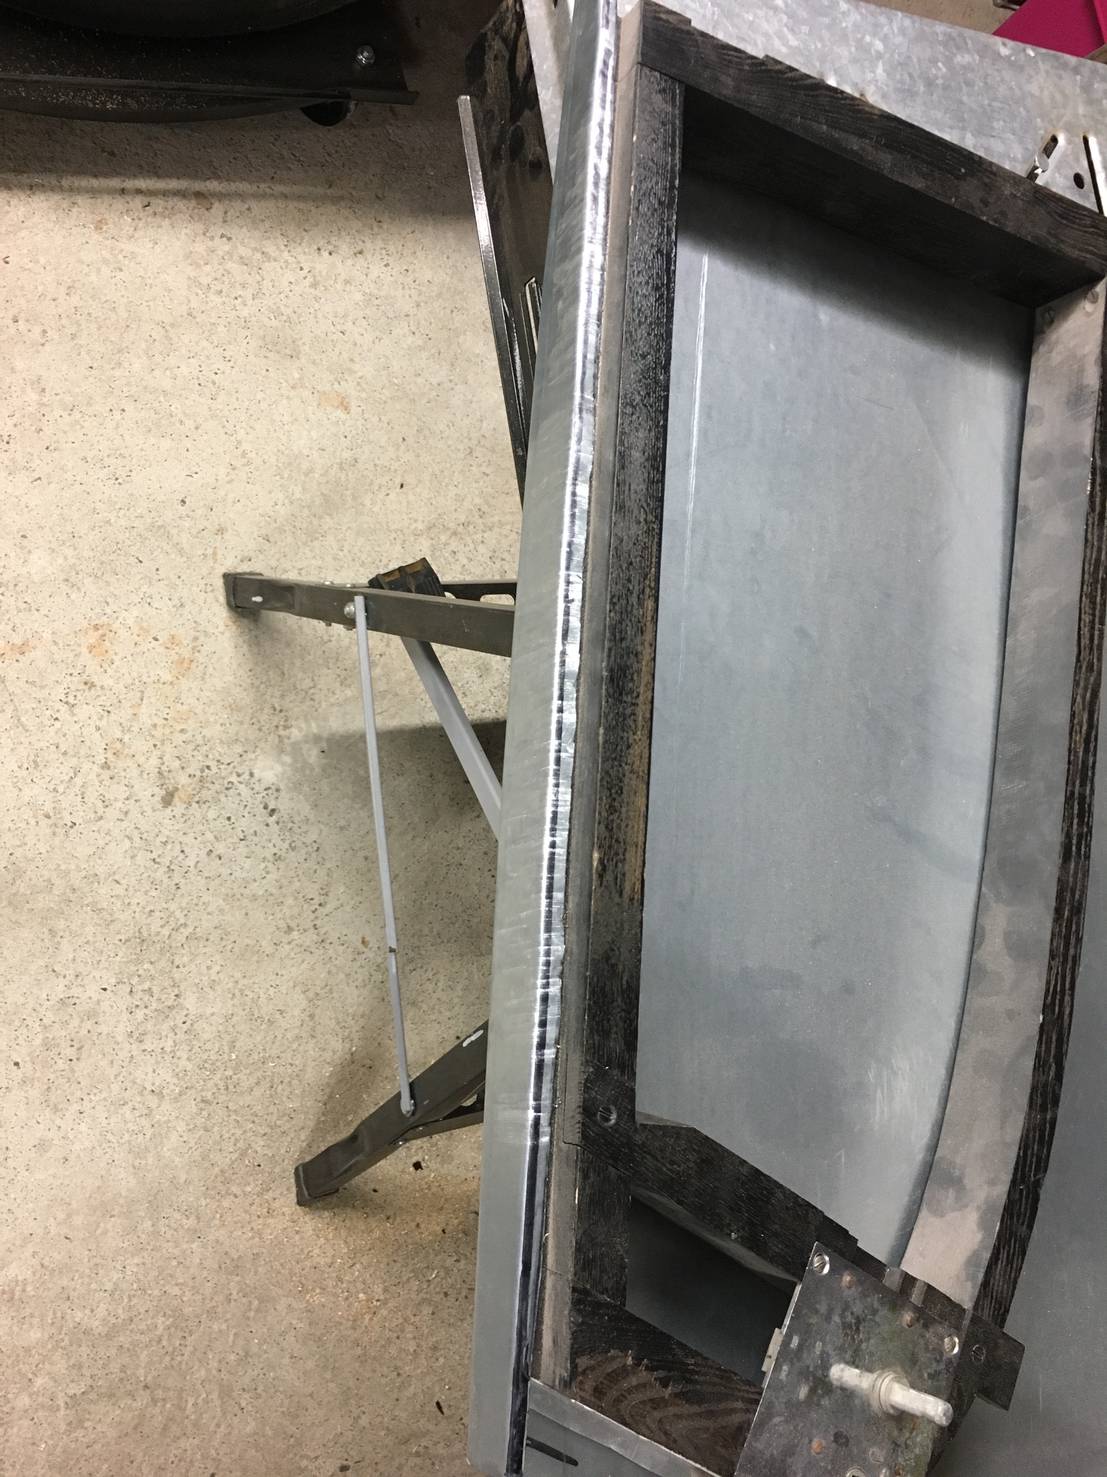
The door skin can be bent down using pliers before hammering.
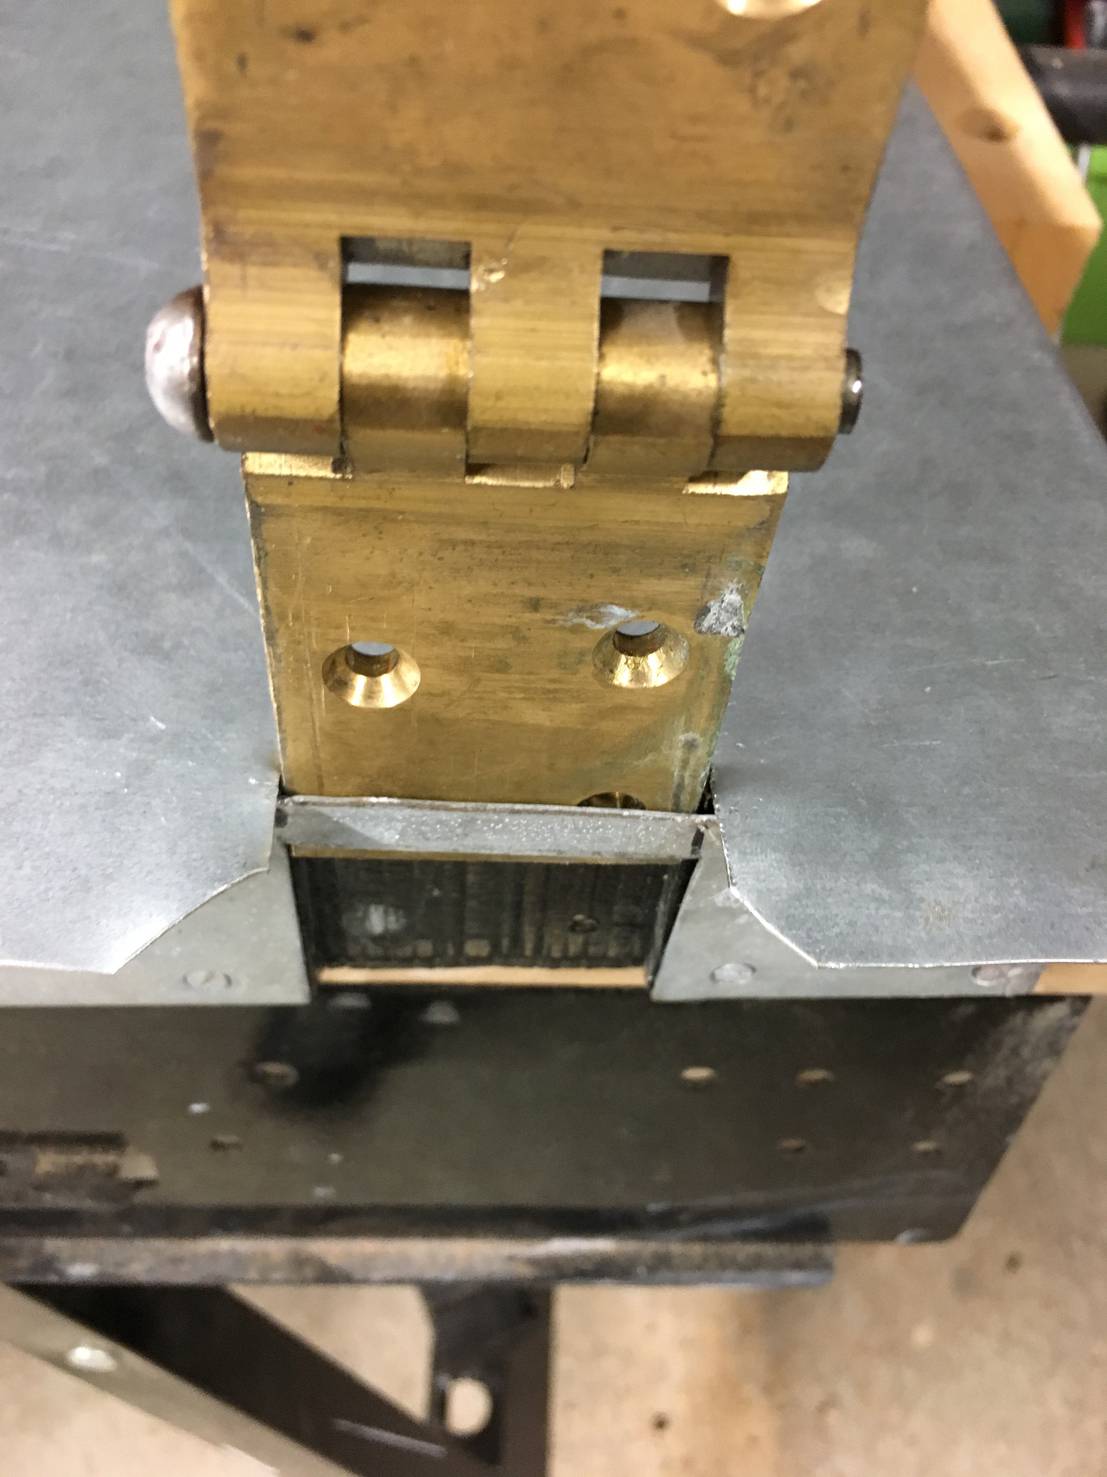
Hinges are positioned in a slot made in the skin.
Using a piece of sheet ply to avoid affecting the door skin.
I will need to shim or bend the hinges to get the gap narrower in the front and wider in the back.
But overall, I am quite pleased with the result.
Summer 2018 update:
Working with the interior have been a welcome break from all sheet metal work, now my workshop smells of laquer and is quite dusty.I did sandwich a layer of teak to a sheet of waterproof plywood for strength. Using the choke in the Morgan does put quite a strain on the wood. I did get a template made in cardboard to make the dash. but I nevertheless ended up with a lot of adjustments to achieve a good result. All Morgans are handmade, so also with mine.
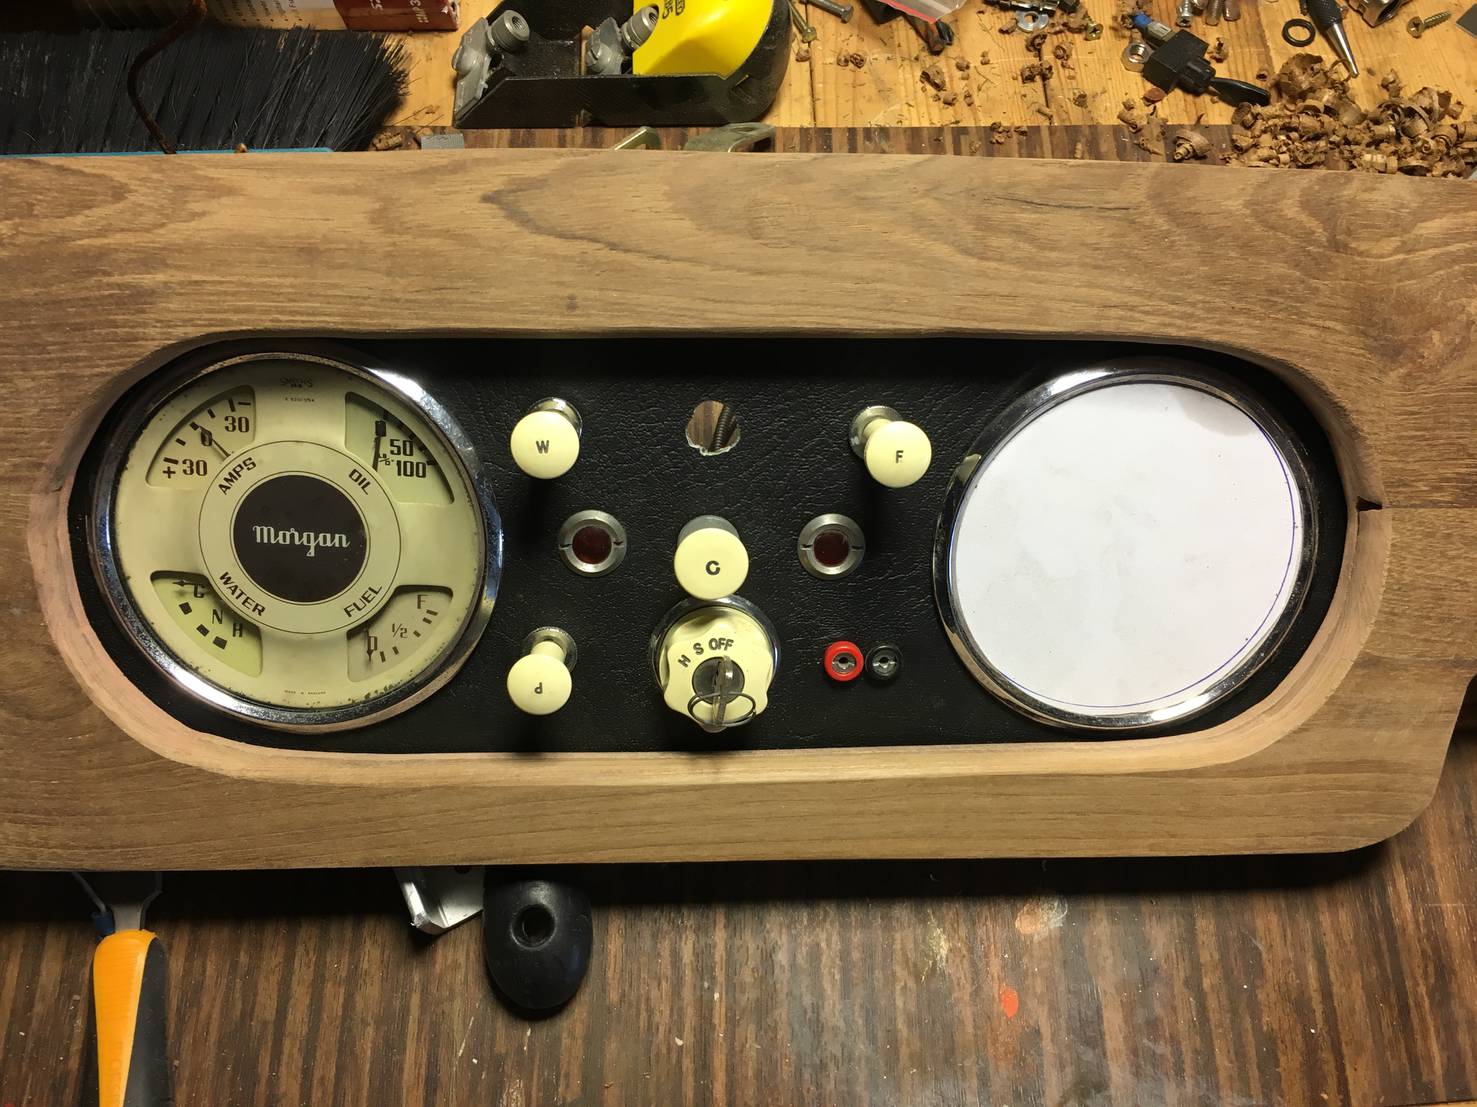
In the beginning, adjusting the hole to the instruments.
Getting there, but still quite a few adjustments are needed.
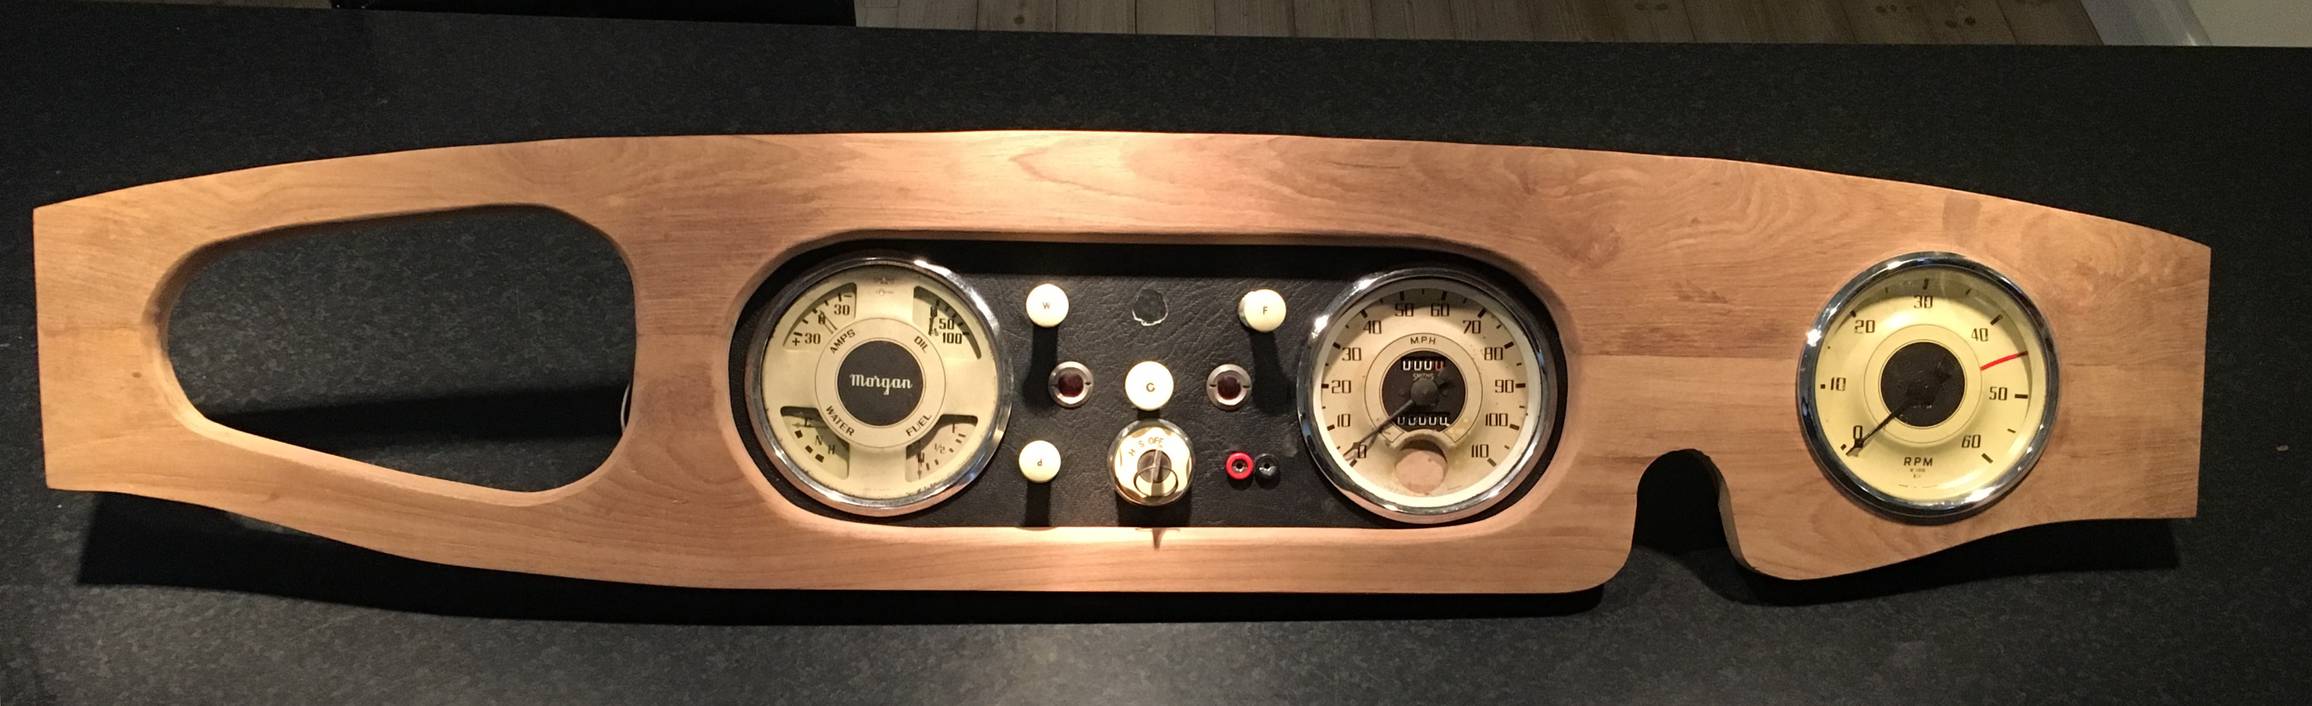
Finished product before laquer, I was at this point not realizing the hole for the steering rod would not fit.

This is after the second coat of laquer, and the hole for the steering column was adjusted between layer one and two.
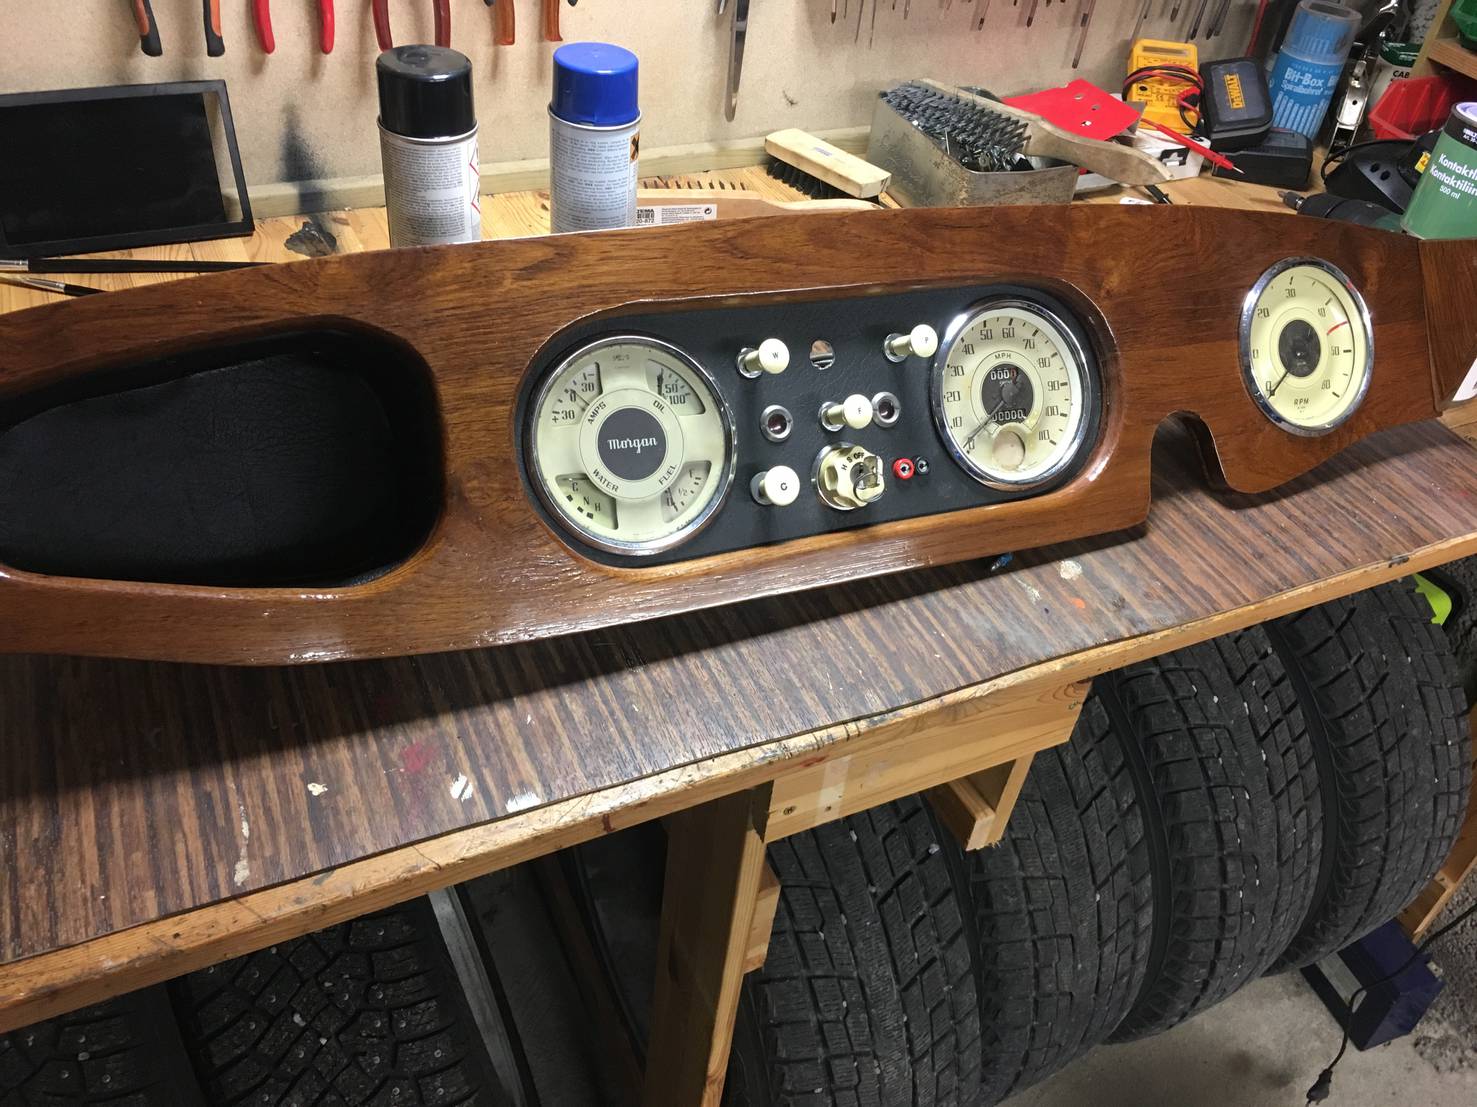
Complete with the glove box, but before sanding flat and polishing again.
All complete, laquer was sanded flat using 1000 grit paper, before polishing to a gloss again.
I used a boat type of laquer, but in retrospect, the next time might be a epoxylaquer instead.
Autumn 2018 update:
The task now is completing the interior with all the needed panels and trim. The reupholstering of the seats have started, the project is flying for the moment. On time I might add.
This picture is taken when the door top wooden trim is beeing made.
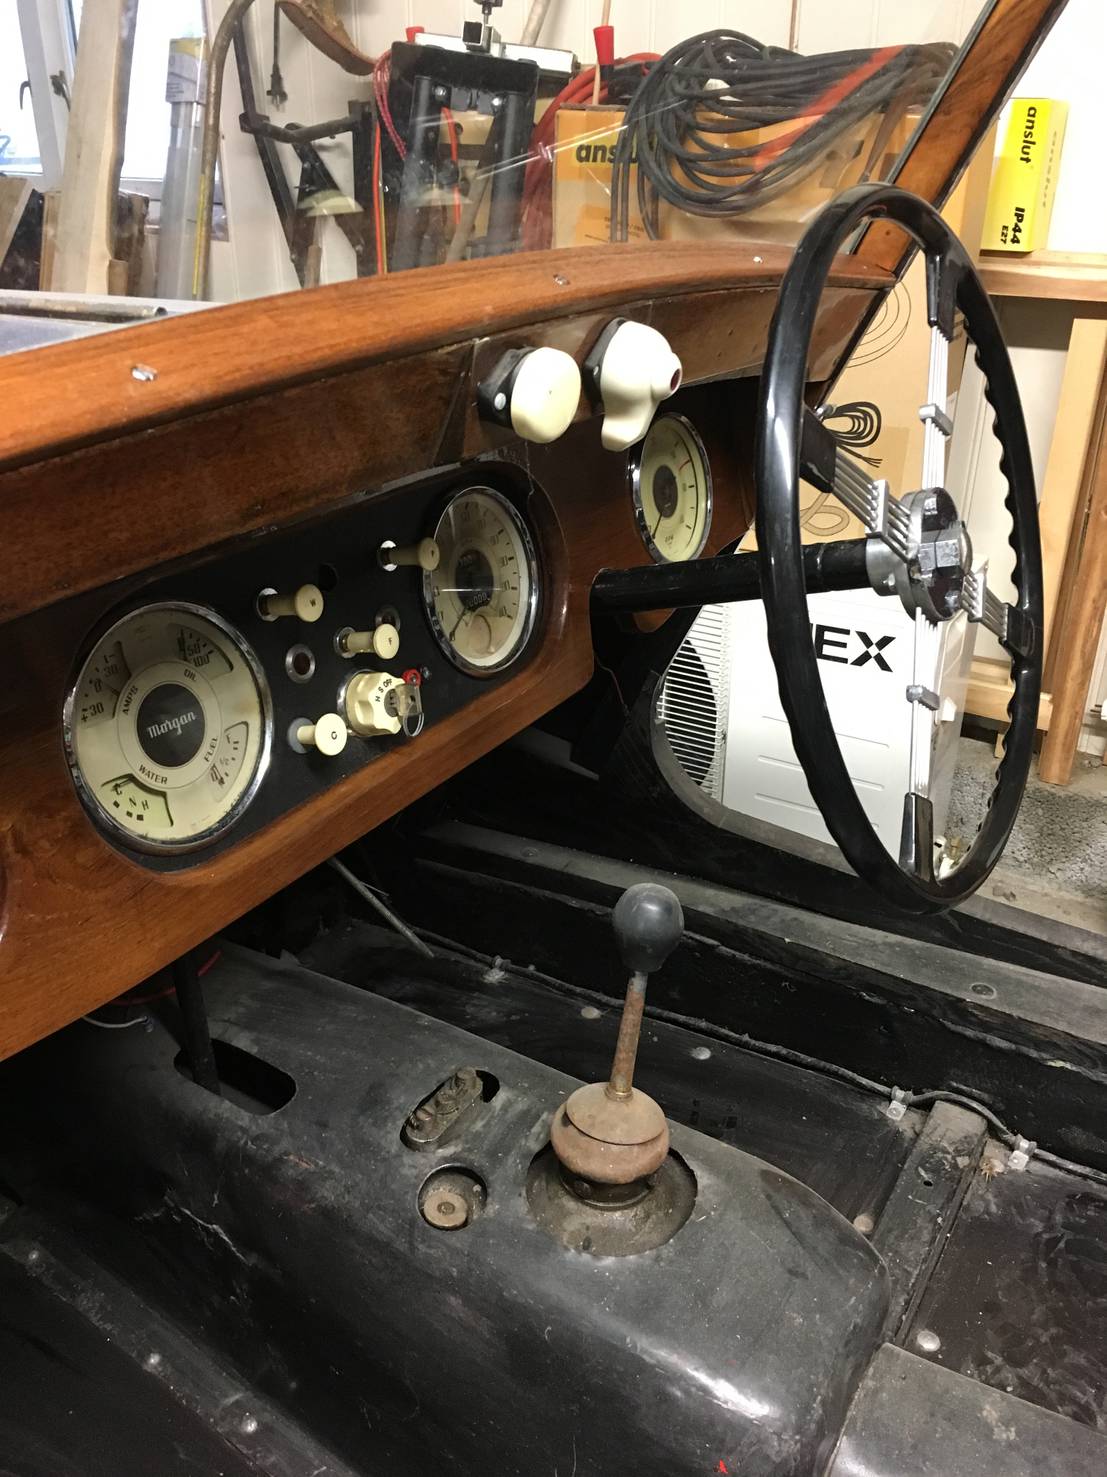
Trial fitting in order to get an overview of the cars progress.
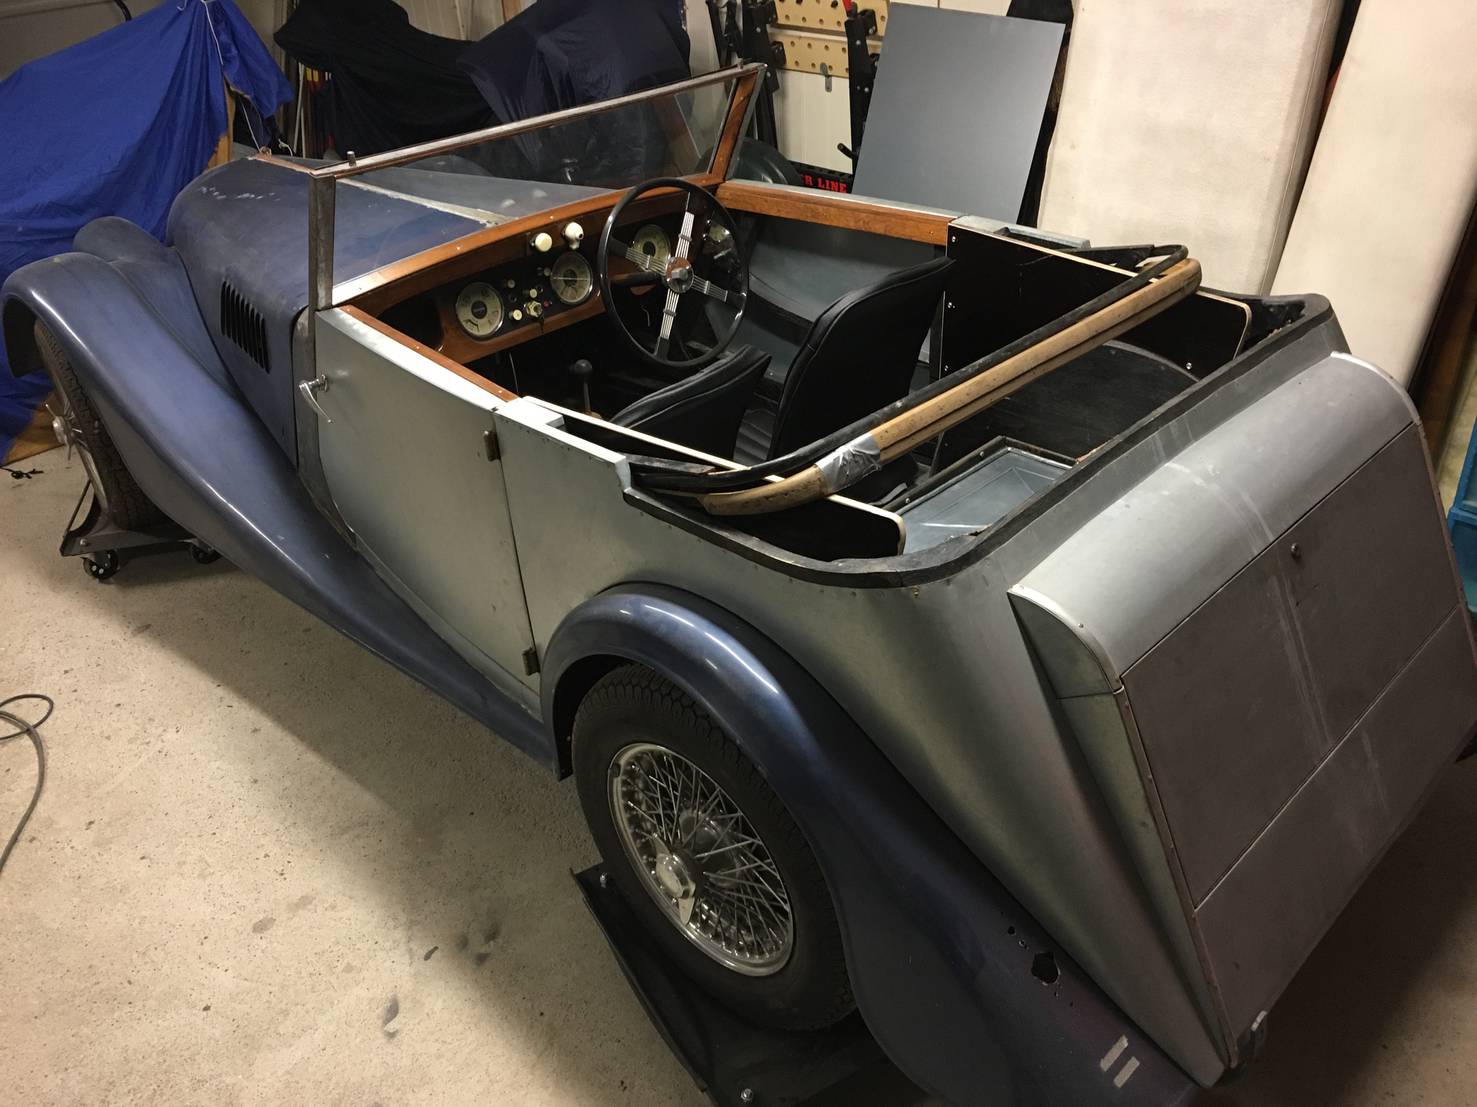
Definately getting there, the work of adapting a 2 seater coupe hood frame to a 4 seater is commencing.
Seat upholstery
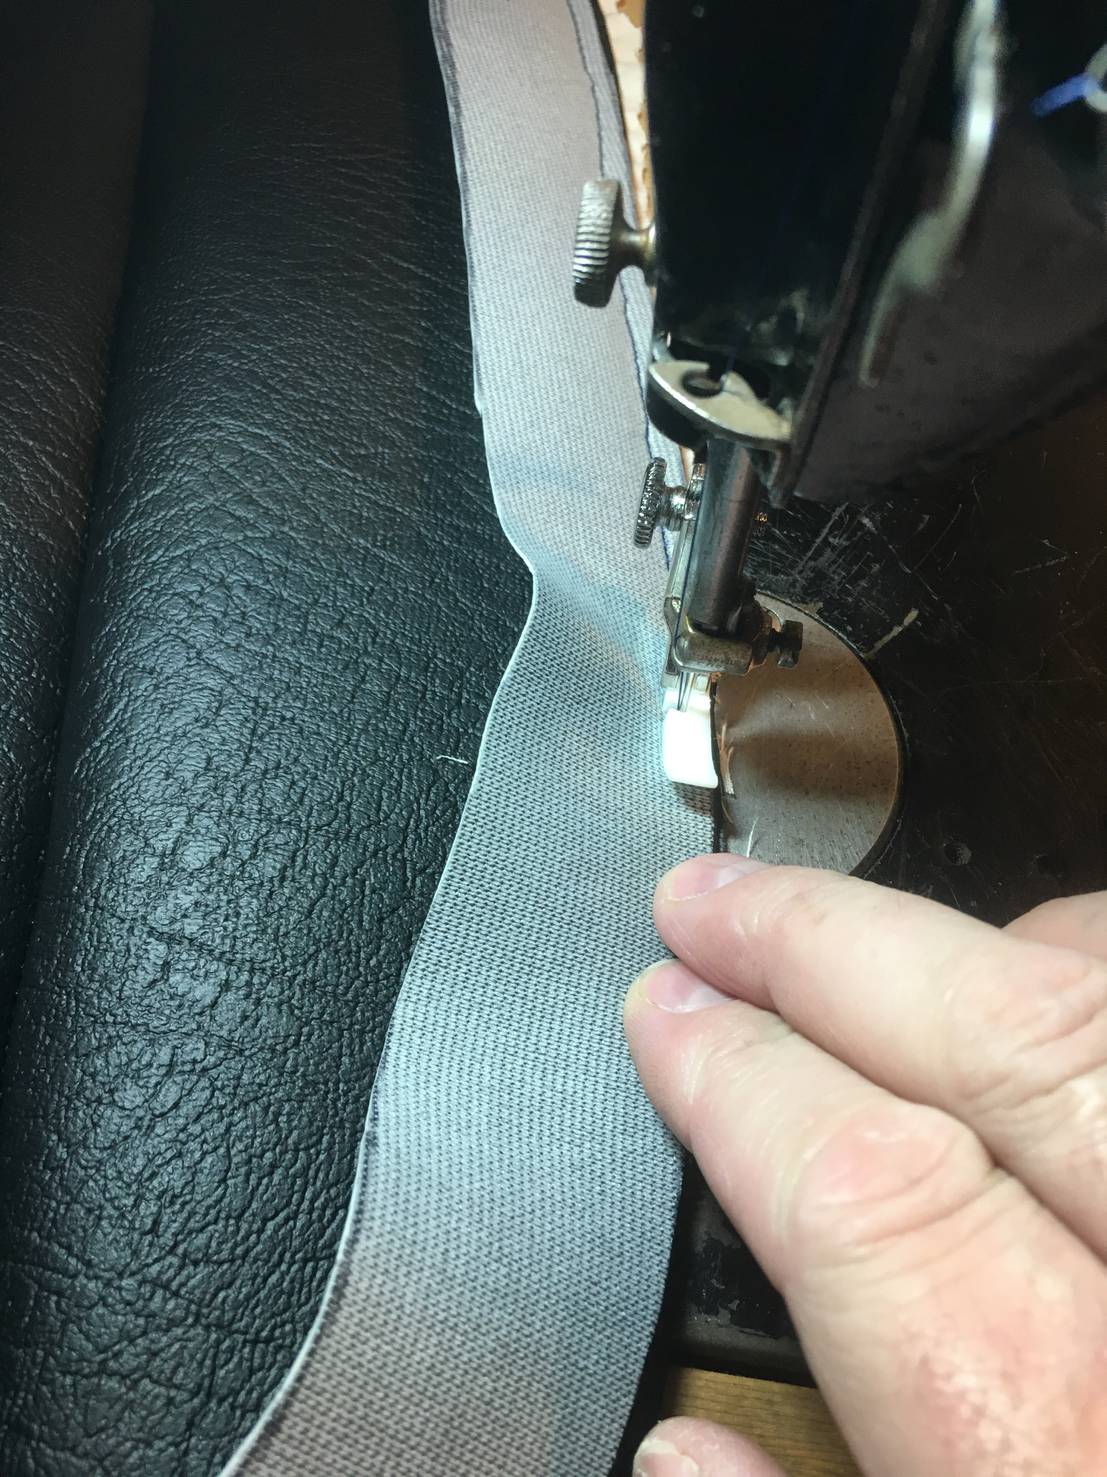
I want to do as much as possible on the car myself, so I did get a Singer 3032 from 1948, which I did alter to fit car upholstery sewing. The conversion did include replacing the old clutch motor to a modern servo motor type. The machine now does sew down to one stich per second and is a dream to work with. Very affordable way to go, cost of used Singer was $50, and new servo motor from china was $78. I then added a set of 10 teflon presser foots, and 3 roller feet, and the sewing machine ended up to be an excellent workhorse capable of sewing up to 10 layers of vinyl with ease. It does easily sew 6 layers of fabric, plastic piping and your fingers if you let it!

Singer 3032 with new servo motor and presser feet.
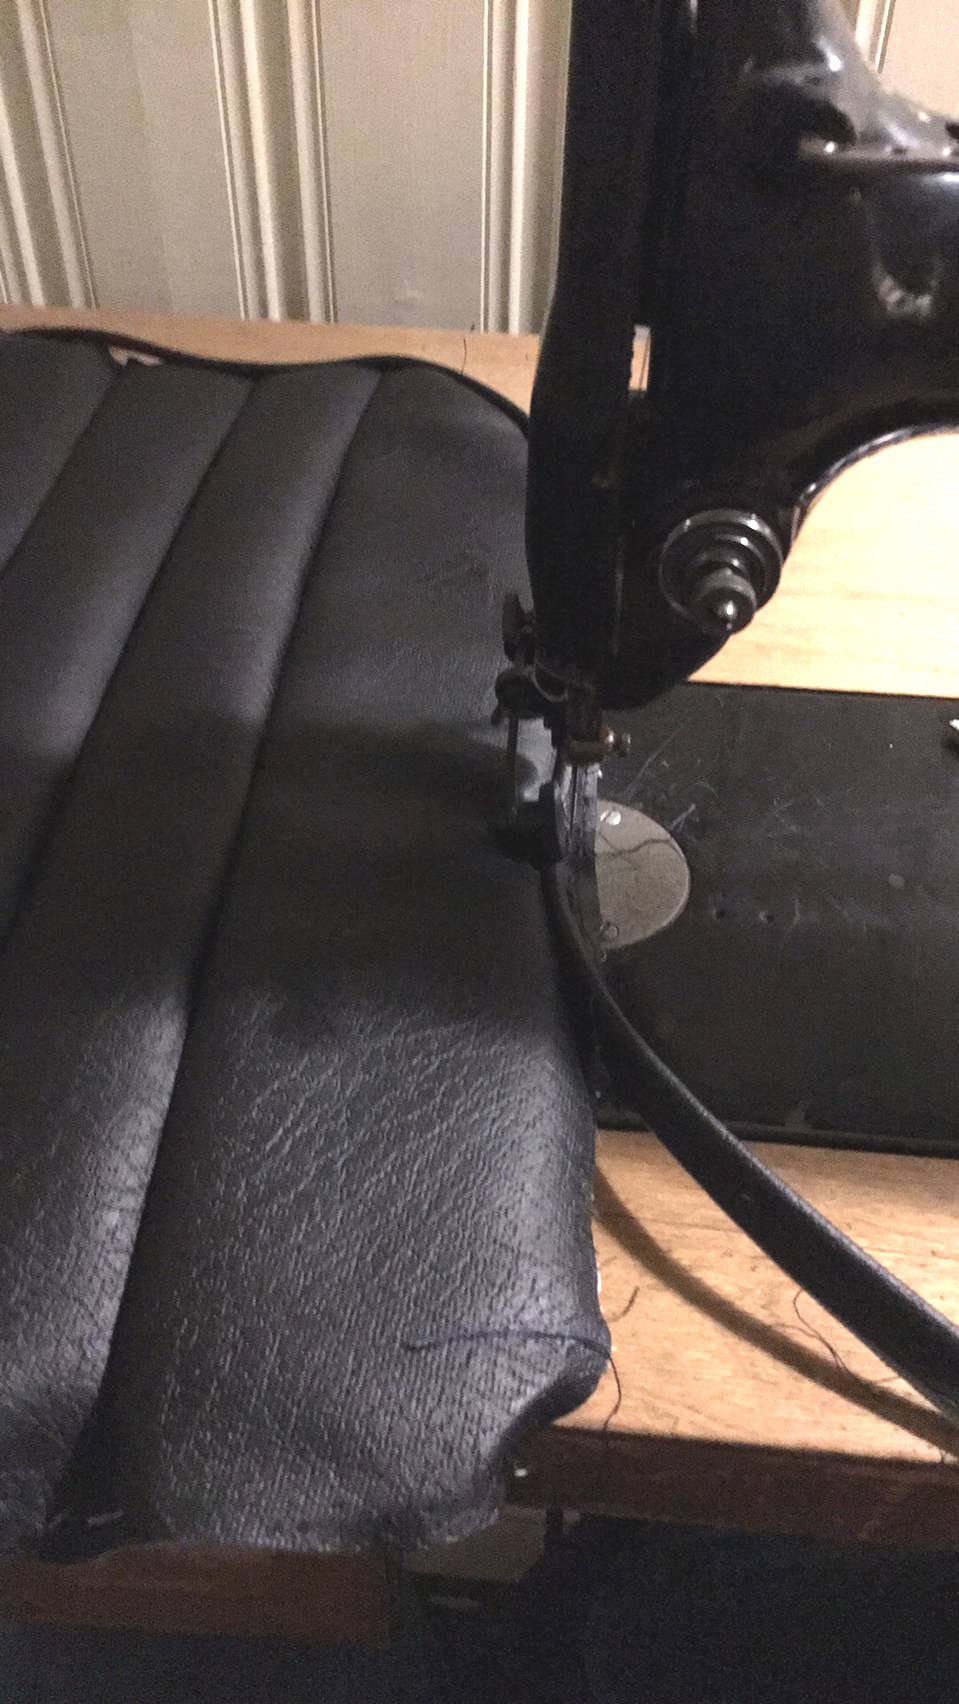
Happily sewing piping to the side of the seat cushion using the roller foot.
Completing the seat pillow.
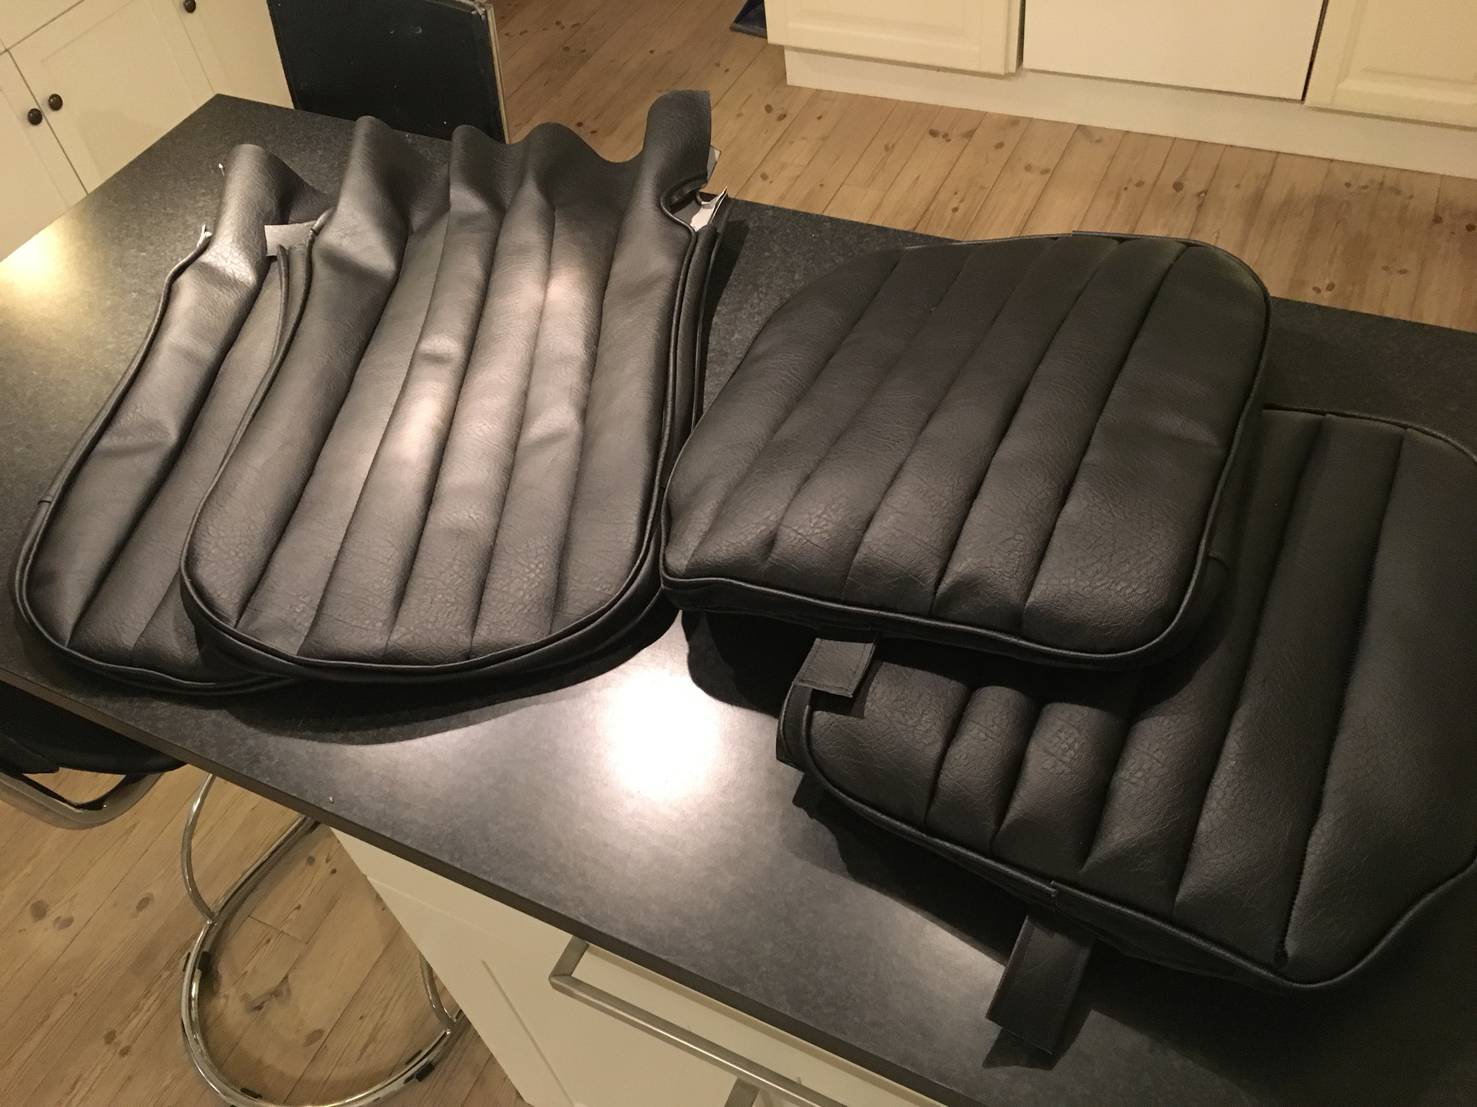
Two front seats complete, quite happy with the result.
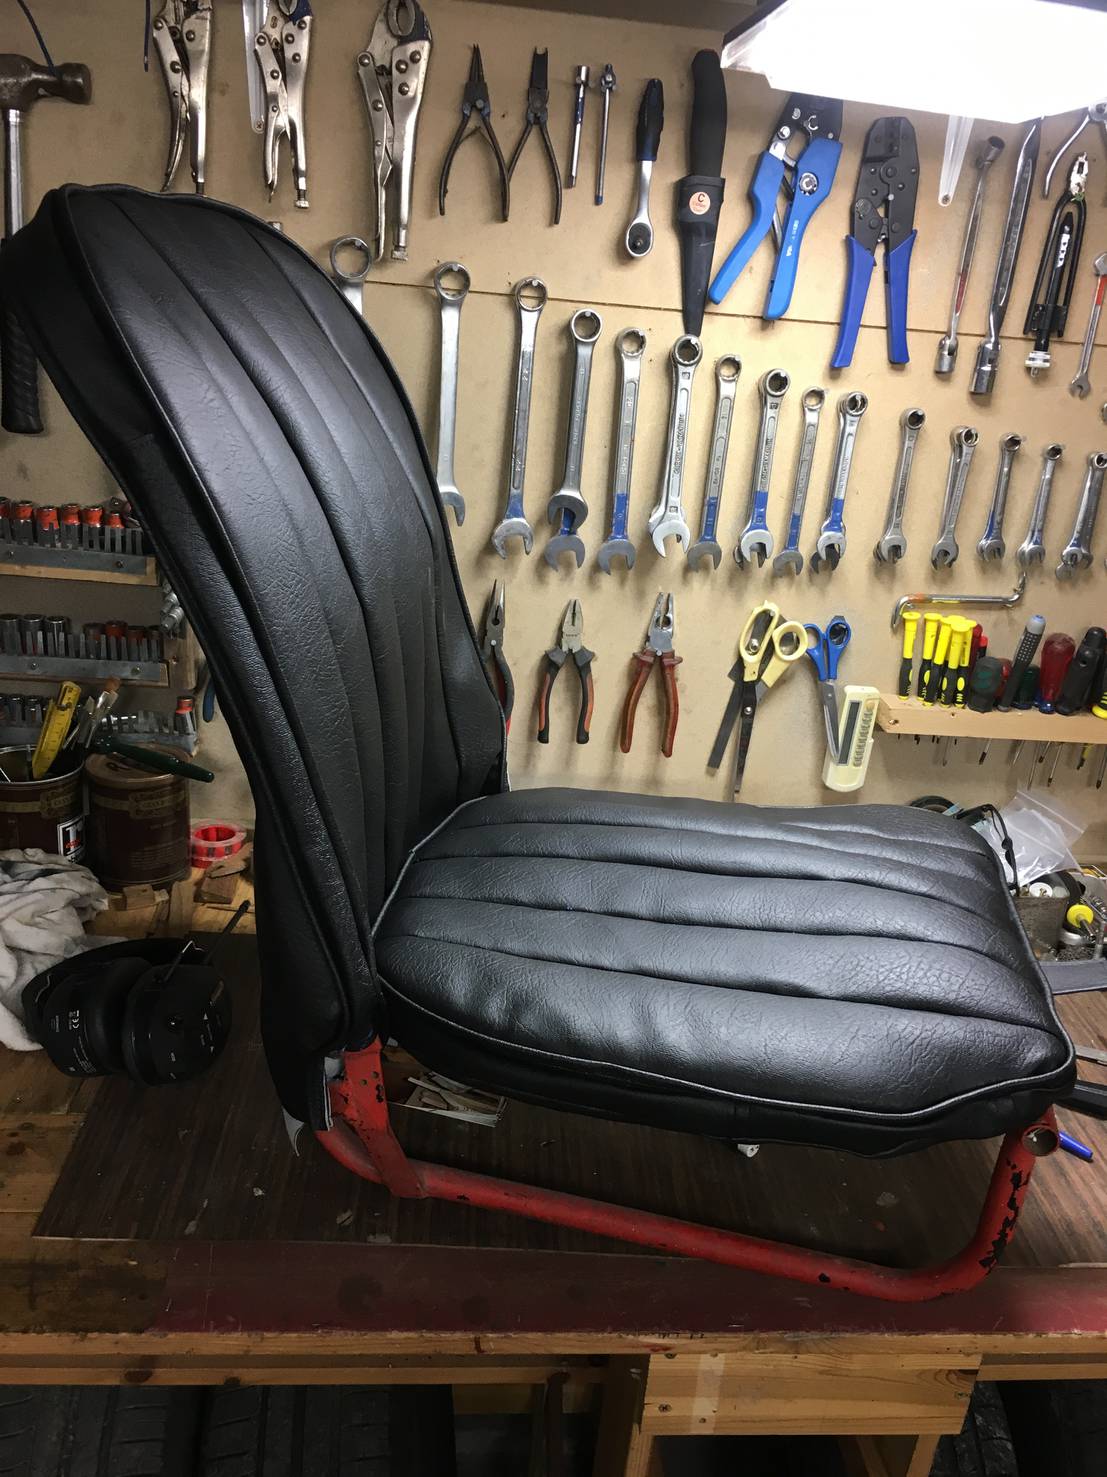
Fitted to the seat frame.
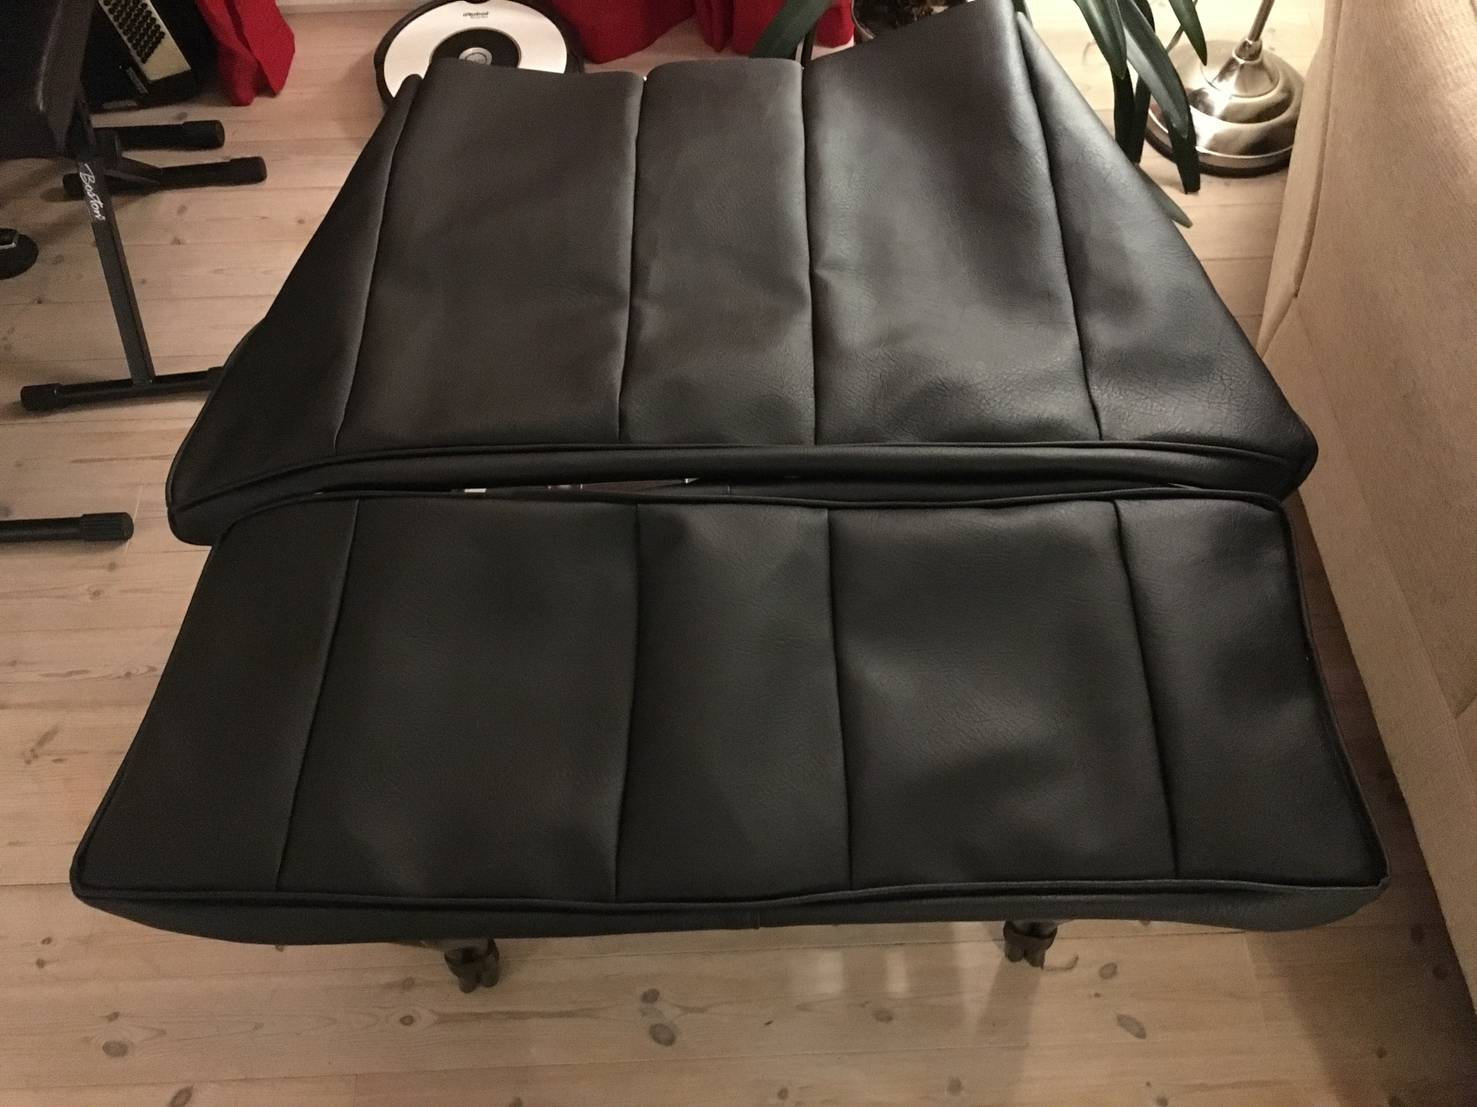
Rear seat trim made.
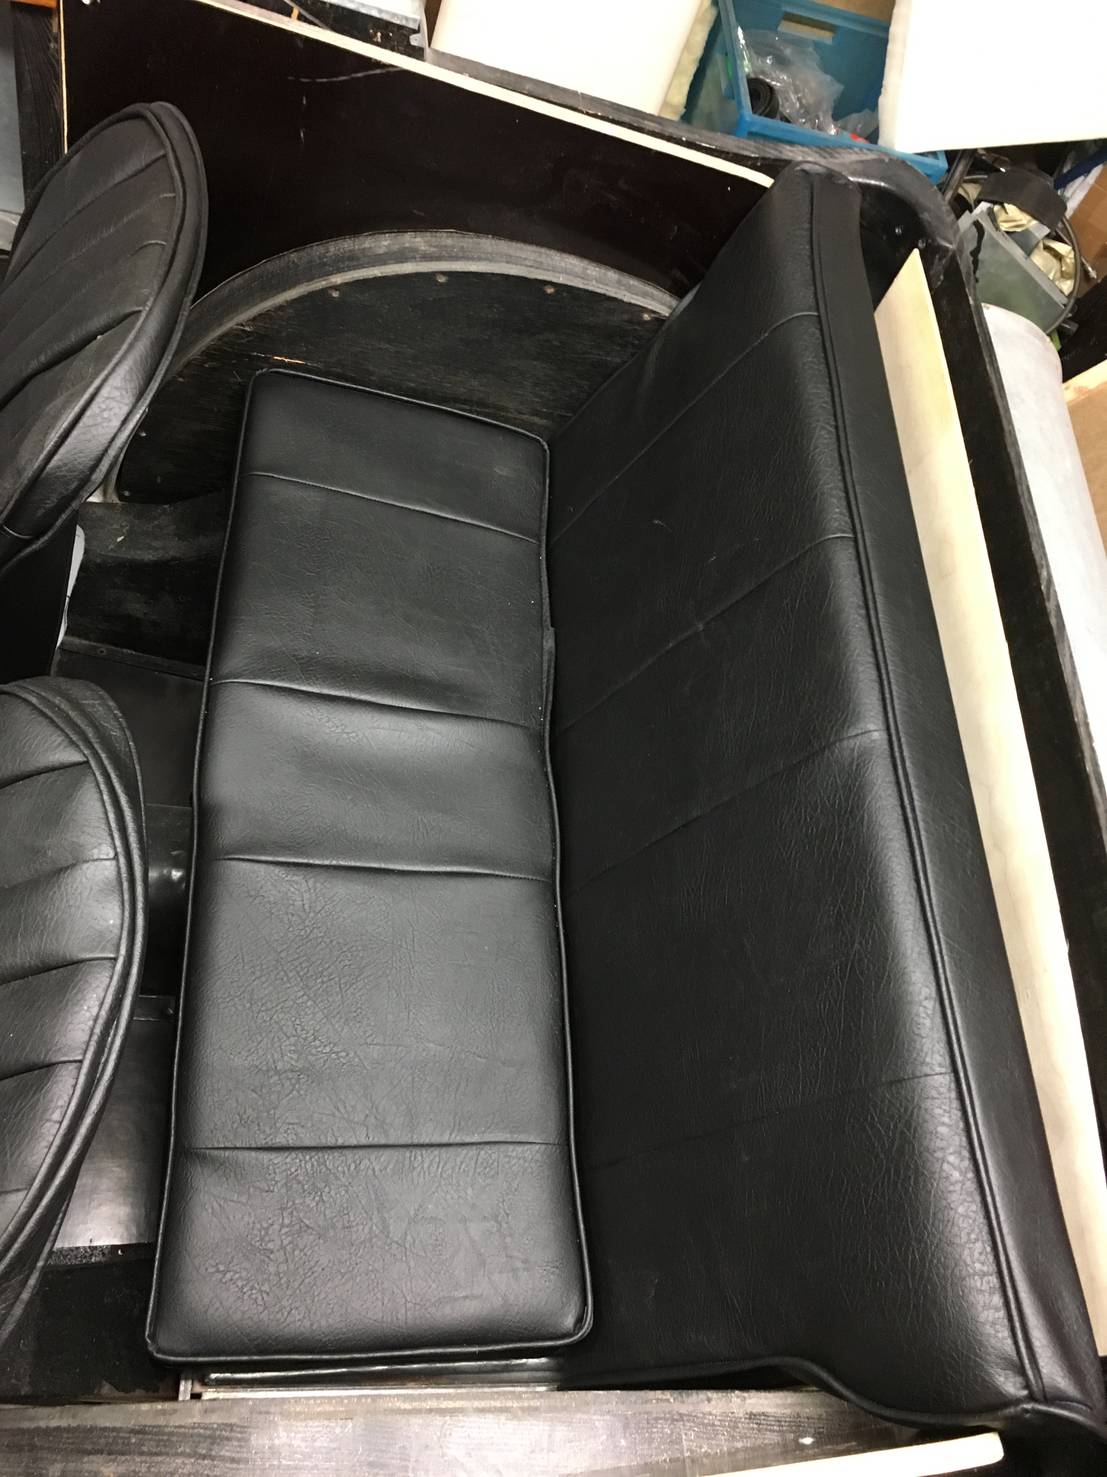
Looks good, as hoped for.
I do respect the skills of the trade and tradesmen/women at Morgan more and more after each task completed.
Snobmog design and details
It can be hard to see from the restoration pictures how the 4 seat coupes look like, so I added a few pictures of the works prototype from 1953. This car was the base of all 4 seater coupes made by Morgan in 1955 and 1956. The look of this car is pretty close to what my will end looking like. There are however small changes to the rear lights compared to later models.